A Cloud Virtual Desktop (CVD) disk is an expandable storage device on the cloud. After you create a CVD disk, you can expand its size at any time to increase storage space without losing the existing data on the disk.
Must-Knows
CVD disks support only expansion and do not support reduction.
It is strongly recommended to back up important data before capacity expansion to prevent data loss caused by misoperations.
Only CVD disks attached to CVD instances in the normal lifecycle support expansion. CVD disks attached to isolated CVD instances cannot be expanded.
You cannot expand a CVD disk when its associated CVD instance is in one of the following statuses: Shut Down, Starting, Stopping, Rebooting, or Creating Custom Image.
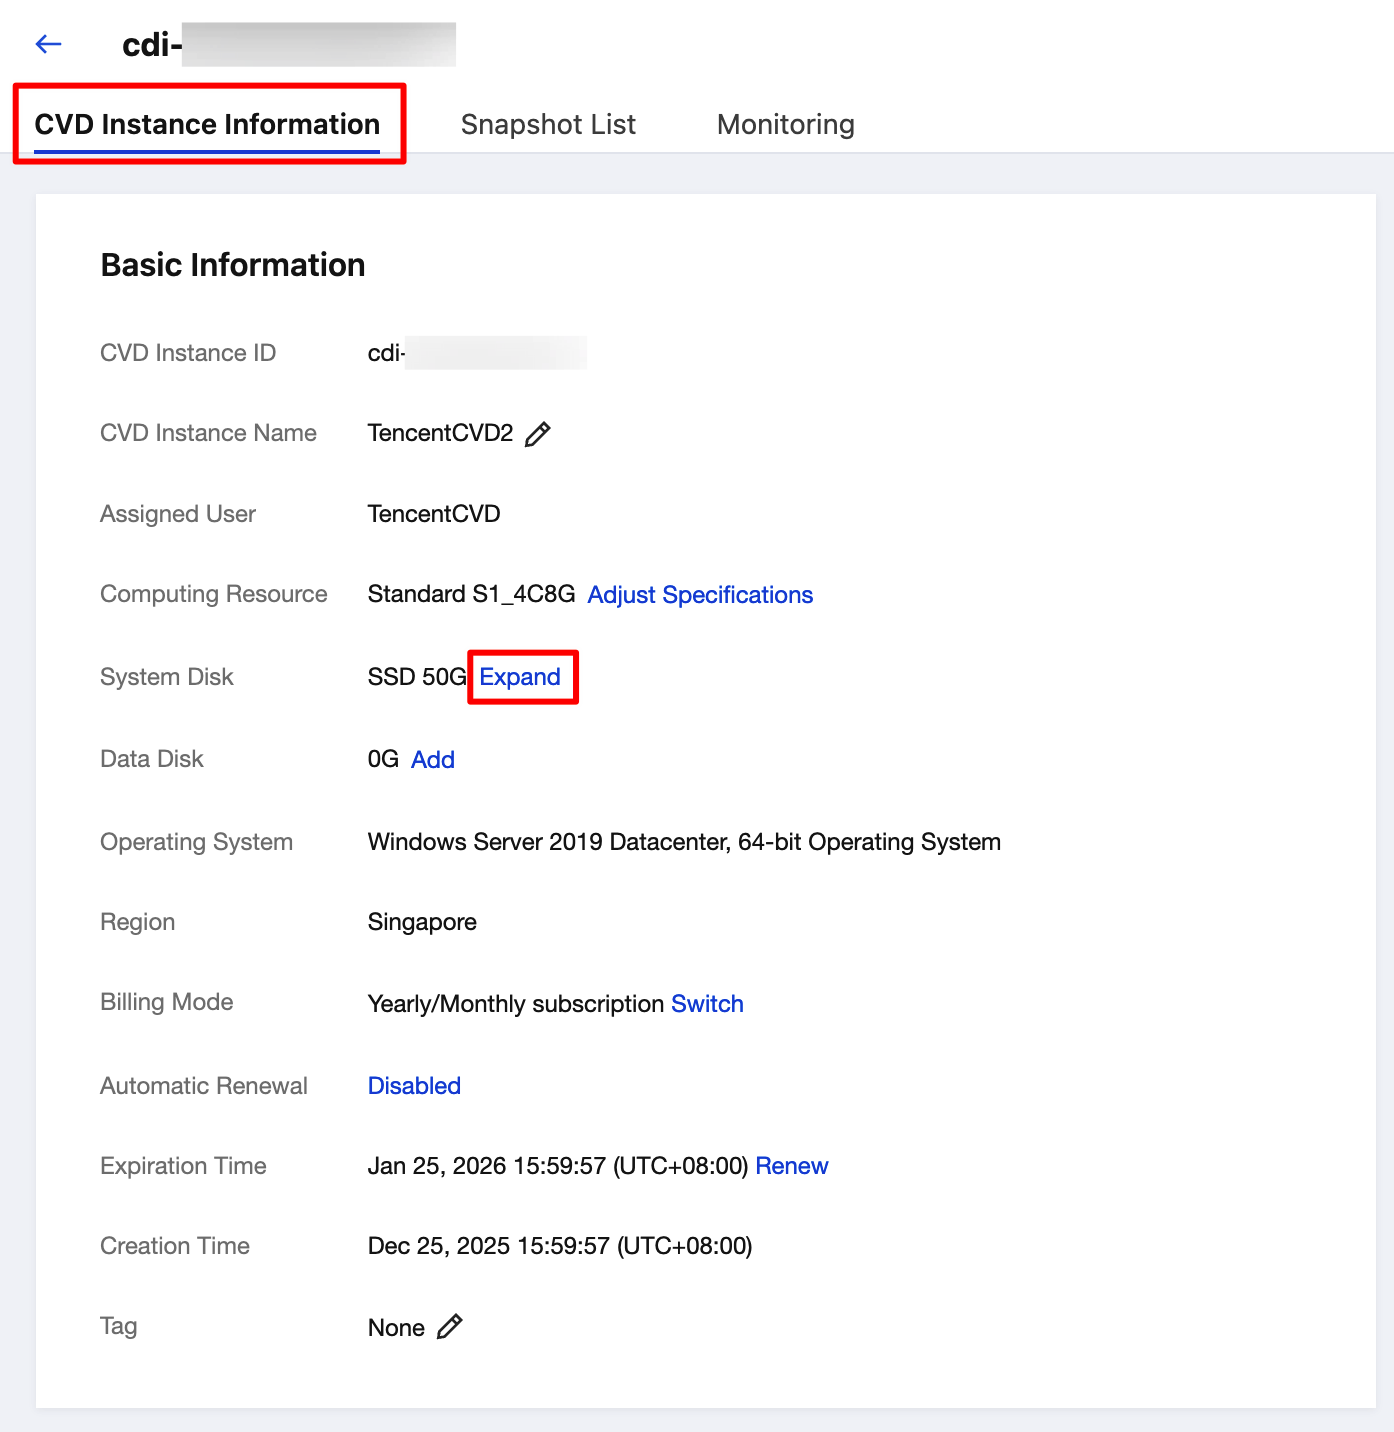
2. Click the ID of the CVD instance for which you want to expand the disk.
3. Click Expand next to the system disk or data disk as needed.
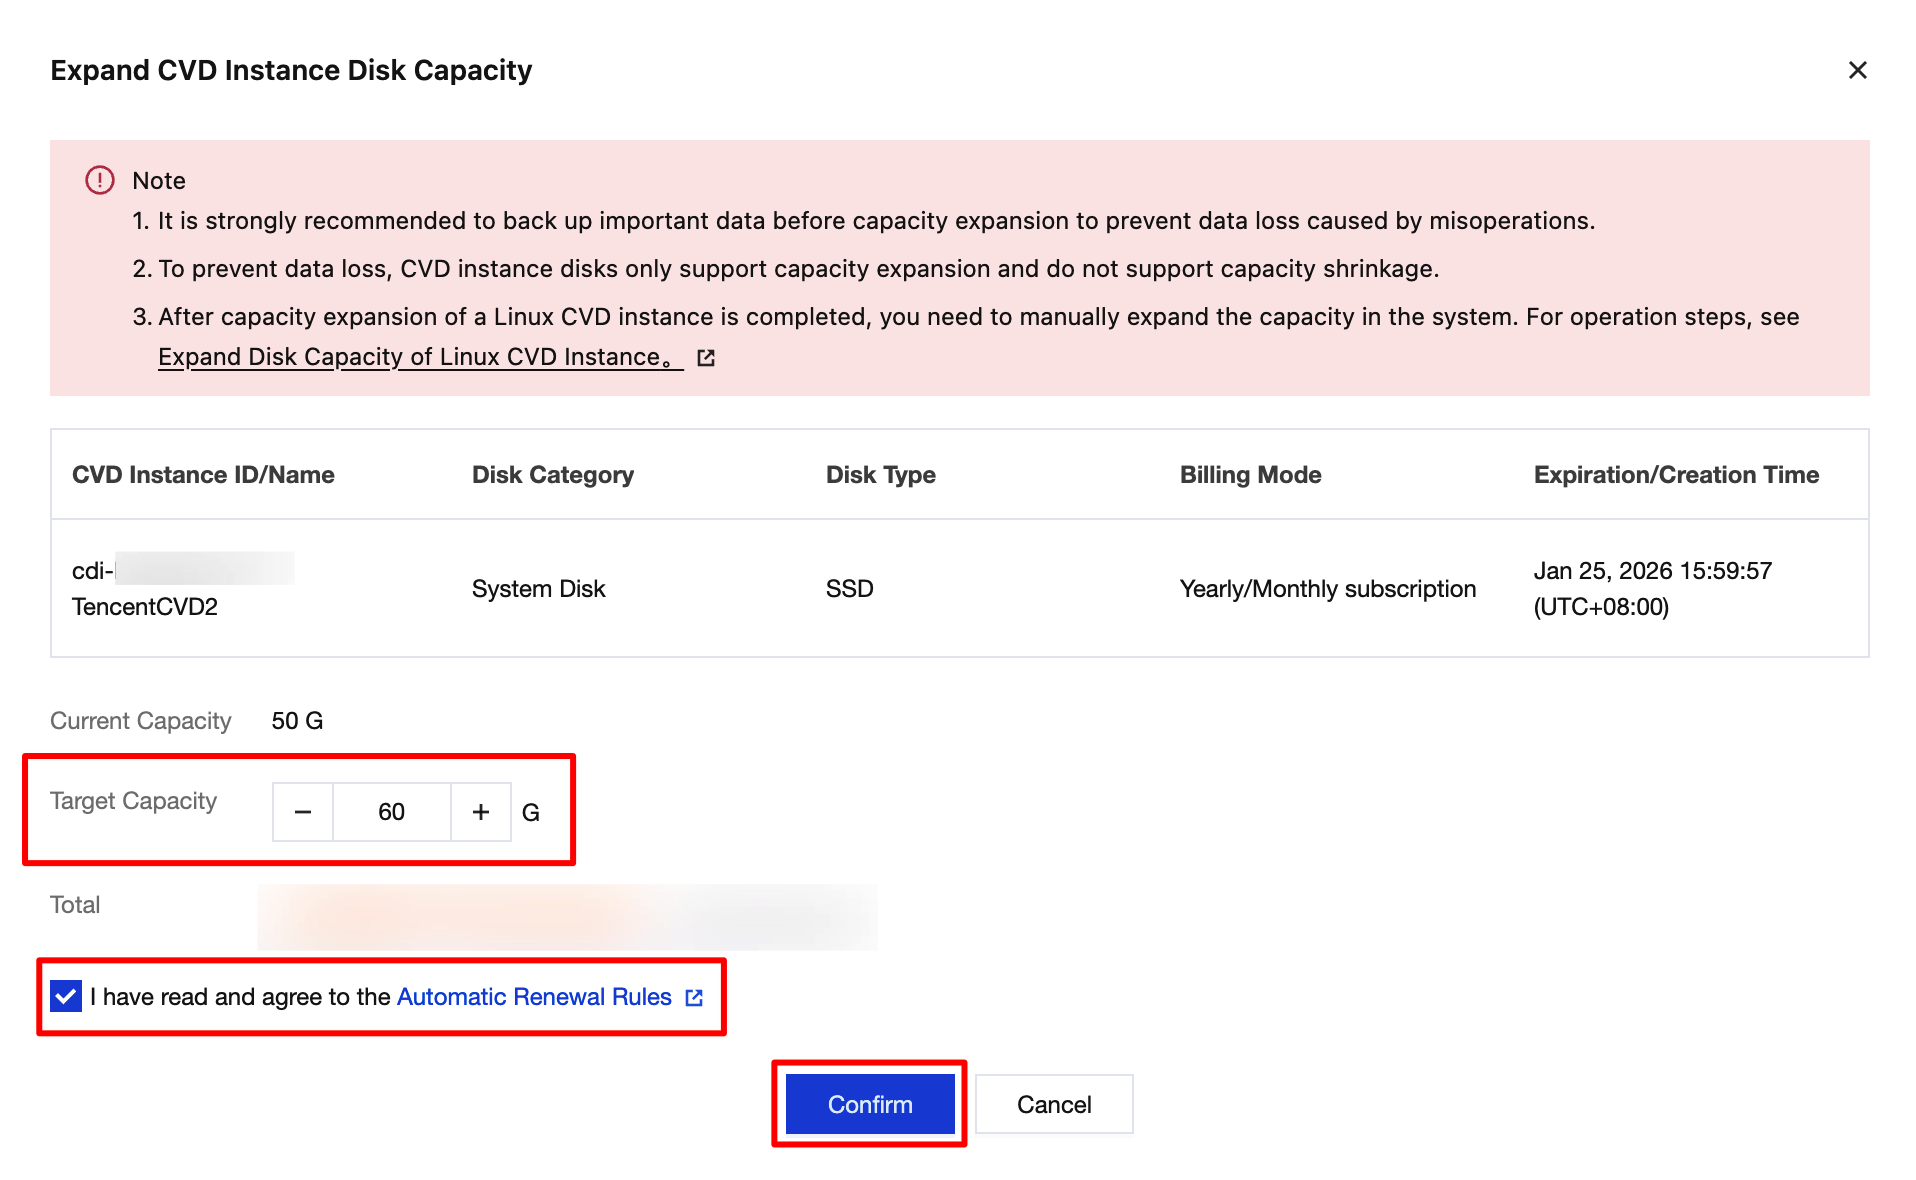
4. In the Expand CVD Disk pop-up window, confirm the CVD instance information, current capacity, target capacity, and fee. Then, click Confirm to proceed.
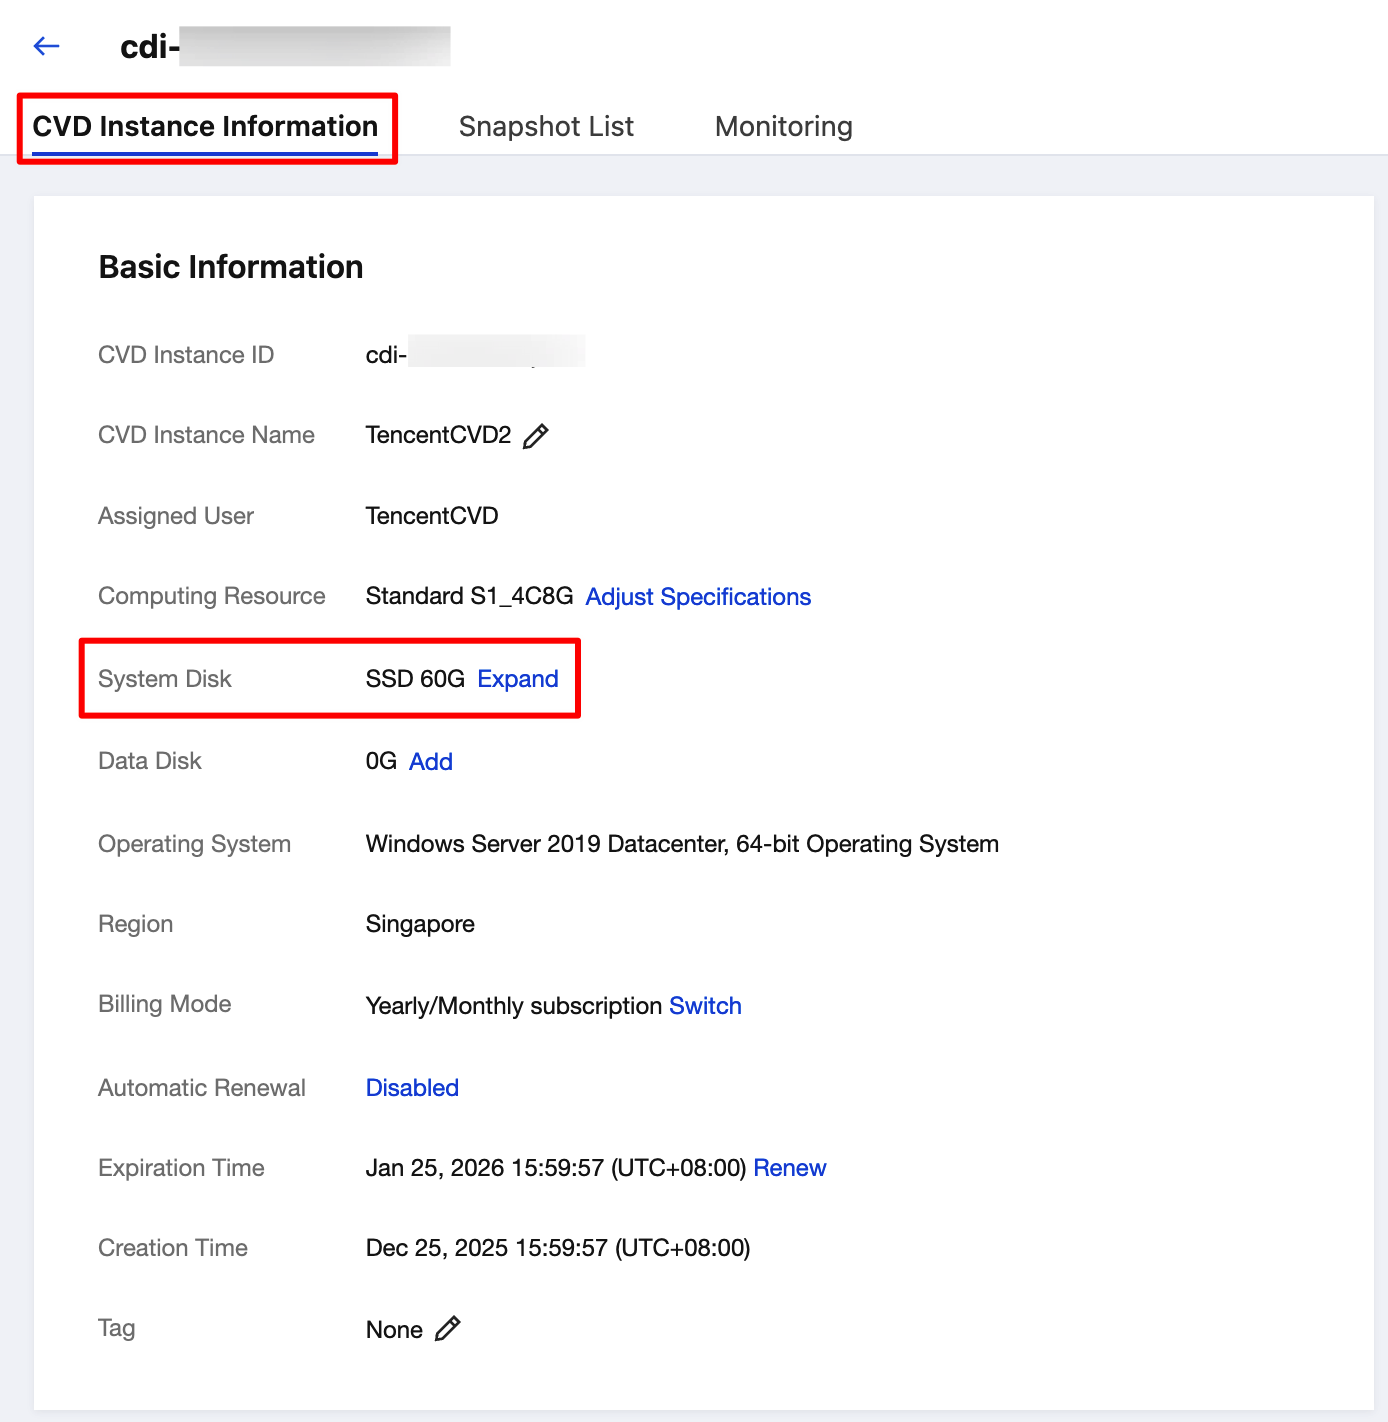
5. After the expansion is complete, view the disk size on the CVD instance details page.
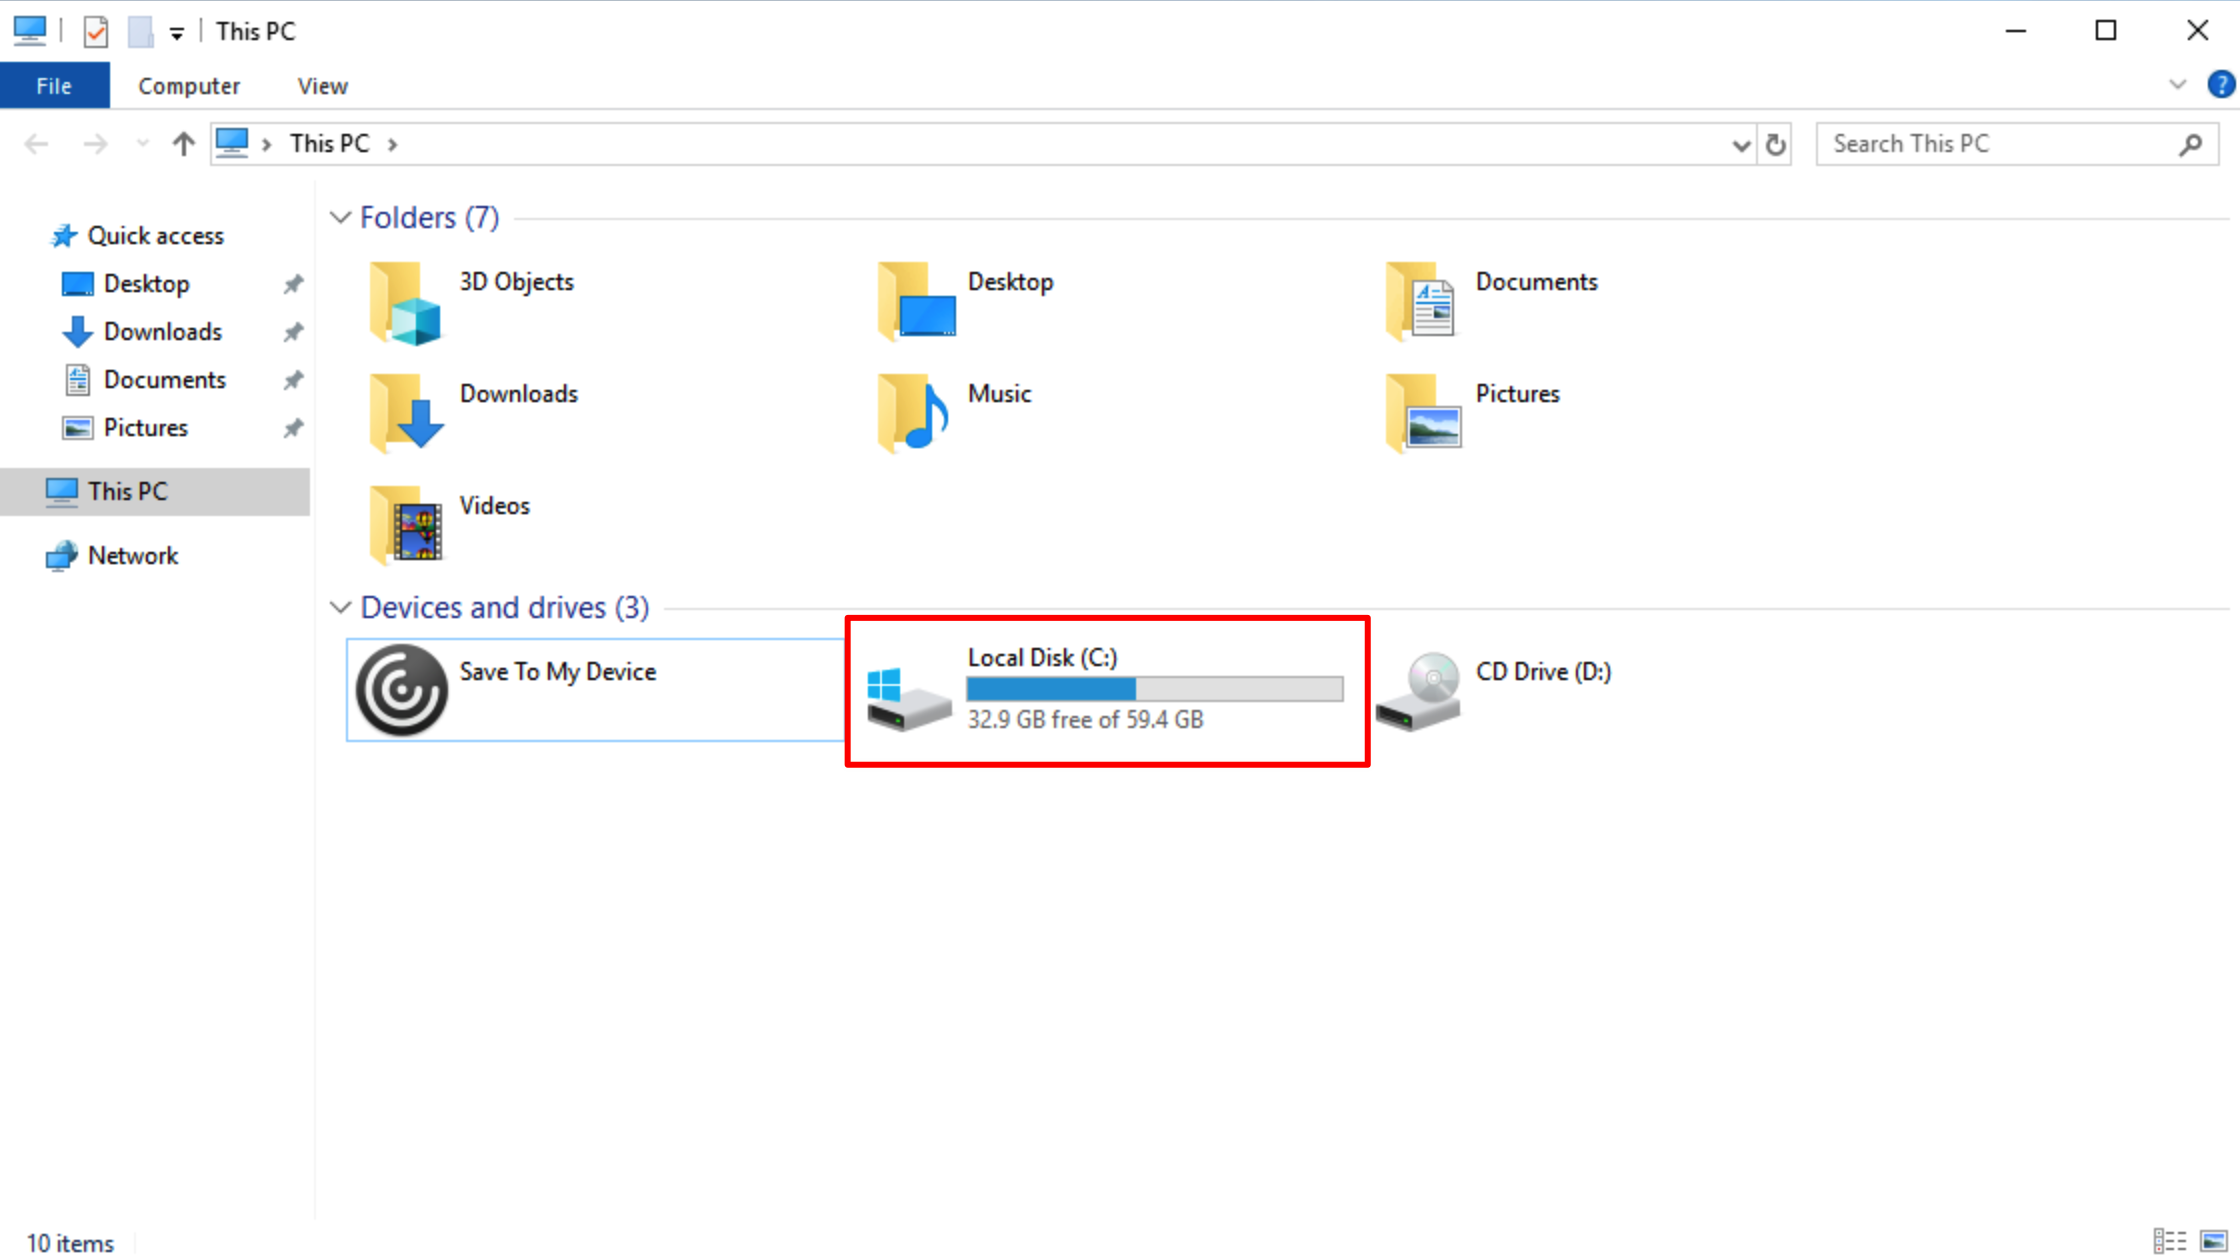
6. After logging in to the CVD instance, verify the capacity size after expansion within the CVD system.
Appendix: Manually Expanding a File System for a Linux CVD
For a Linux CVD, if the disk space is not automatically expanded within the system after you perform Expand CVD Disk in the CVD console, you can manually expand the file system. See the following steps.
1. On the terminal of the Linux CVD instance, run the following command to switch to the administrator identity.
sudo su -
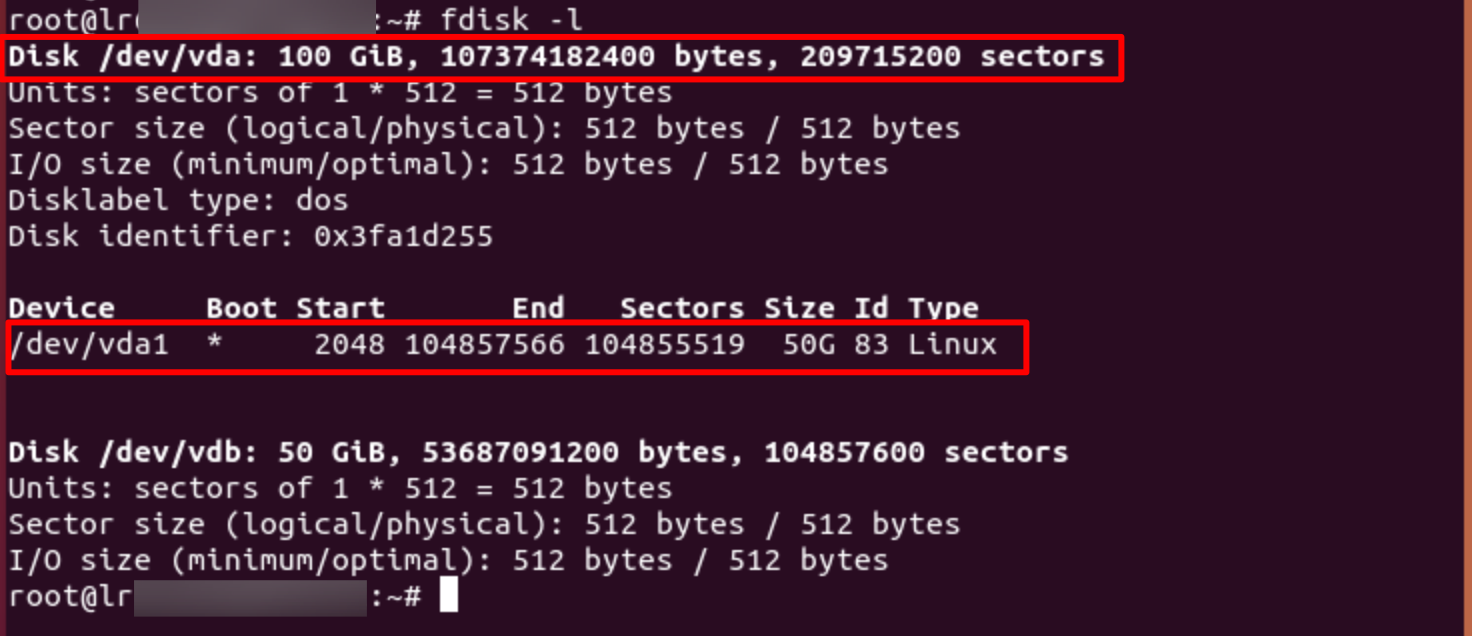
2. Run the following command to query the partition information of the CVD disk.
fdisk -l
The following figure shows the returned result, indicating that the disk /dev/vda has a capacity of 100 GB and contains an MBR partition /dev/vda1 with a capacity of 50 GB.
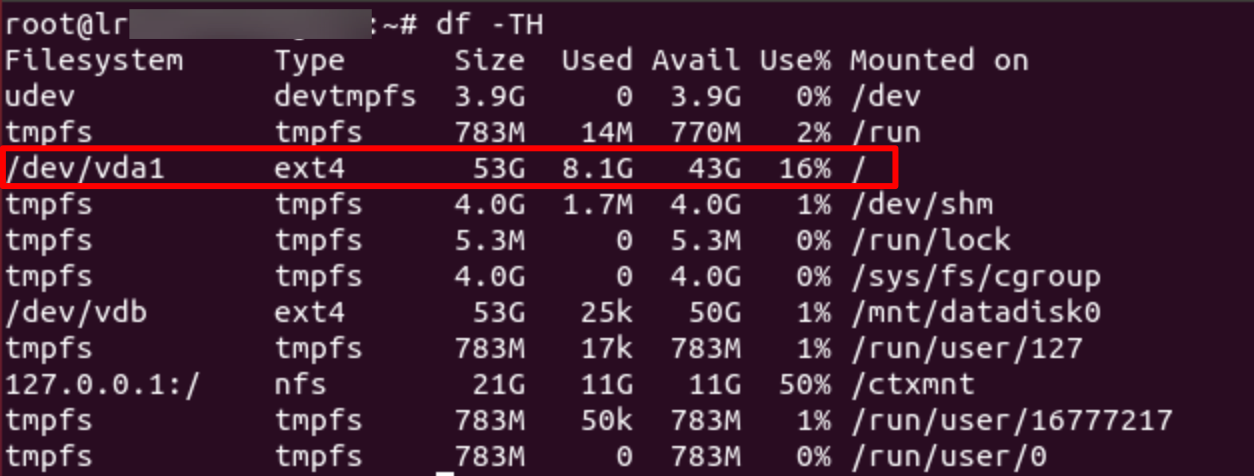
3. Run the following command to identify the file system of the existing partition.
df -TH
The following figure shows the returned result, indicating that the file system type for /dev/vda1 is ext4.
4. Run the following command to install the growpart tool.
apt-get install -y cloud-guest-utils
5. Run the following command to expand the partition /dev/vda1 using the growpart tool. In the command, /dev/vda and 1 must be separated by a space.
growpart /dev/vda 1
The following figure shows the returned result:
6. Run the following command to expand the ext4 file system.
resize2fs /dev/vda1
The following figure shows the returned result:
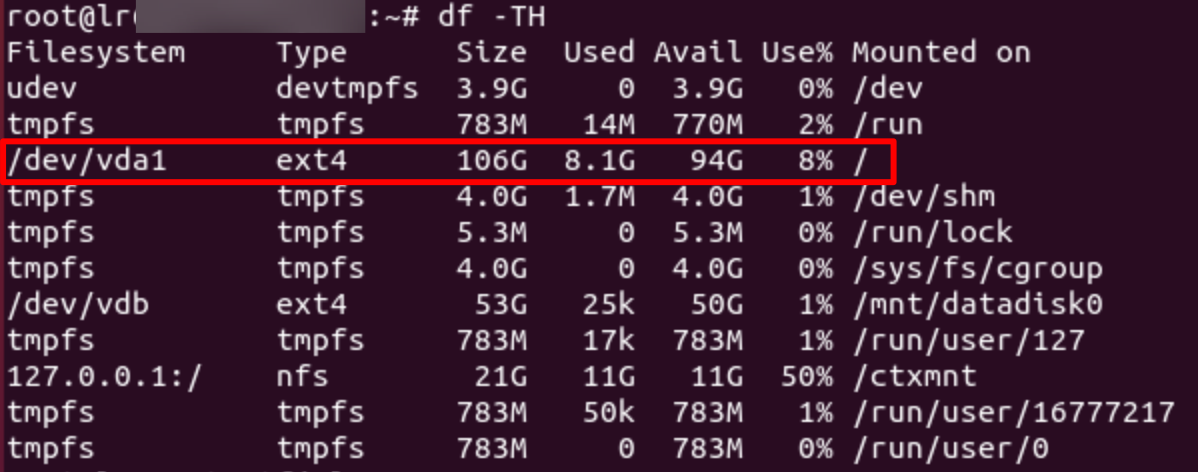
7. Run the following command to view the expansion result.
df -TH
The following figure shows the returned result, indicating that the expansion succeeds.
After successful expansion, check data integrity and observe whether services on the CVD instance are running normally.