In addition to the public images and Tencent Cloud office images provided by Cloud Virtual Desktop (CVD), you can create custom images. You can create a custom image based on a CVD instance that has already been installed and configured with the required office software. After creating a custom image, you can quickly create CVD instances with the same configuration as the image in the CVD console.
Must-Knows
CVD instances come pre-installed with cloudbase-init and Tencent CVD Assistant services by default. Ensure these services are set to start automatically (which is the default); otherwise, the created image will be unusable.
Pay-as-you-go instances do not support creating custom images in the Shut Down status. Creating images online is supported, and the image creation process takes approximately 30 minutes.
Images containing data disks cannot be used to reset an existing CVD instance. They can only be used to create CVD instances. Choose images with caution.
The maximum capacity for a data disk used to create an image is 1,000 GB.
The custom image feature is in beta testing. Each account can retain up to 5 custom images. Storage fees will be charged based on the number and size of images in the future.
Select C:\\Program Files or C:\\Program Files (x86) as the software installation directory. Do not select C:\\Users\\xxxxxx, as this may cause the software to be unavailable in CVD instances created from this image.
Creating a Custom Image
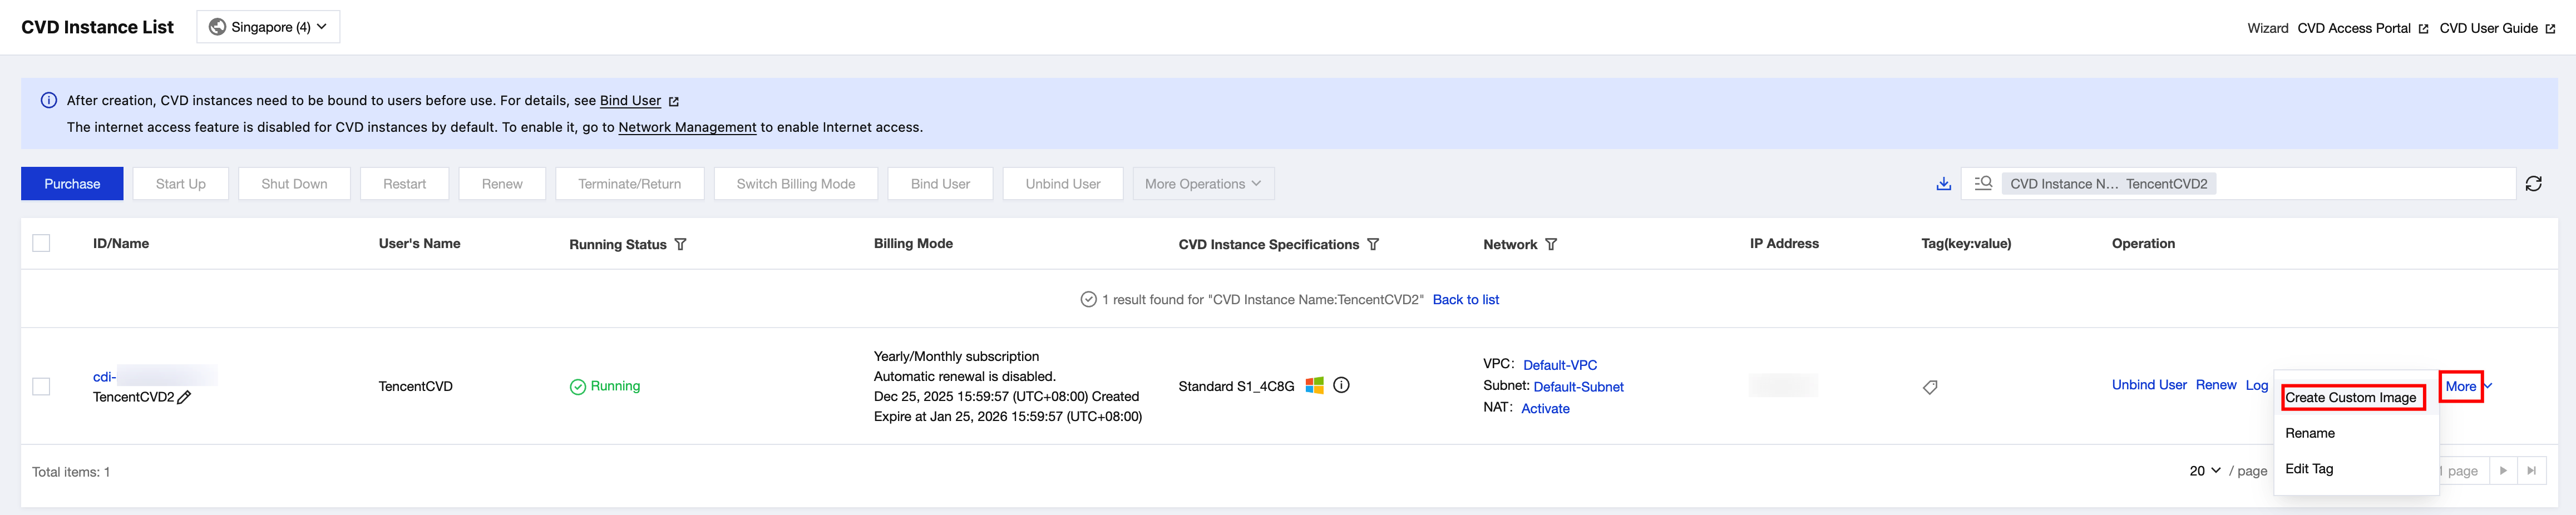
1. On the Desktop List page of the CVD console, choose More > Create Custom Image in the operation column of the target instance.
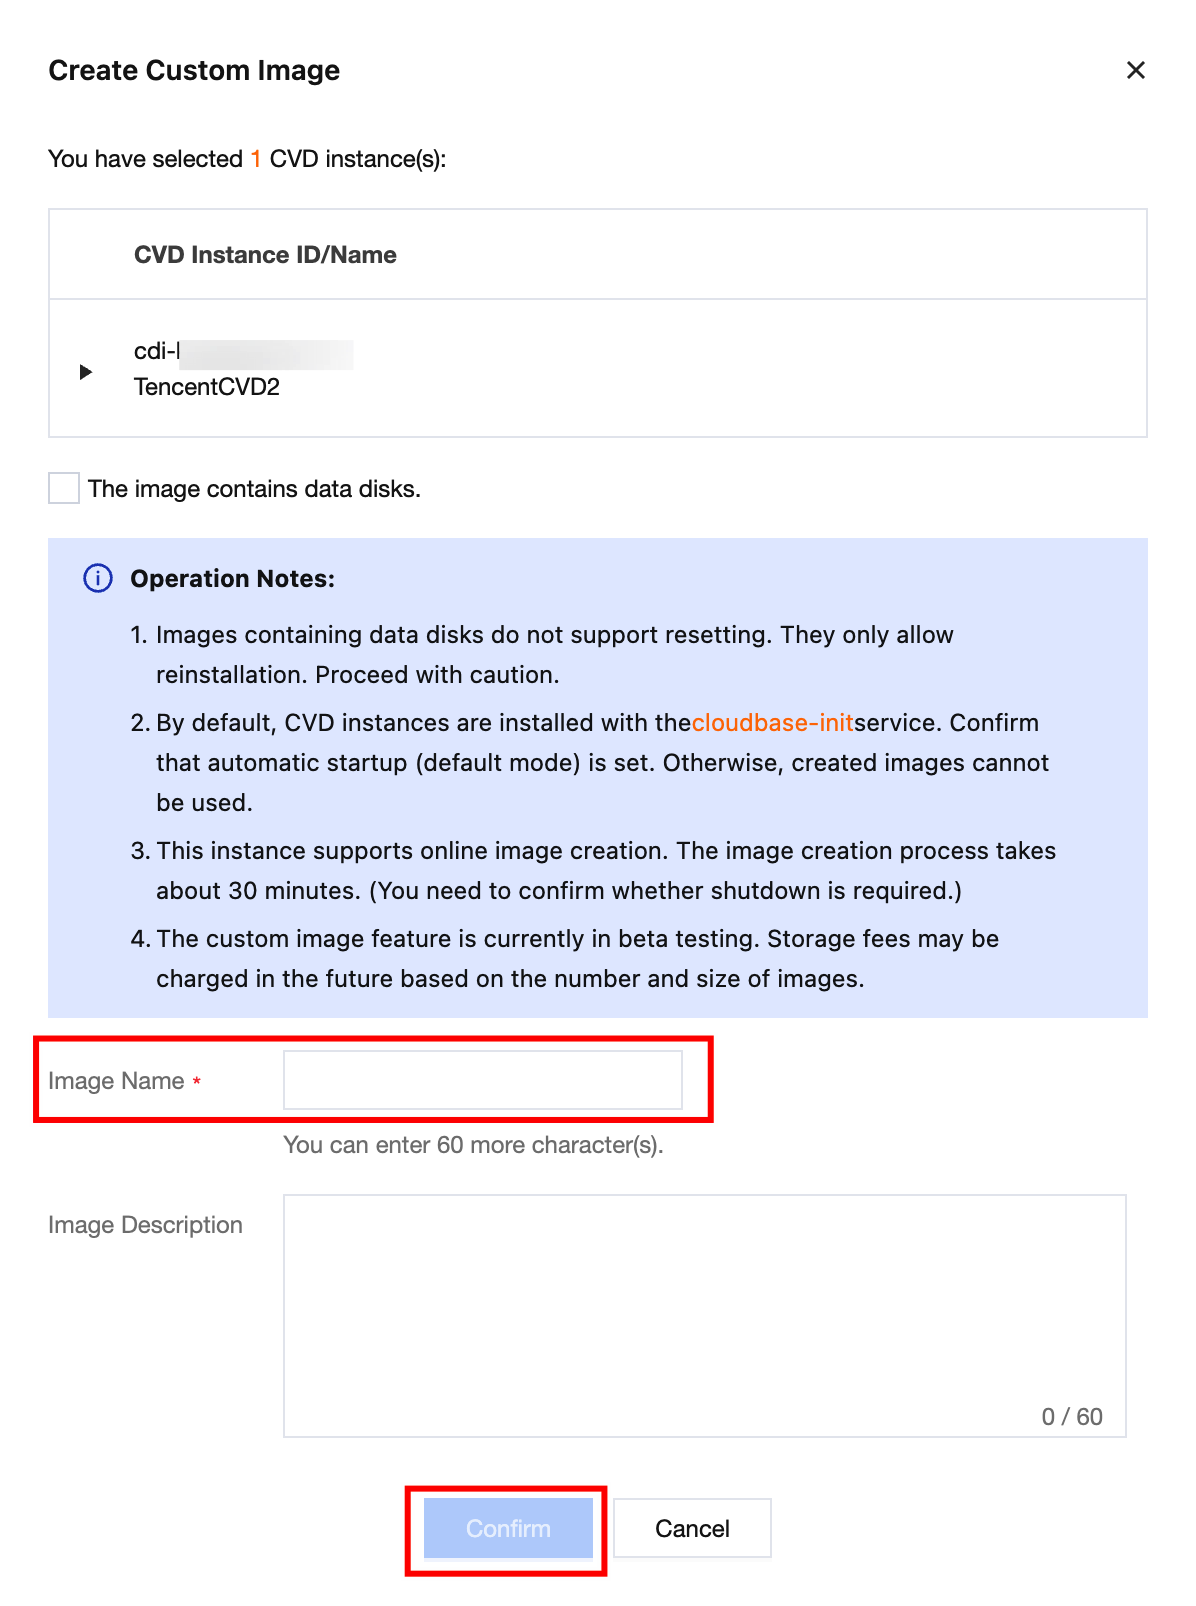
2. In the Create Custom Image pop-up window, configure the relevant information.
Image Name and Image Description: Customize the name and description.
Image Includes Data Disk: If your instance has a data disk, select this option as required.
If the option is selected, the created custom image will include the data disk.
If the option is not selected, only a system disk image of the CVD instance will be created.
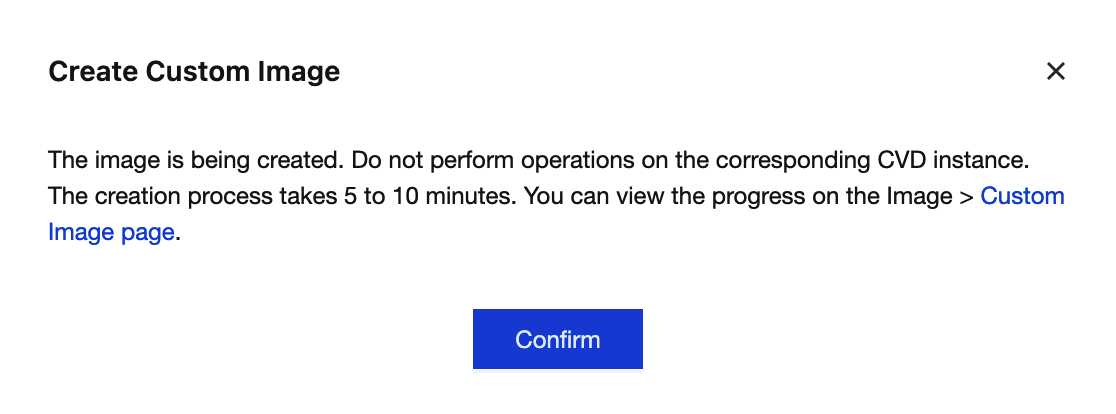
3. The custom image creation process begins. You can view the progress on the Custom Images tab of the Images page in the CVD console.
4. The custom image is created successfully, as shown in the following figure:
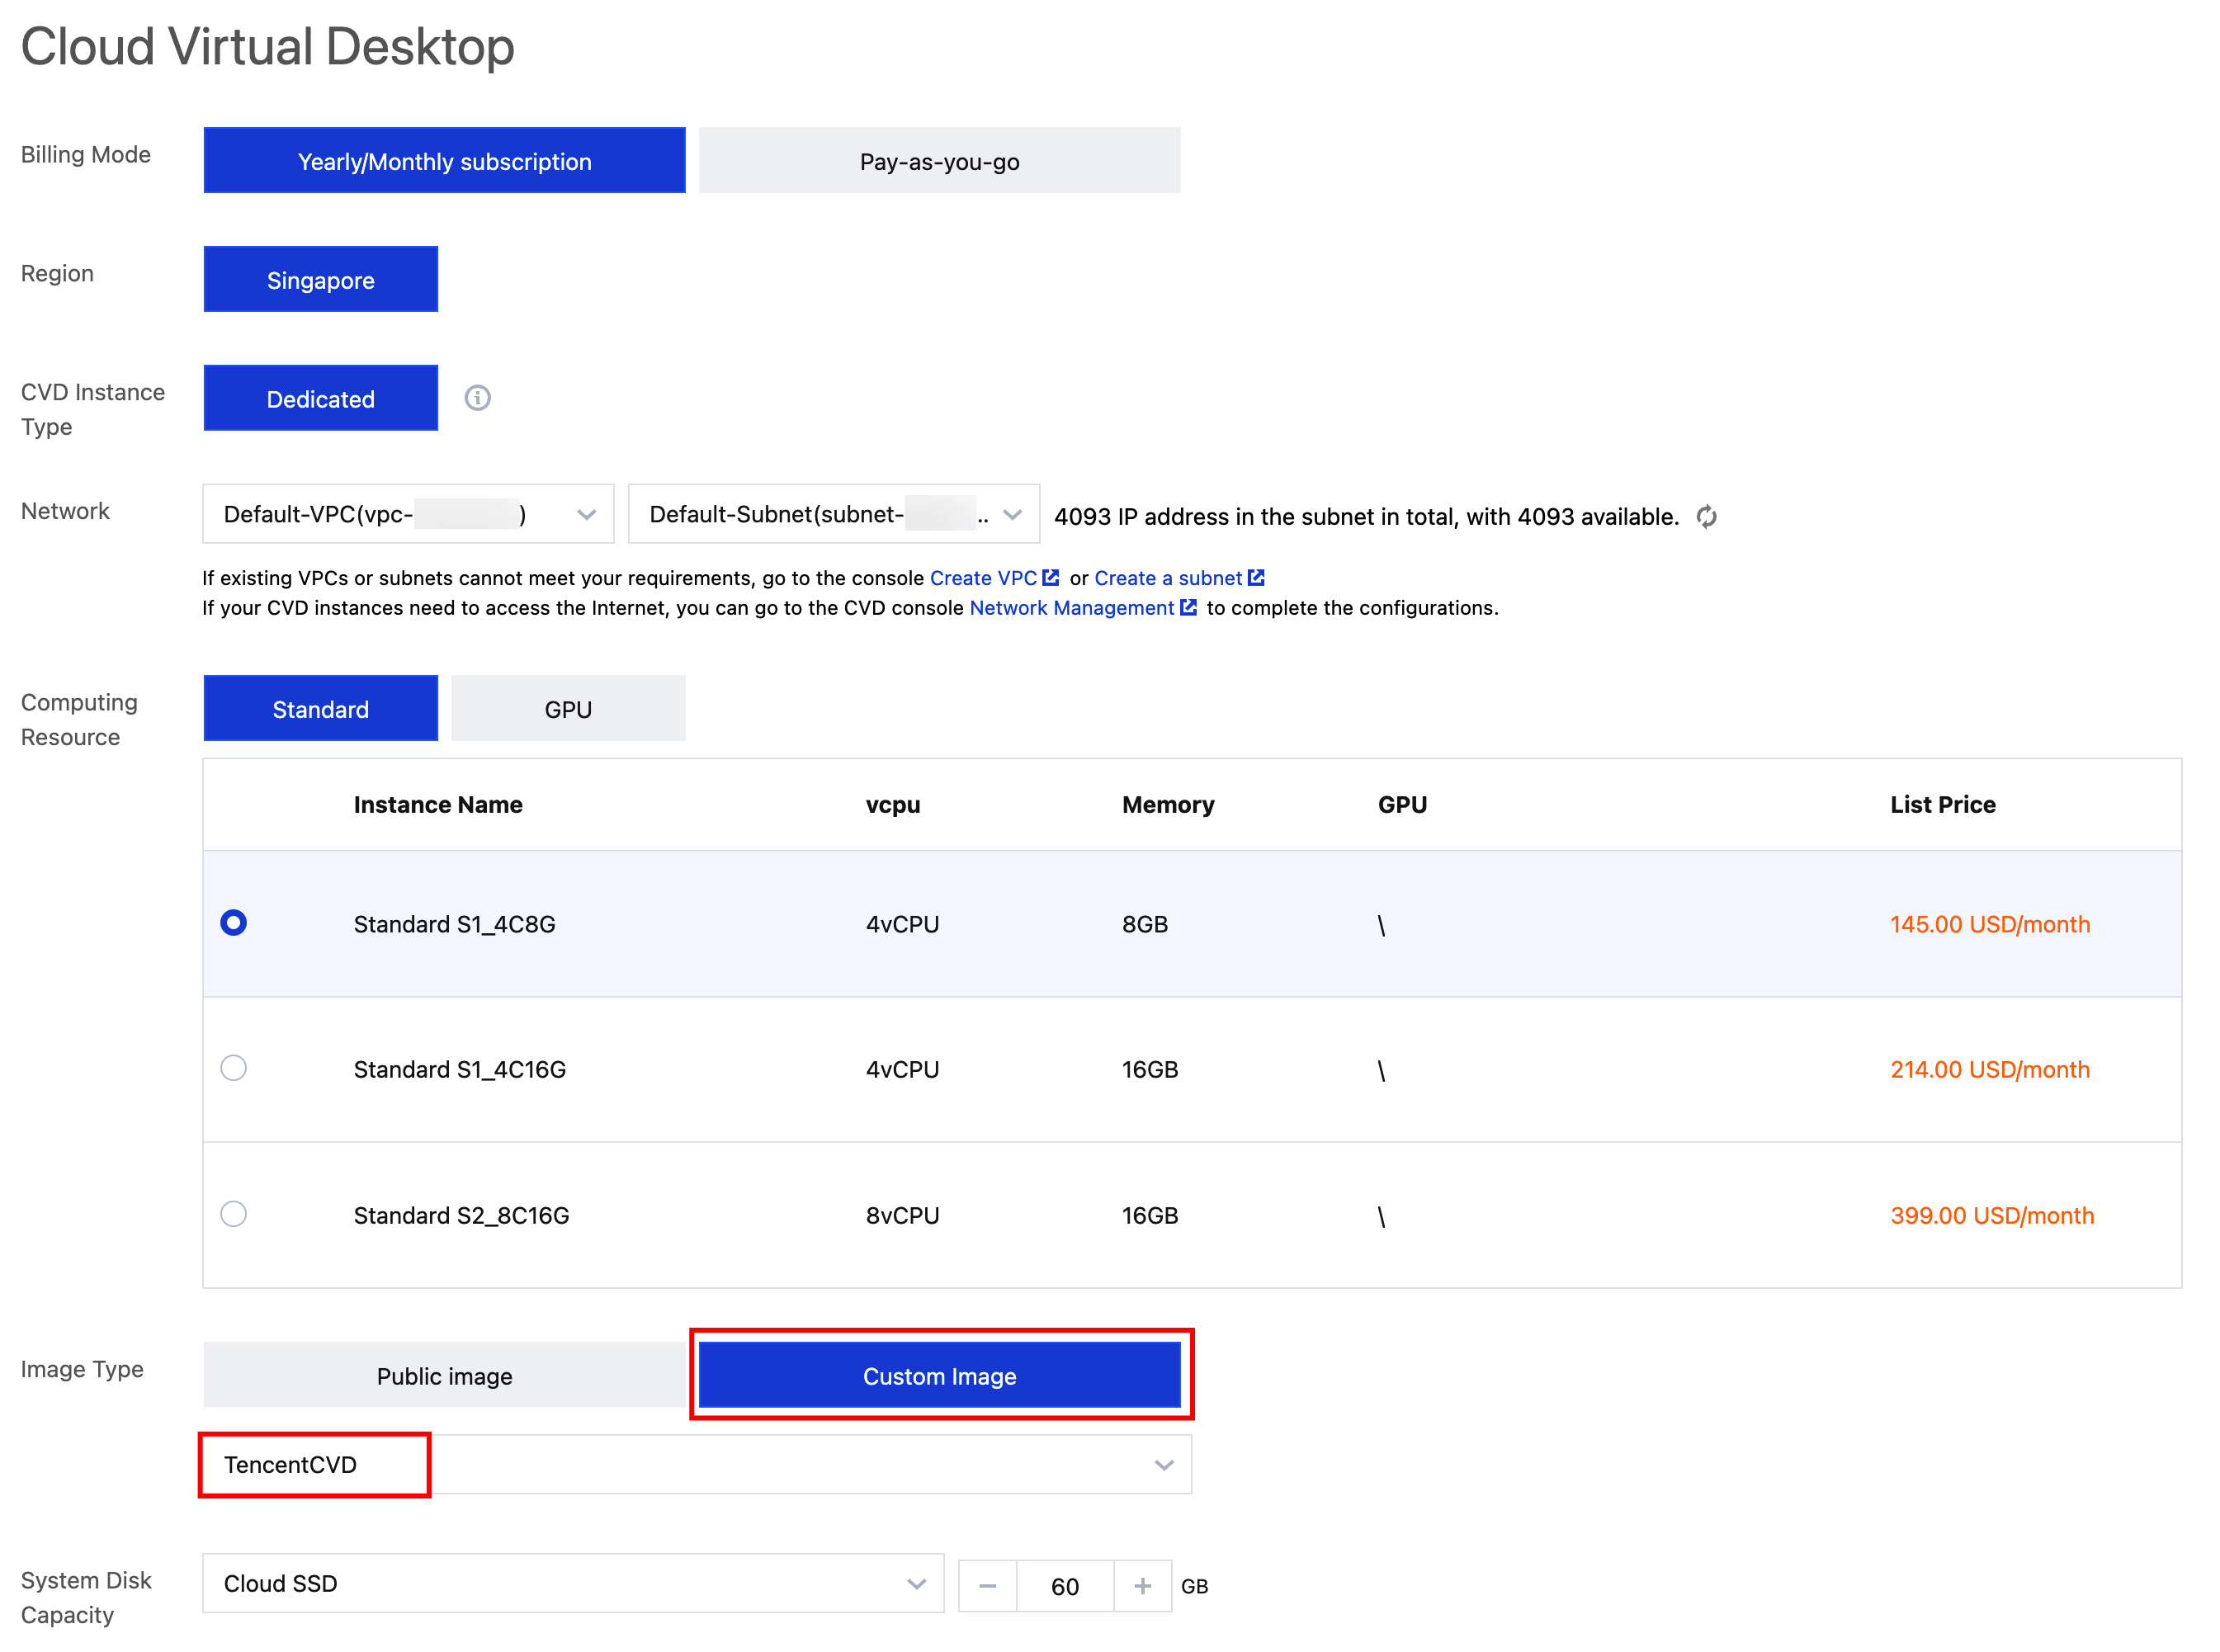
Creating a CVD Instance from a Custom Image
On the Custom Images tab of the Images page, click Create CVD Instance in the operation column of the target image. The image type defaults to Custom Image. Select the desired custom image from the drop-down list to create the CVD instance.
Note:
The system disk capacity must be greater than or equal to the system disk capacity of the custom image.
If the custom image contains a data disk, the data disk capacity must be greater than or equal to the data disk capacity of the custom image.
Deleting a Custom Image
After a custom image is deleted, it cannot be used to create CVD instances, but this does not affect CVD instances that have already been started.
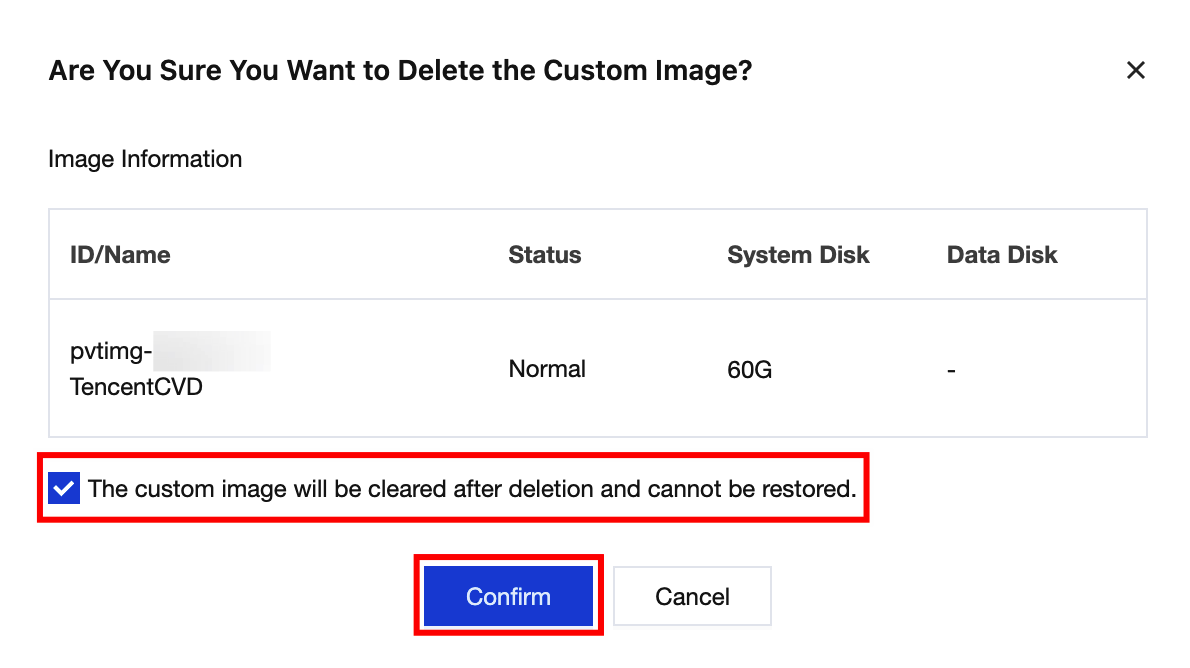
1. Log in to the CVD console and go to the Images page. On the Custom Images tab, select the image to be deleted, and click Delete.
2. On the confirmation page, select The custom image will be cleared after deletion and cannot be recovered, and then click Confirm to delete the image.