
SSL VPN 访问控制实践指引(okta)

最后更新时间:2024-05-24 10:58:47
本文介绍如何使用第三方 IDP(okta)和 SSL VPN 实现访问控制,提升您业务的安全性。
操作流程
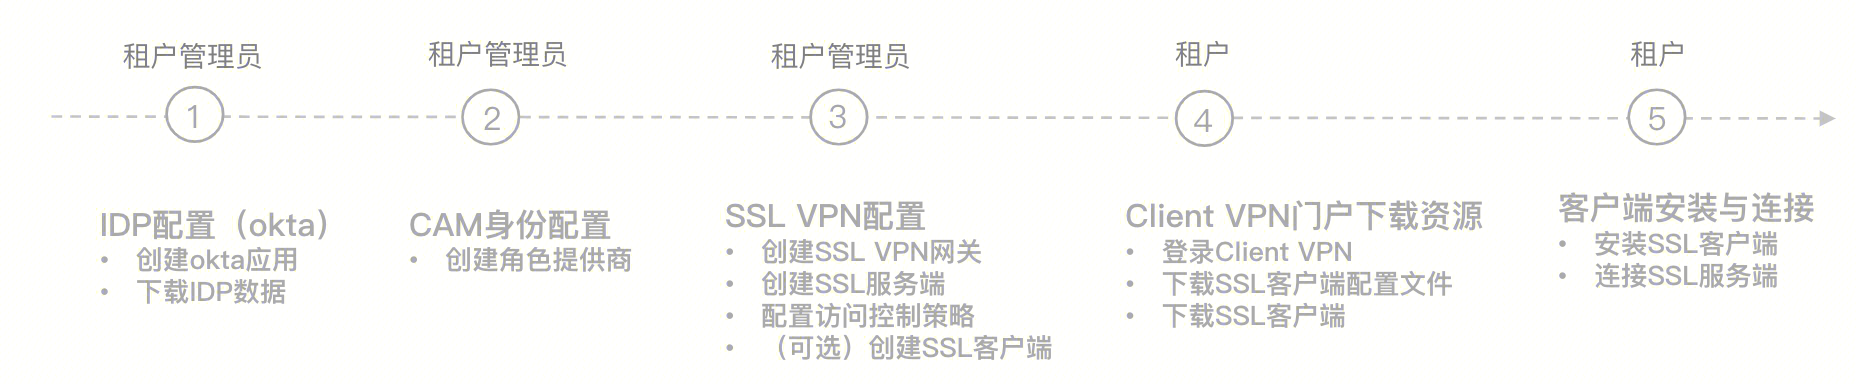
步骤1:(租户管理员)IDP 配置(okta)
通过本步骤配置 Okta 和腾讯云之间的信任关系使之相互信任。
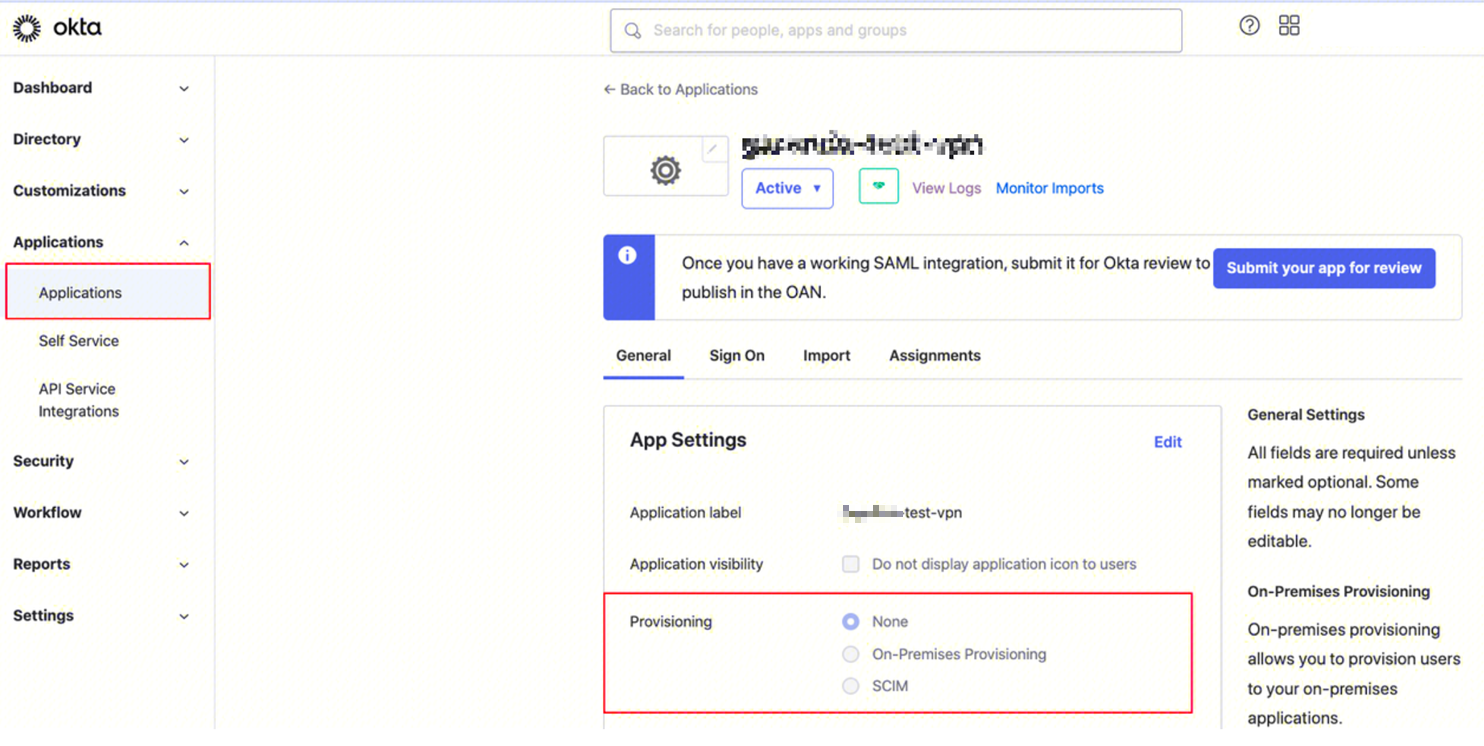
1. 登录 Okta 官网,并创建 Okta 应用程序。
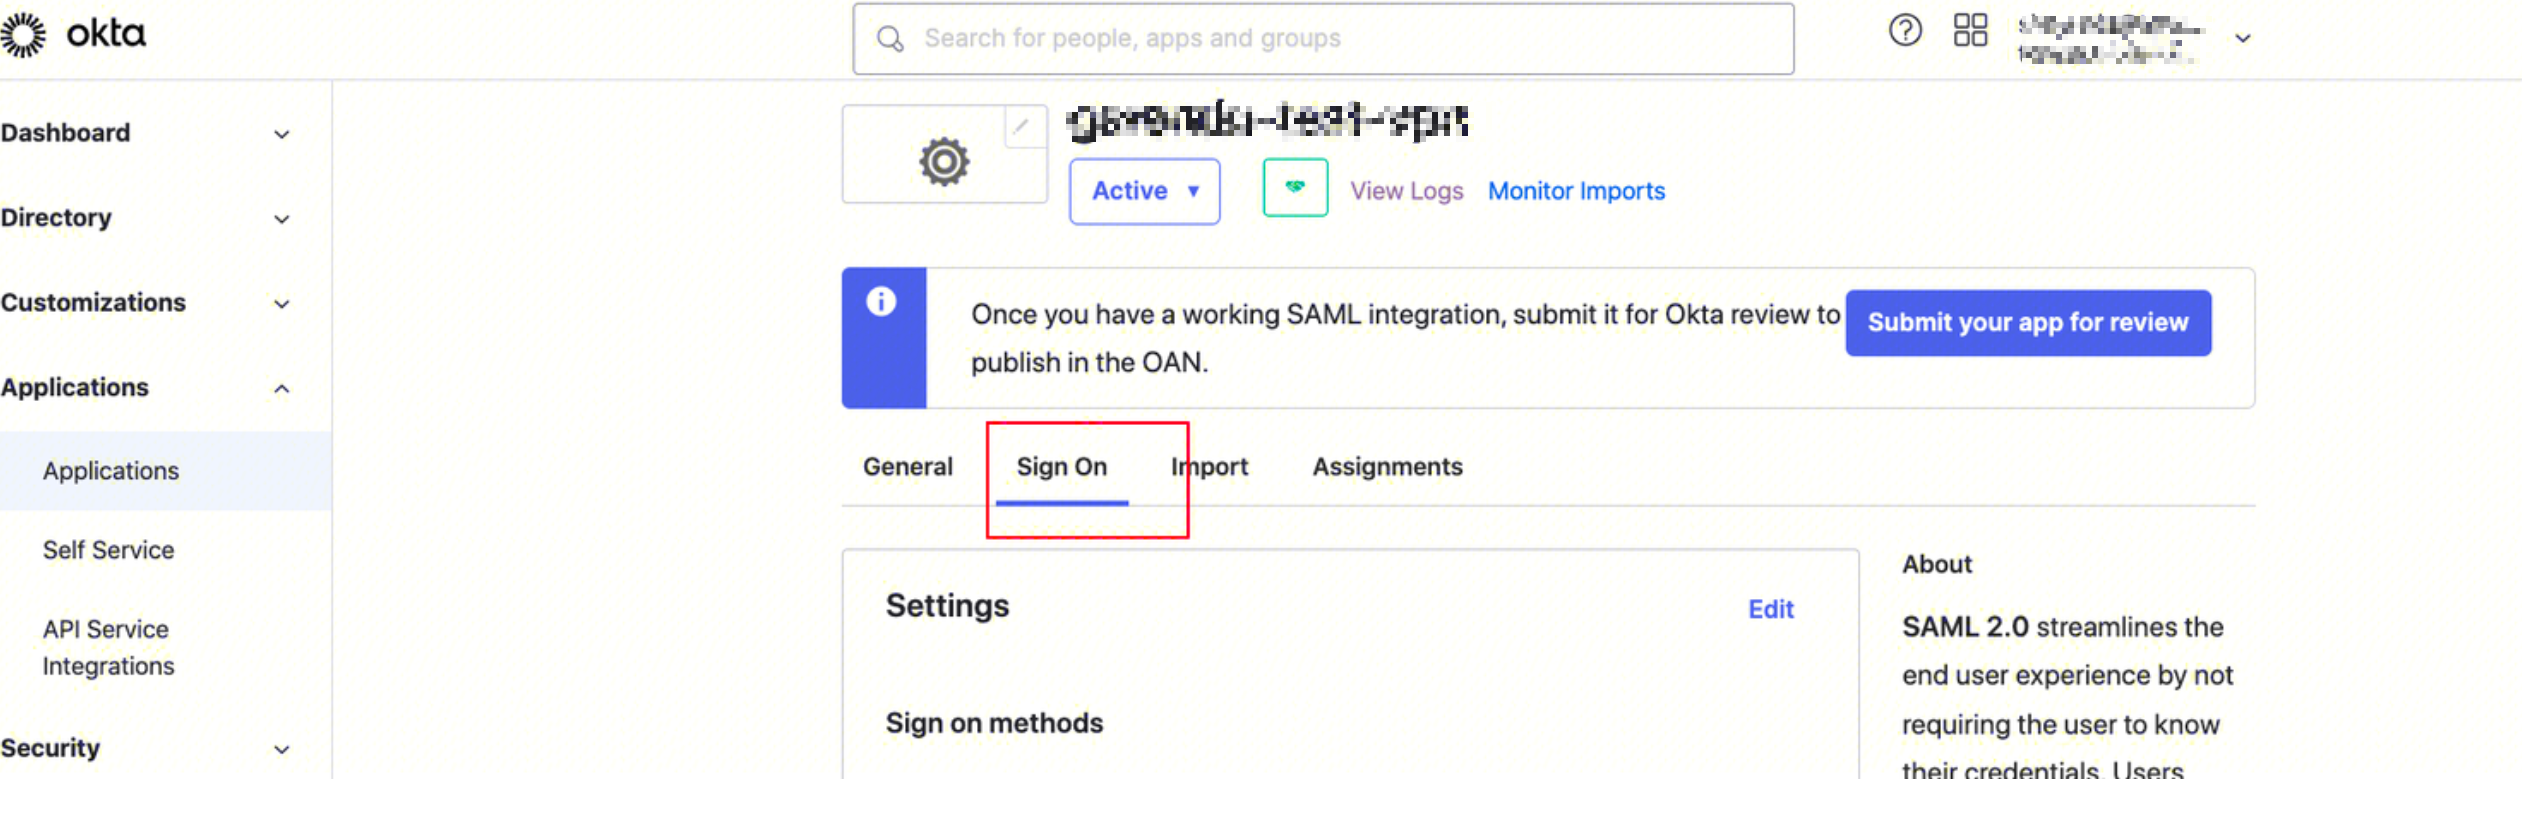
2. 进入 Applications 页面,并单击应用名称,然后在 General 页签单击 Edit。
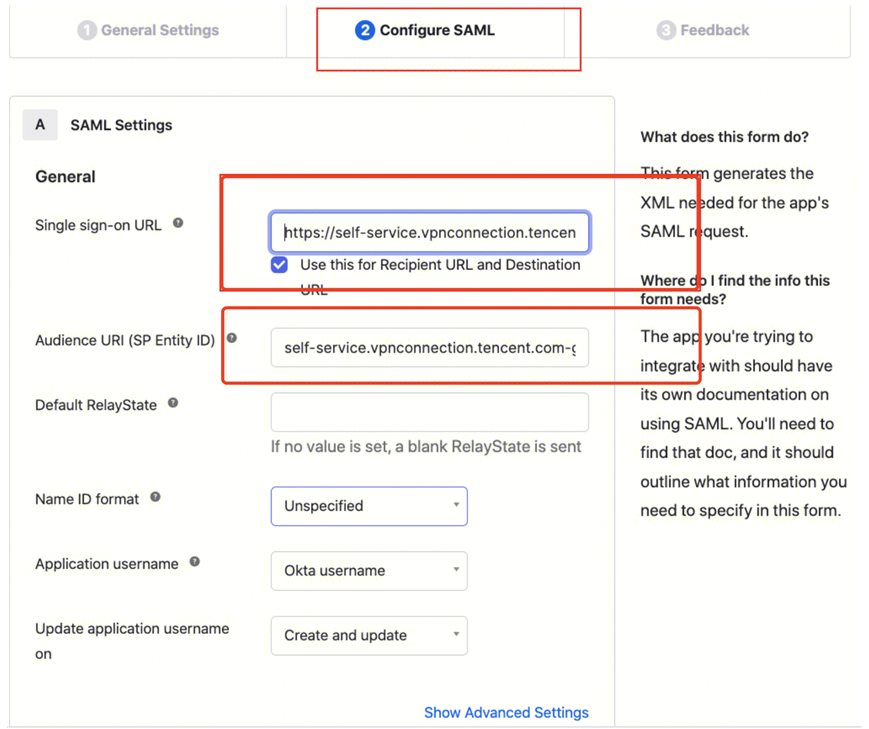
3. 在 Configure SAML 页面配置 Single sign-on URL 和 Audience URL(SP Entity ID)。
说明:
Single sign-on URL:
https://self-service.vpnconnection.tencent.com/api/auth/sso-v2/saml,此项为固定值。Audience URI (SP Entity ID):腾讯云 Client VPN 自助服务门户。
4. 在配置 SAML/Configure SAML 页面将 GENERAL 下 ATTRIBUTE STATEMENTS 补充为以下信息。
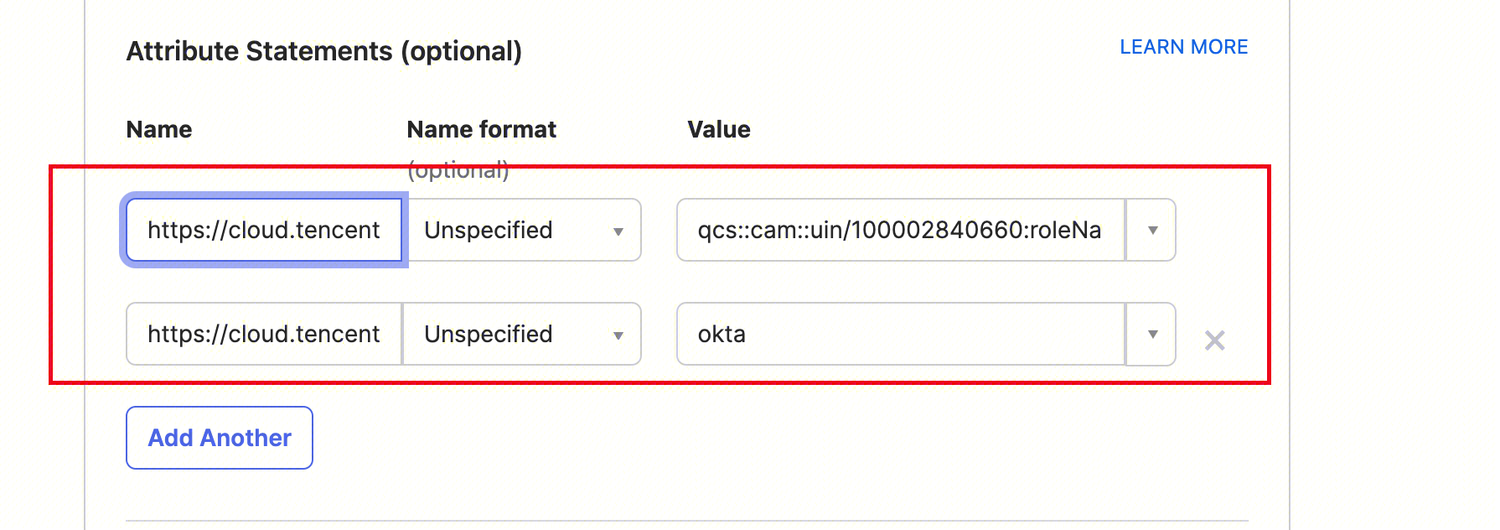
Name | Value |
https://cloud.tencent.com/SAML/Attributes/Role: | qcs::cam::uin/{AccountID}:roleName/{RoleName},qcs::cam::uin/{AccountID}:saml-provider/{ProviderName} |
https://cloud.tencent.com/SAML/Attributes/RoleSessionName | okta |
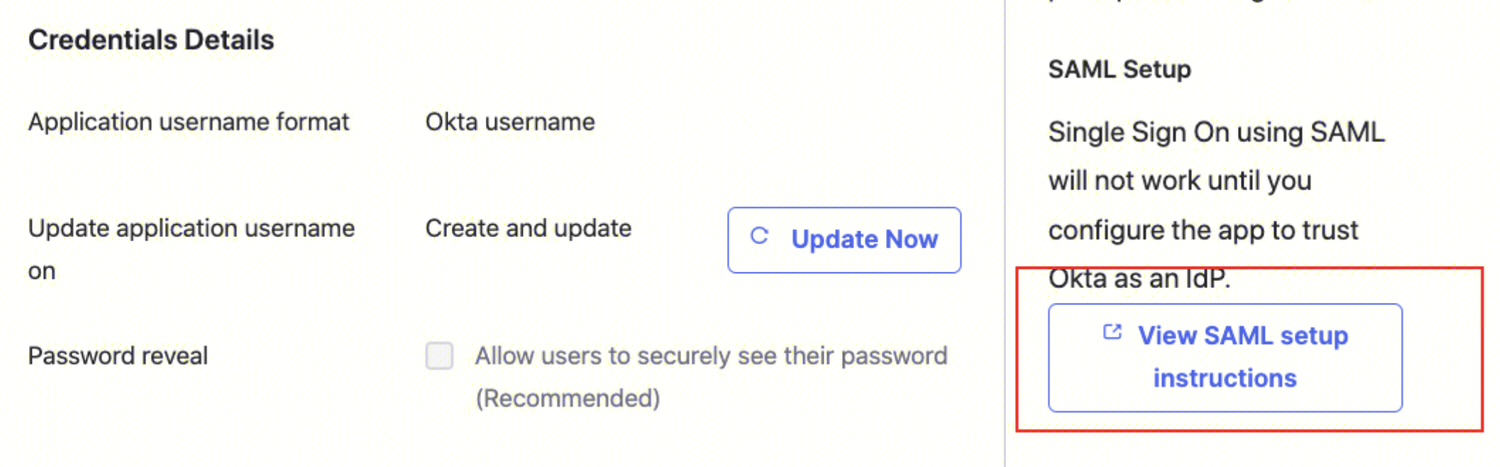
5. 在 Sign on 页签获取生成并下载 IDP 的 SAML-Metadata 文件。
单击 View SAML setup instructions.
单击 Download certificate
,下载好的文件需要在腾讯云 CAM 身份配置时上传,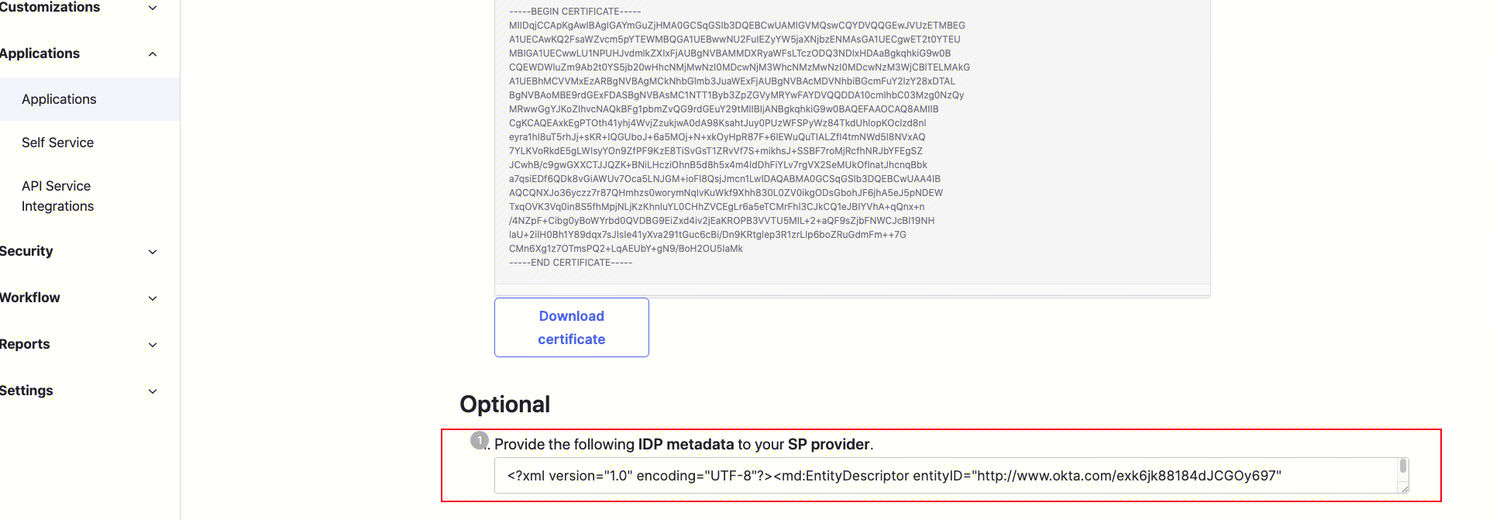
步骤2:(租户管理员)CAM 身份配置
1. 登录访问管理(CAM)控制台,进入 身份提供商 > 角色SSO 页面,单击新建提供商。

2. 在新建身份提供商页面,选择提供商类型为 SAML 并配置提供商信息,单击下一步。

身份提供商名称:输入身份提供商名称。
备注信息:输入您对当前身份提供商的备忘信息。
元数据文档:即 步骤1:(租户管理员)IDP 配置(okta) 中下载的文件。您需要在元数据文档上传 IDP 配置中下载的 SAML-Metadata 数据文档,元数据文档内容检验合法即可上传成功。
步骤3:(租户管理员)VPN资源配置
1. 登录 私有网络控制台,在左侧导航栏中选择 VPN 连接 > VPN 网关,进入管理页。
2. 在 VPN 网关管理页面,单击新建,并在弹出的新建 VPN 网关页面,依据界面参数配置 SSL VPN 网关。
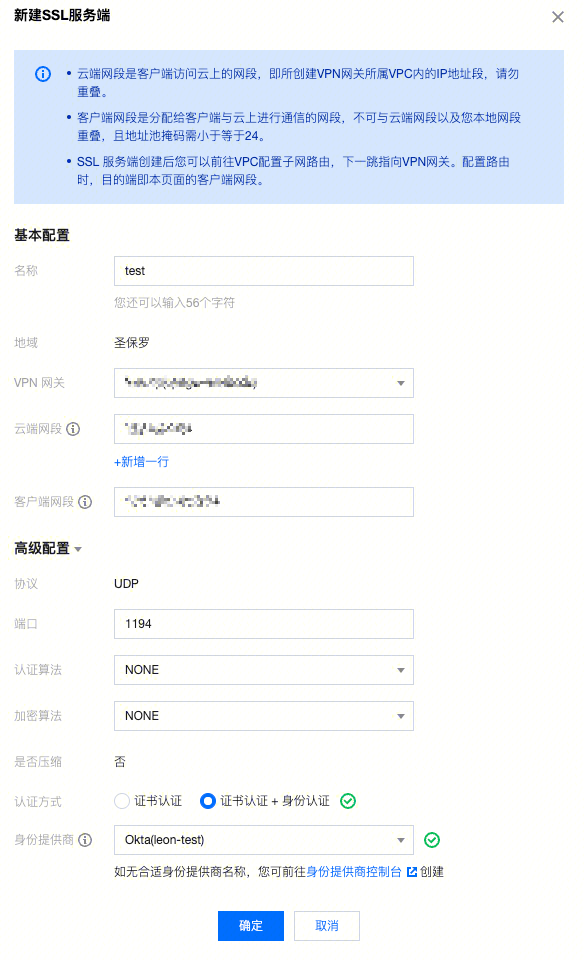
1. 在左侧导航栏中选择 VPN 连接 > SSL 服务端,进入管理页。
2. 在 SSL 服务端管理页面,单击新建,在弹出的新建 SSL 服务端对话框中,依据界面参数配置 SSL 服务端。
认证方式:该认证方式默认 SSL 服务端可被 SSL 客户端全量访问。
身份提供商:当前身份提供商为腾讯云 CAM,详情可查看 身份提供商 使用说明。
步骤4:(租户)在 Client VPN 门户下载 SSL 客户端配置文件和 SSL 客户端
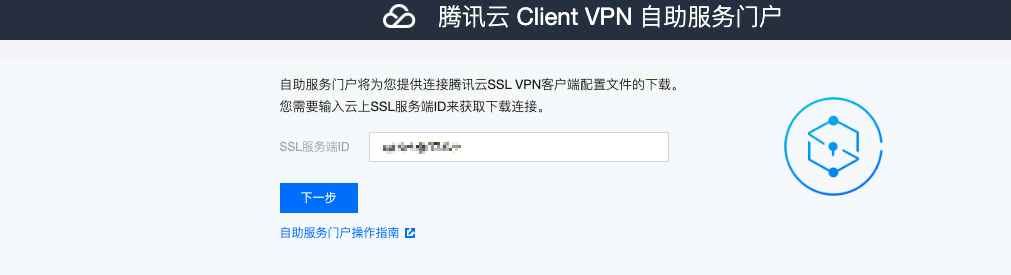
1. 通过您本地浏览器访问 腾讯云Clinet VPN 自主服务门户。
2. 在 SSL 服务端 ID 所在行的输入框中输入创建好的 SSL 服务端 ID,然后单击下一步,开始 SSO 认证。
如果您没有或者不确定 SSL 服务端 ID ,可联系租户管理员获取。
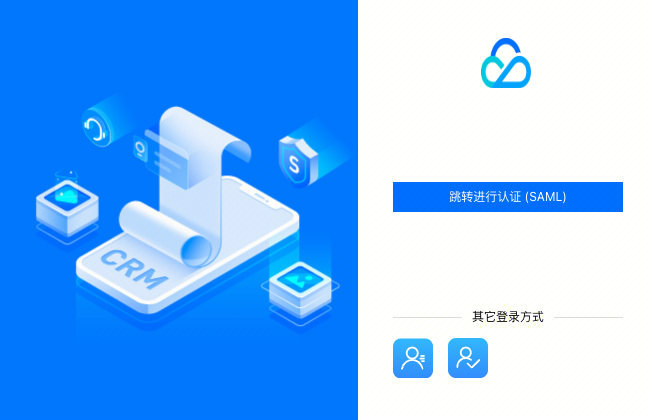
3. 单击跳转进行认证(SAML)后,您需要完成您的管理员指定的认证程序。
如果您没有账号或在认证登录过程中遇到其他问题,请联系您的租户管理员。在您完成认证并成功登录后,将自动登录您的业务系统。
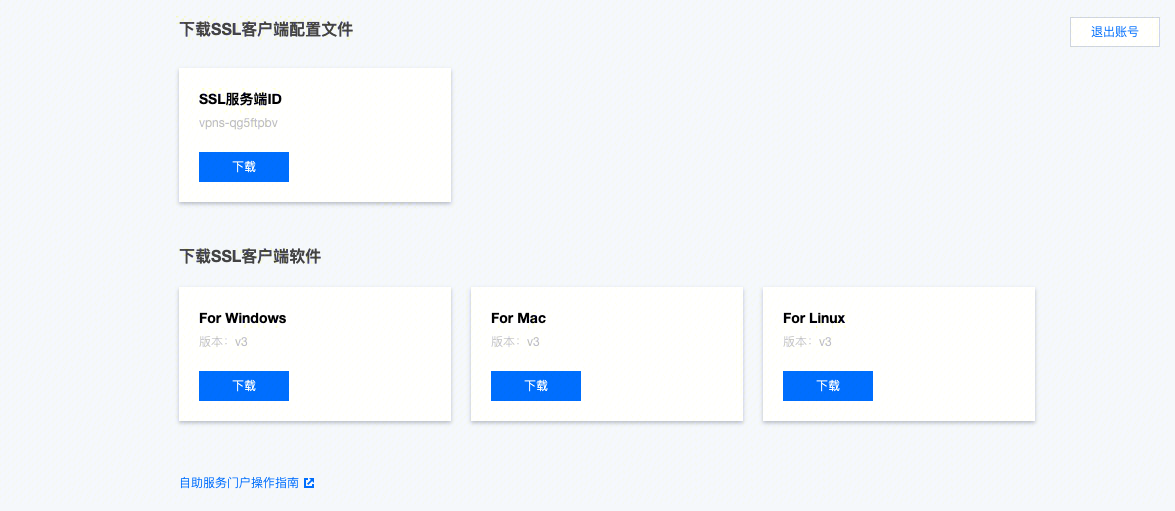
4. 在下载SSL客户端配置文件区域找到您需要下载的客户端配置文件,单击下载。
步骤5:(租户)SSL 客户端安装与连接
说明:
客户端 OpenVPN 请使用3.4.0及以上版本。
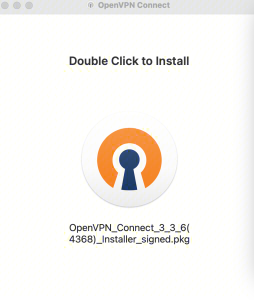
1. 在本地解压安装包,双击安装程序依据界面提示进行安装。
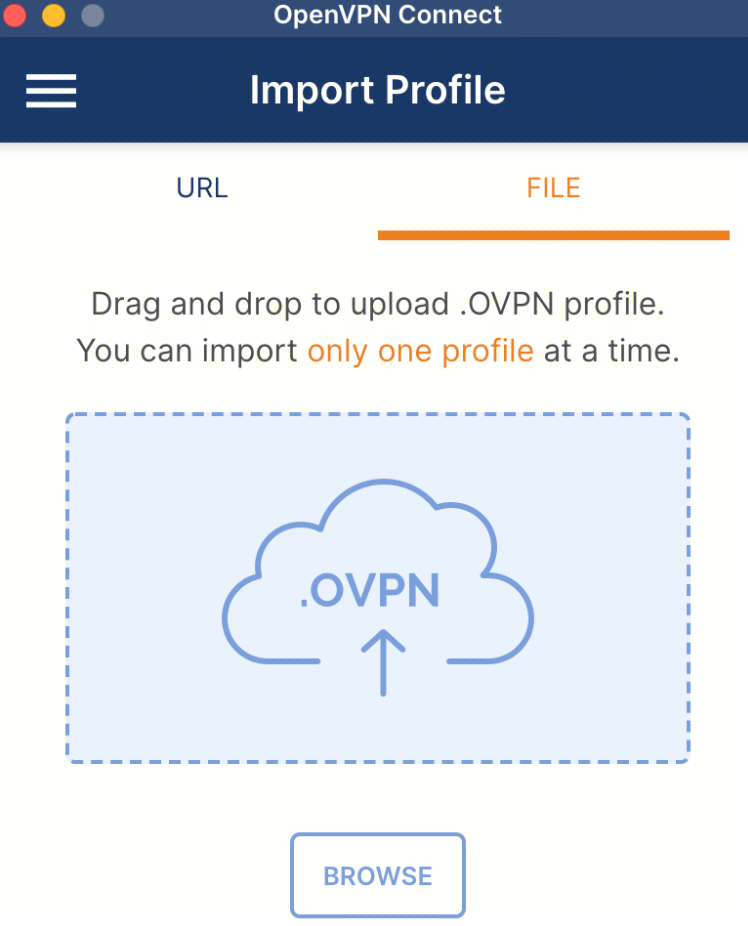
2. SSL 客户端安装完成后,选择“Import Profile”菜单中的“FILE”页面,上传已下载的 SSL 客户端配置文件(.ovpn 格式)。
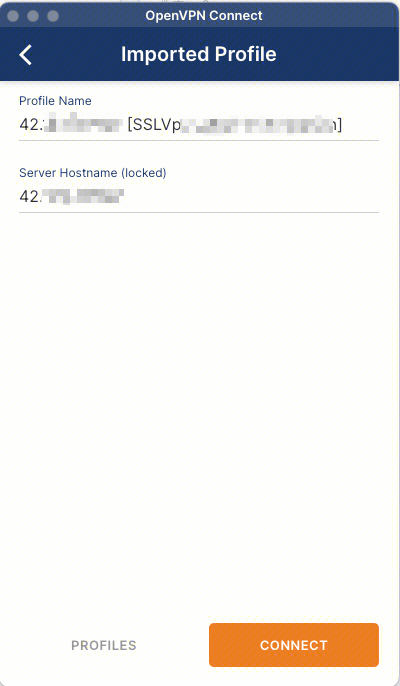
3. 上传成功后,选择 connect 进行连接。
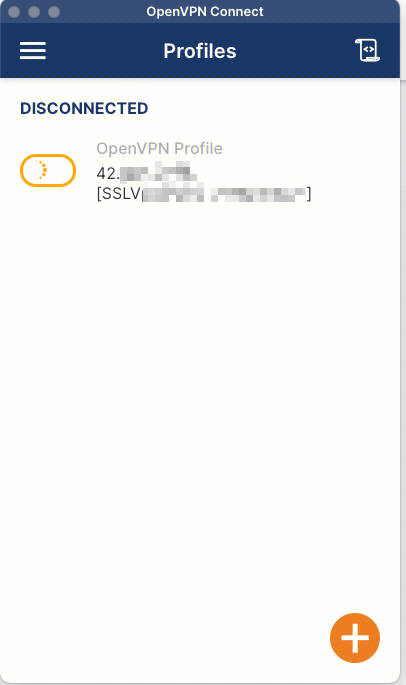
4. Profiles 连接中,请稍候。
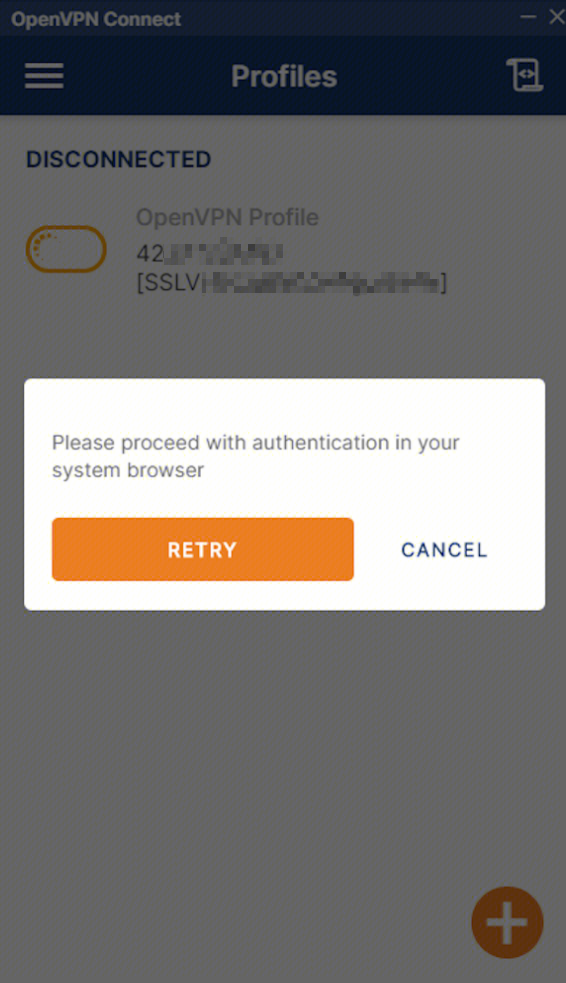
5. 进行认证登录。
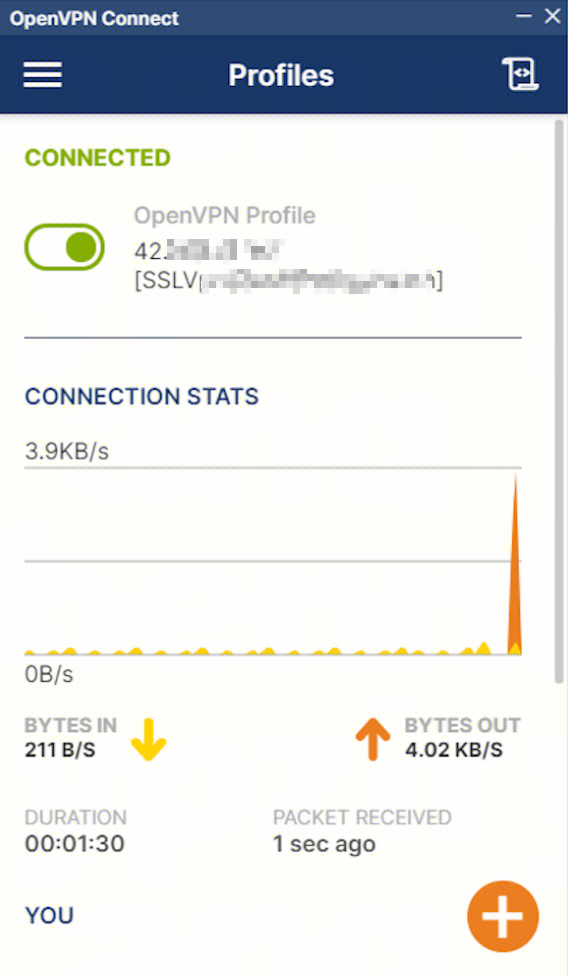
6. 连接成功。
文档反馈