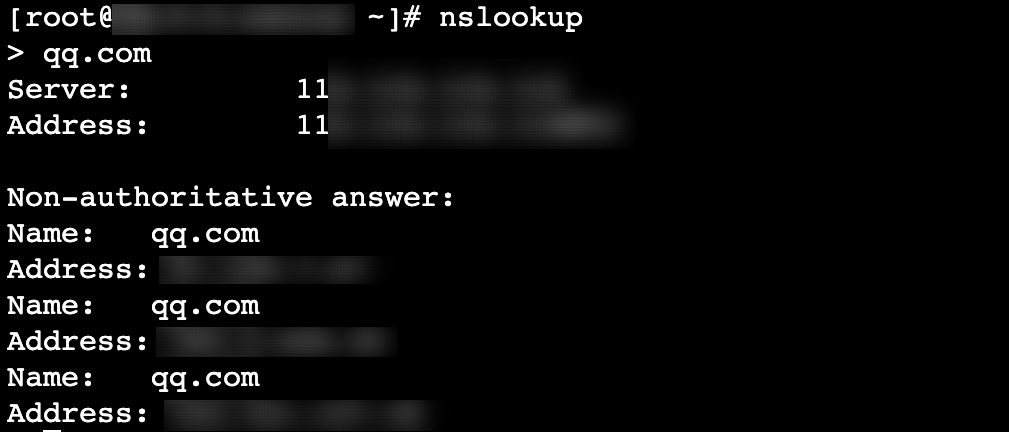
When the NAT firewall DNS toggle is enabled, the DNS address of the connected VPC will be changed to direct the DNS traffic to the NAT firewall.
Note
Tencent Cloud's default DNS addresses are 183.60.83.19 and 183.60.82.98.
To configure DNS protection:
Create a NAT firewall for the region and connect to a VPC.
Enable the NAT firewall to monitor traffic. Any routing changes may lead to network jitter of 1 to 2 seconds.
Enable the DNS toggle to verify the DNS address.
Use NAT firewall's access control feature to restrict DNS resolution (verification).
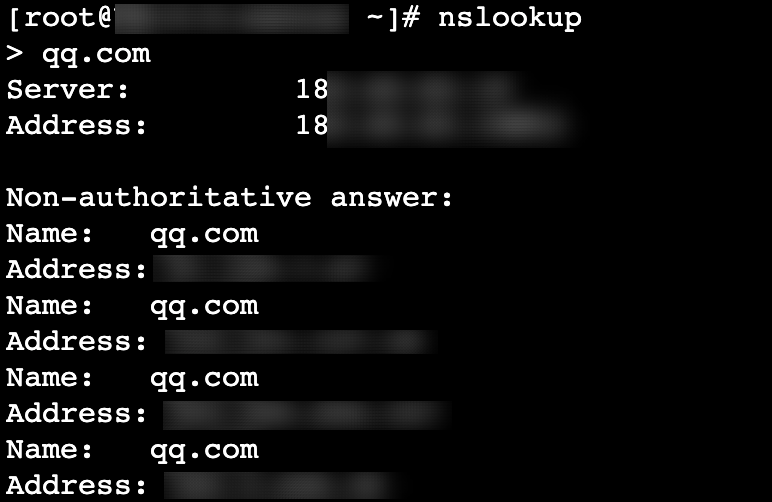
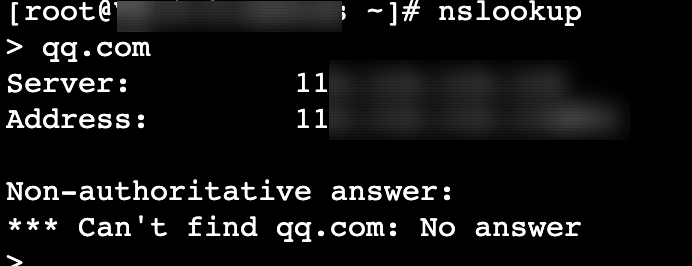
The CVM public network resource is the default DNS server, as shown in the image below:
Step 1: create a NAT firewall
1. Log in to the Cloud Firewall console, and then click Firewall Toggles -> NAT firewall -> Network topology in the left navigation pane.
2. On the Network Topology page, click Create instance, and then select a region.
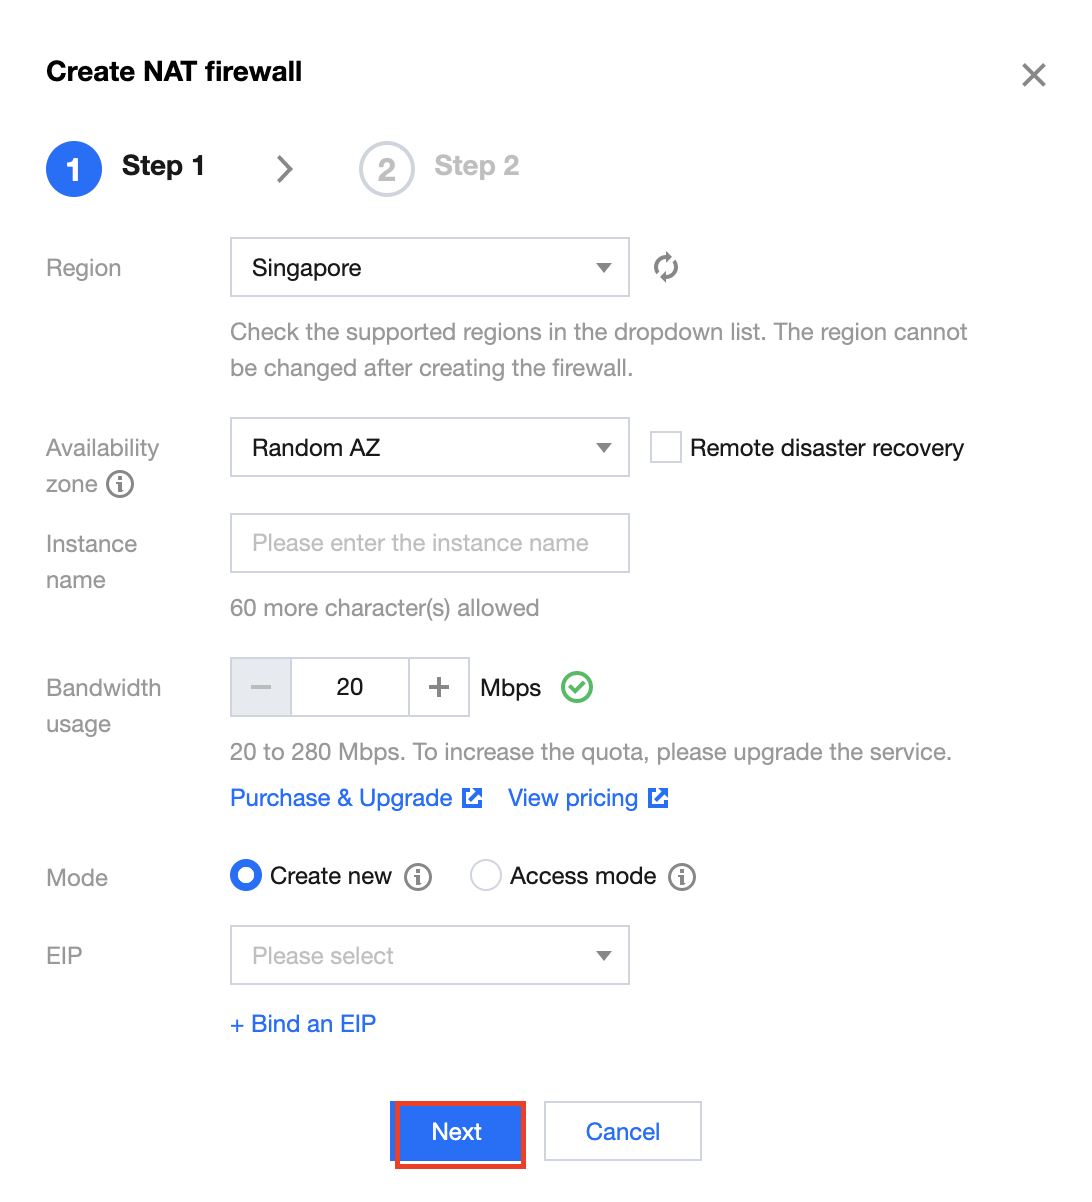
3. On the Create NAT firewall window that appears, configure the parameters and click Next.
Field description:
Region: Select a region for the instance to be created (all regions in China are available). The region cannot be modified after the instance is created.
Note
You can select one of the regions in China (including Hong Kong) where you have a VPC. Multiple firewall instances can be created for a single region, but the total bandwidth cannot exceed the quota.
Zone: Select an availability zone according to your needs.
Instance name: Enter the name of the instance.
Bandwidth quota: Select a bandwidth quota according to your needs (at least 20 Mbps). For more bandwidth, upgrade your service.
Note
It must match the bandwidth of the edge firewall. For multiple NAT firewalls, their bandwidth sum must be less than or equal to that of the edge firewall.
Mode: Supports the Create new mode and Use existing mode.
Create new: If no NAT gateway is available in the current region, you can create a new NAT gateway and use it as the NAT firewall for Internet access.
Use existing: If a NAT gateway is available in the current region, or you do not want to change your outbound IP address, you can use the Use existing mode to smoothly add a NAT firewall between the NAT gateway and CVM instance.
EIP: If you select to create a new EIP, the system automatically requests an EIP for you. Or you can select and bind one of the idle EIPs.
4. Select a VPC to connect to, and then click Create. You can view the new instance in the firewall instance list after a few minutes.
Step 2: enable the firewall
On the NAT firewall page, click Firewall toggle. Then, select the subnet for your database based on your actual demands, and click
to enable the firewall.
Step 3: enable and verify DNS
1. On the NAT firewall page, click Firewall instances. Then, select the firewall instance that you just created in Step 1, and click Instance configuration.
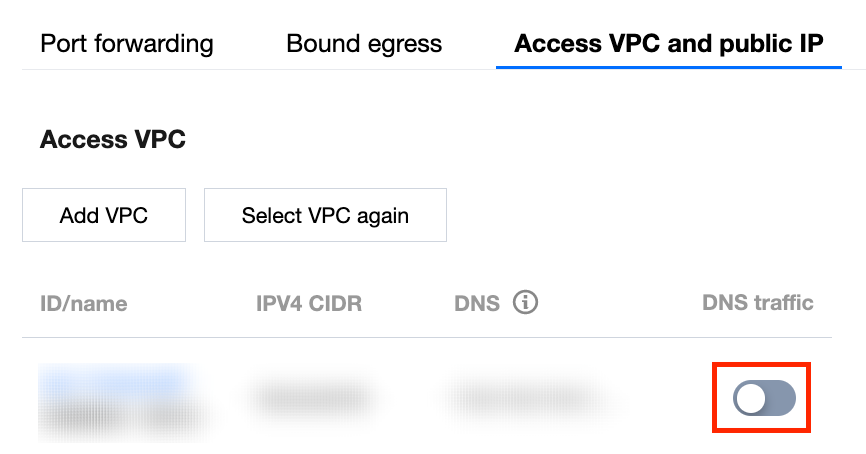
2. On the Access VPC and public IP page, select an ID, and then click
to enable DNS traffic.
3. Flush DNS to obtain the address by running ipconfig /release Ipconfig /renew.
Step 4: restrict DNS resolution
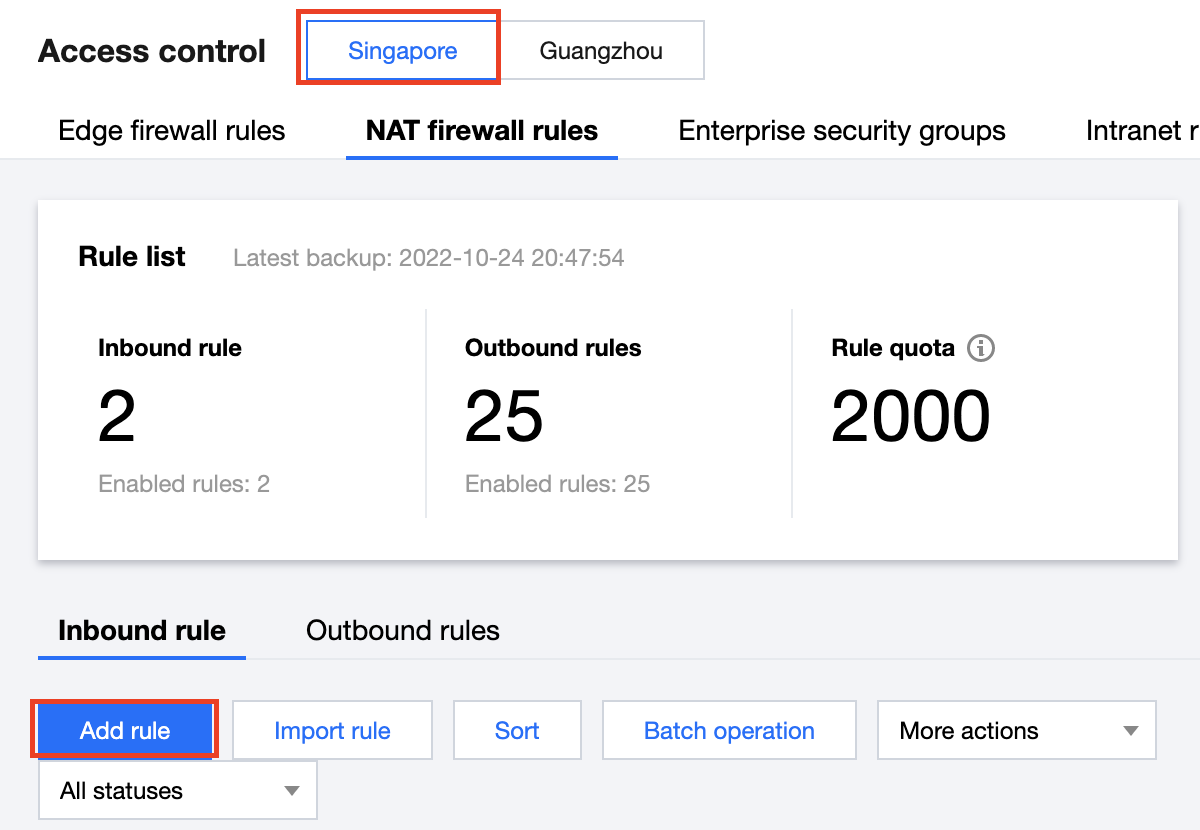
1. On the NAT firewall rules page, select a region, and then click Outbound rules -> Add rule.
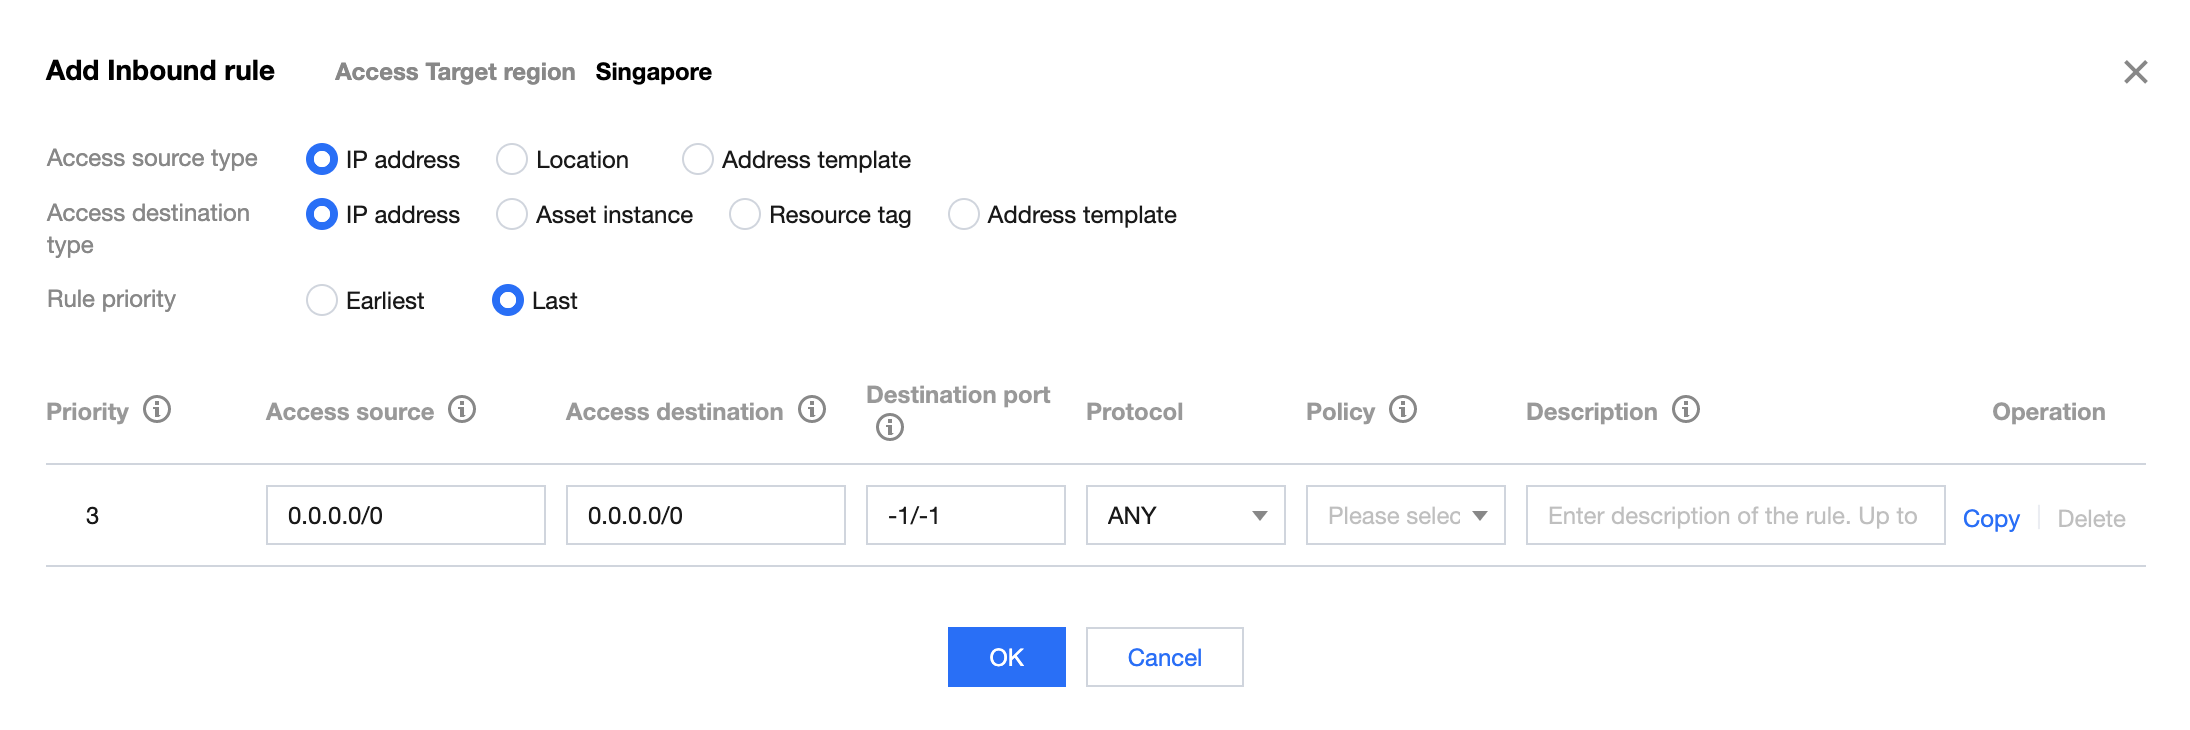
2. On the Add outbound rule window that appears, configure the parameters and click OK.
Field description:
Priority: Indicates the priority of the access control rule. The priorities of outbound and inbound rules are independent of each other. The rule with the highest priority is evaluated first. If a given rule is matched, rules with lower priorities will not be evaluated. When you modify the priority of a given rule, the priorities of the original rule with that priority and all the subsequent rules will increase by 1. When you delete a given rule, the priorities of all the following rules will decrease by 1.
Access source: For outbound rules, the access source is a private network asset in the current region, and can be an IP or CIDR.
Access destination: For outbound rules, the access destination is a public IP address or domain name, and can be an IP, CIDR, domain name, or geographic location.
Destination port:
TCP/UDP/ANY rules support a single port number, a port range with '/', and multiple ports separated by commas, such as "80", "80/80", "-1/-1", "1/65535", and "80,443,3380/3389".
HTTP/HTTPS/SMTP/SMTPS/FTP rules only support a single port number. SMTP and FTP rules cannot use the same port.
No port is required for ICMP rules.
Protocol: ANY, TCP, UDP, and ICMP are available for outbound rules.
Policy description:
Allow: Allow the matched traffic and record the hit count and traffic logs, but not access control logs.
Observe: Allow the matched traffic and record the hit count, access control logs, and traffic logs.
Block: Block the matched traffic and record the hit count and access control logs, but not traffic logs.
Description: Rule description with up to 50 characters.
3. After configuration, verify if the DNS server can be connected.