Step 1. Creating an Instance with Custom Route
Step 2. Configuring the Forwarding Route
This is to forward the traffic going to the VPC where the customer service is deployed to the firewall instance through the firewall gate.
2. Make sure that the firewall VPC and related route tables have been created. If not, wait until they are prepared or submit a ticket. 3. Open the route table page and select the service VPC and firewall VPC to connect.
Notes
To give a clear illustration, take Beijing-based service VPC-A, Chongqing-based service VPC-B and Beijing-based firewall VPC-BJFW as examples.
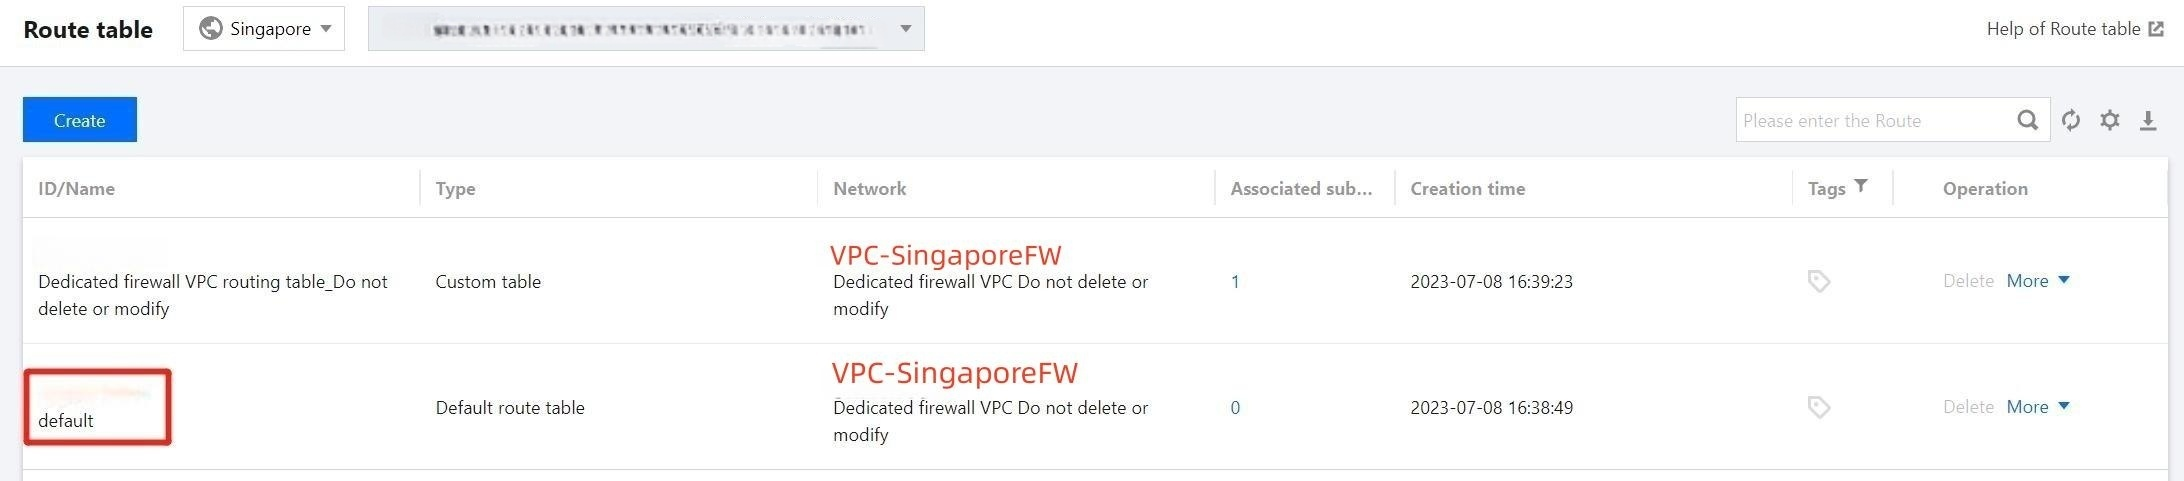
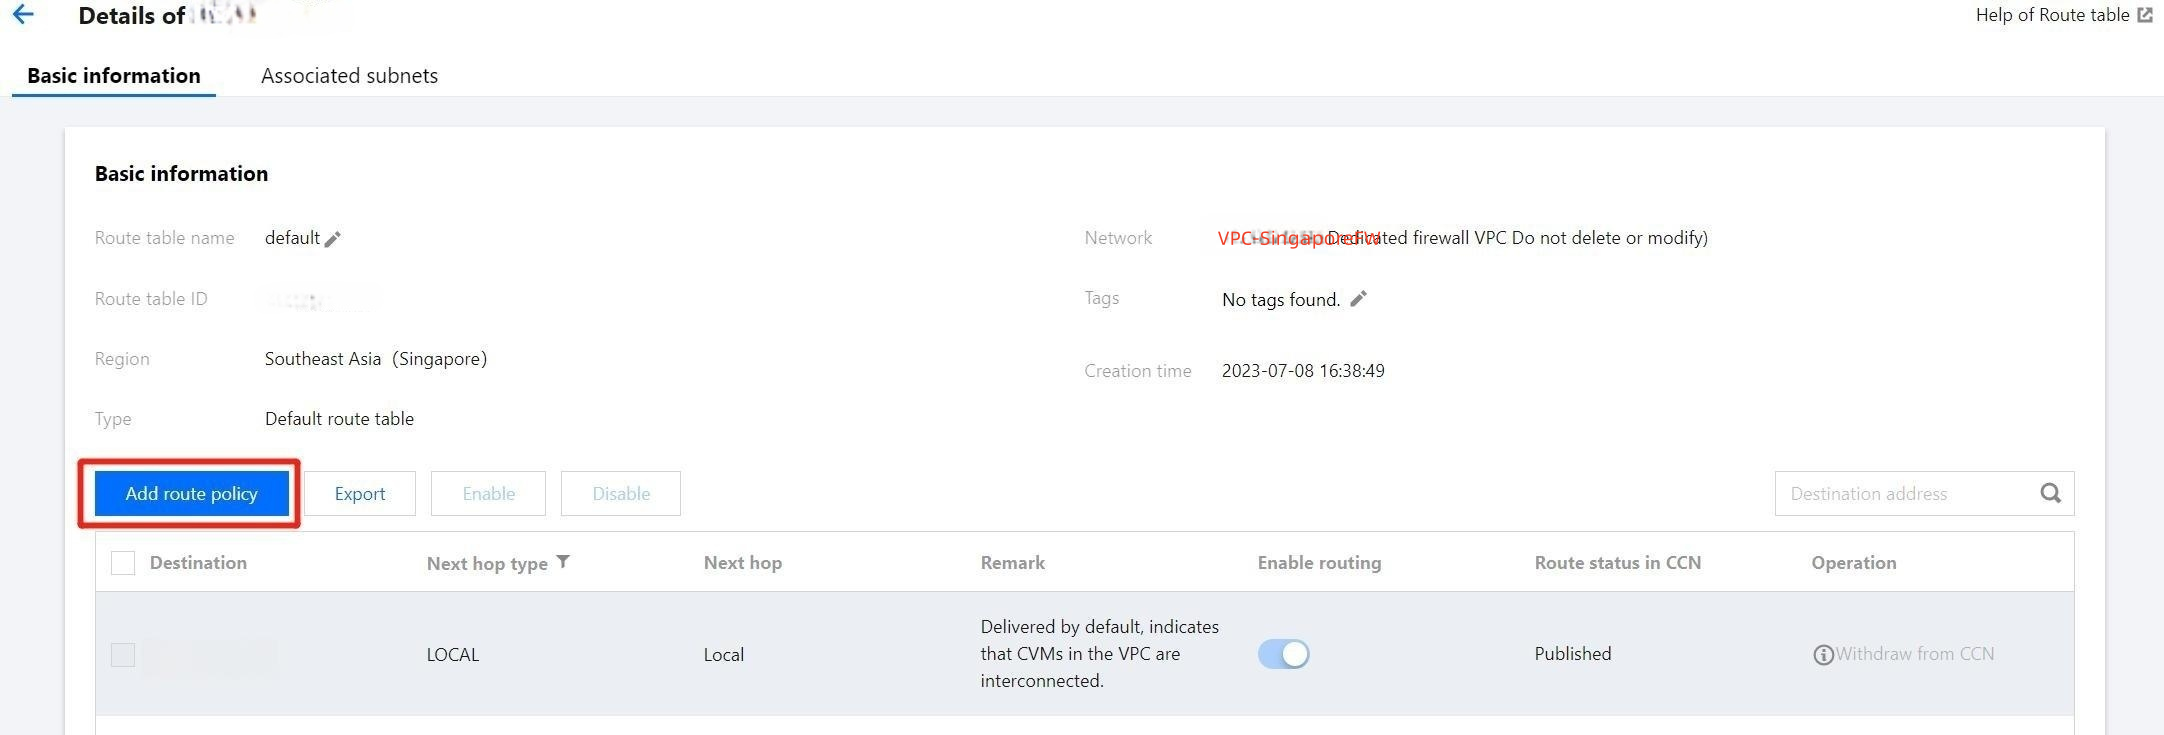
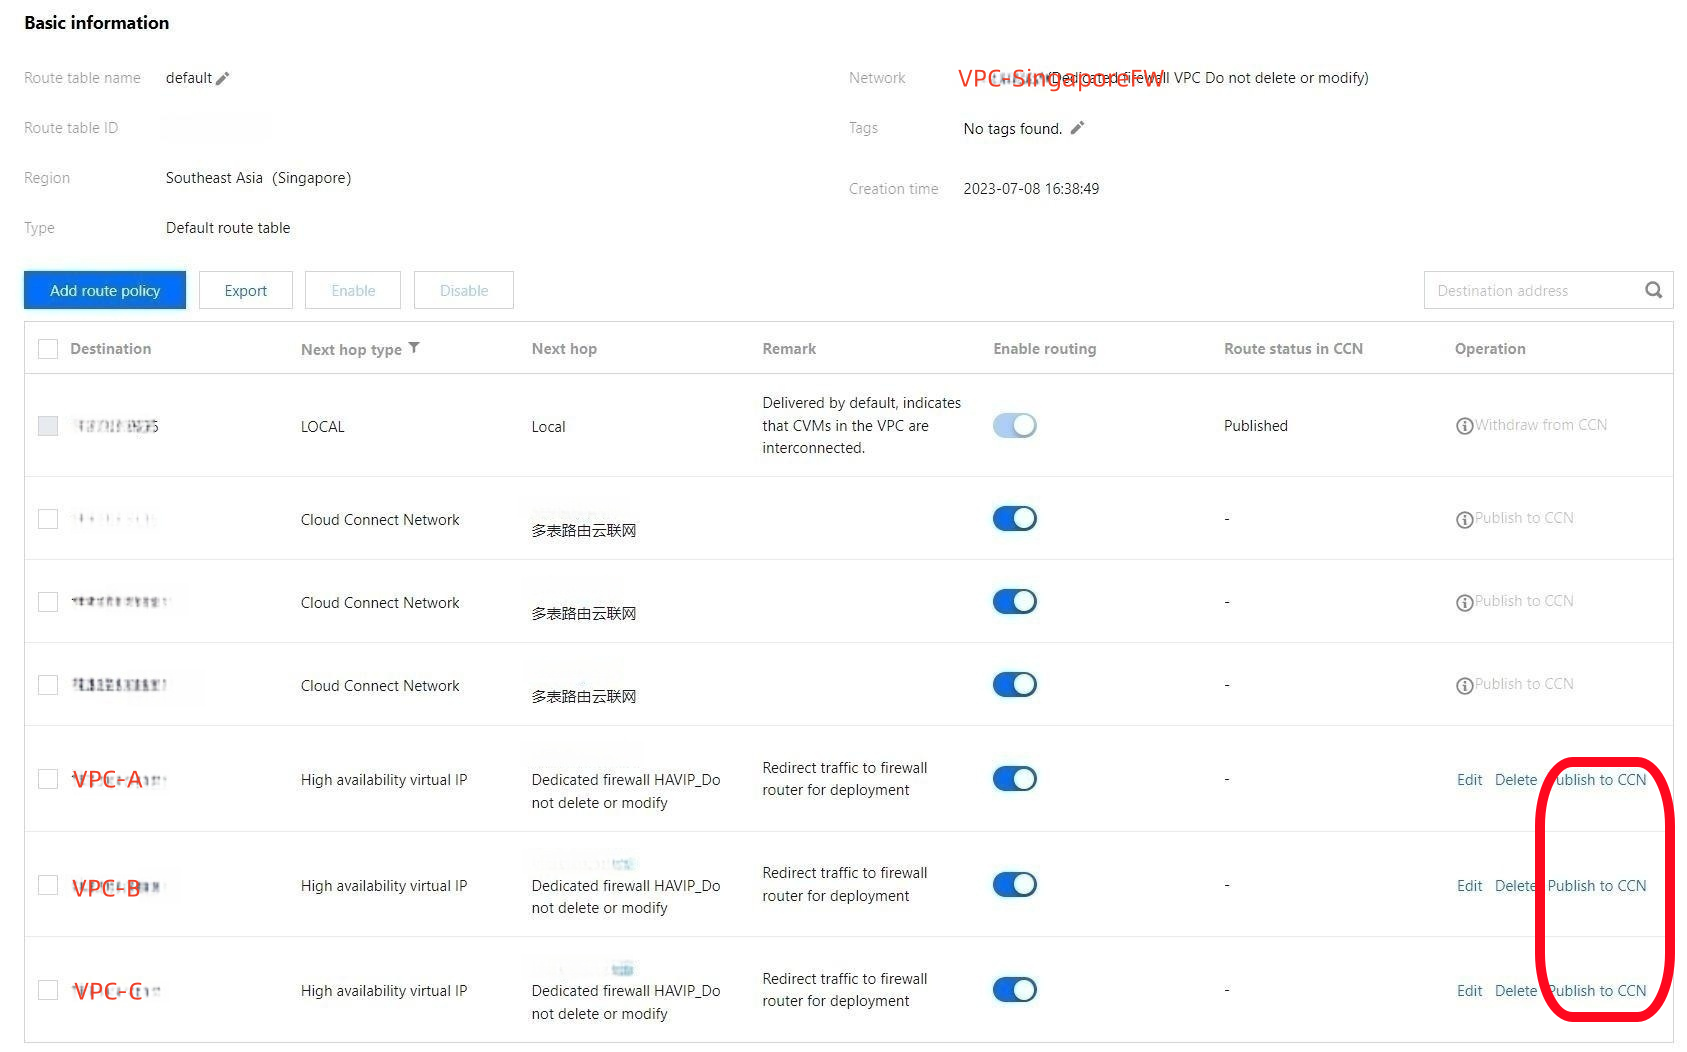
4. Go to VPC > Route Table and select the firewall VPC to connect. There are two route tables available, one used for the firewall VPC and that cannot be modified, the other named "default". Select the route table named "default" to edit. 5. Click Add routing policies. The policies you add can direct the next hop of the service VPC to the firewall.
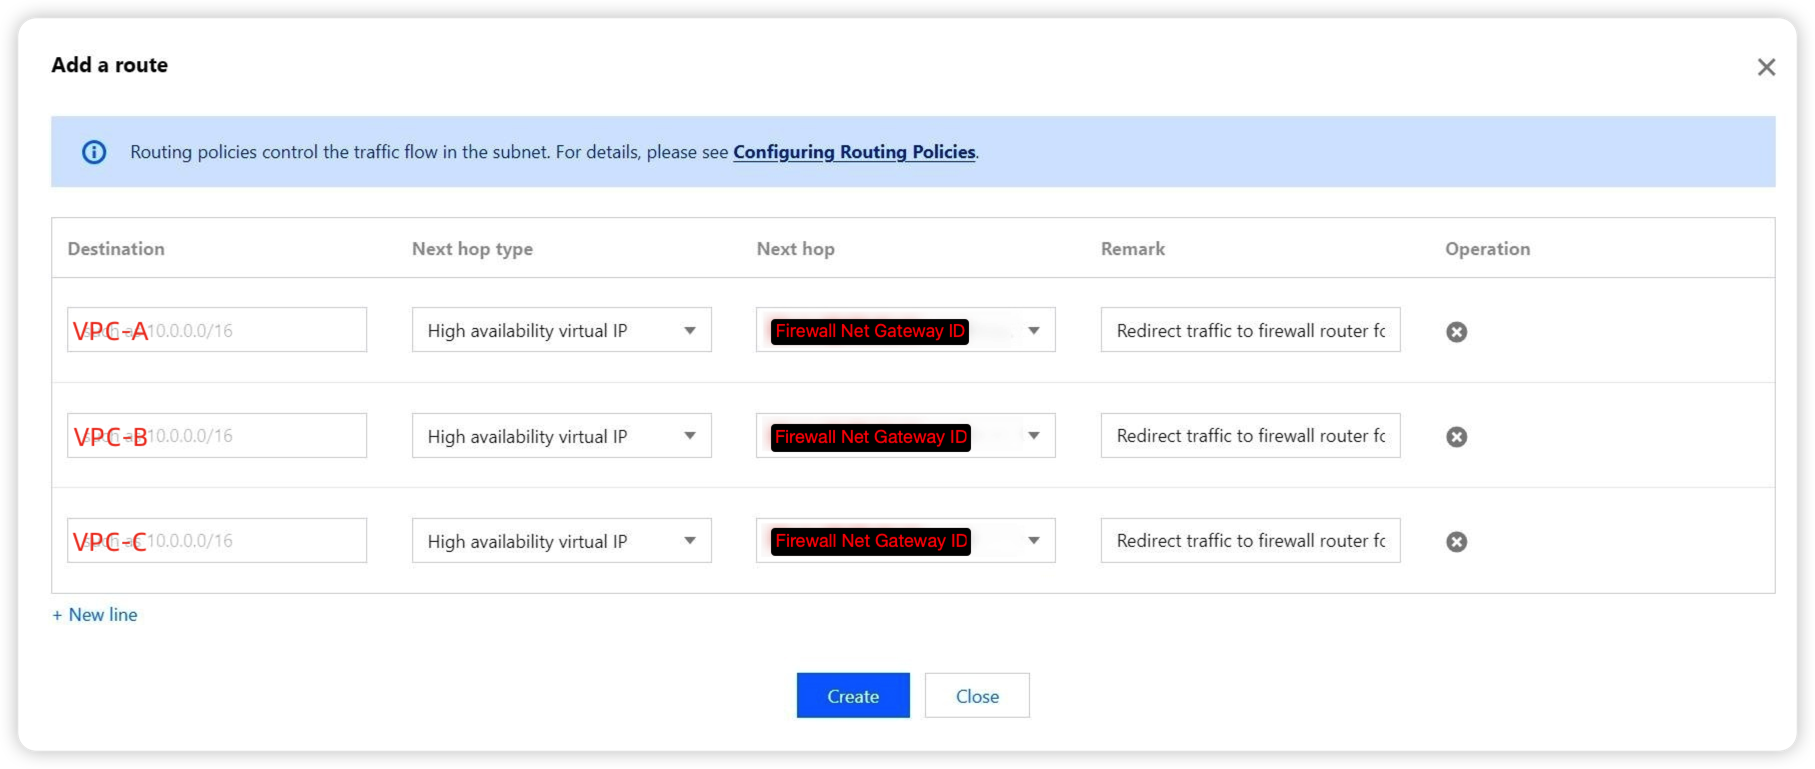
6. Enter the CIDR of the service VPC for Destination, and select High availability virtual IP for Next hop type, and Firewall gateway ID for Next hop. Notes is optional.
Notes
If you see the message "The specified CIDR forms ECMP", disable related routes in the default route table first.
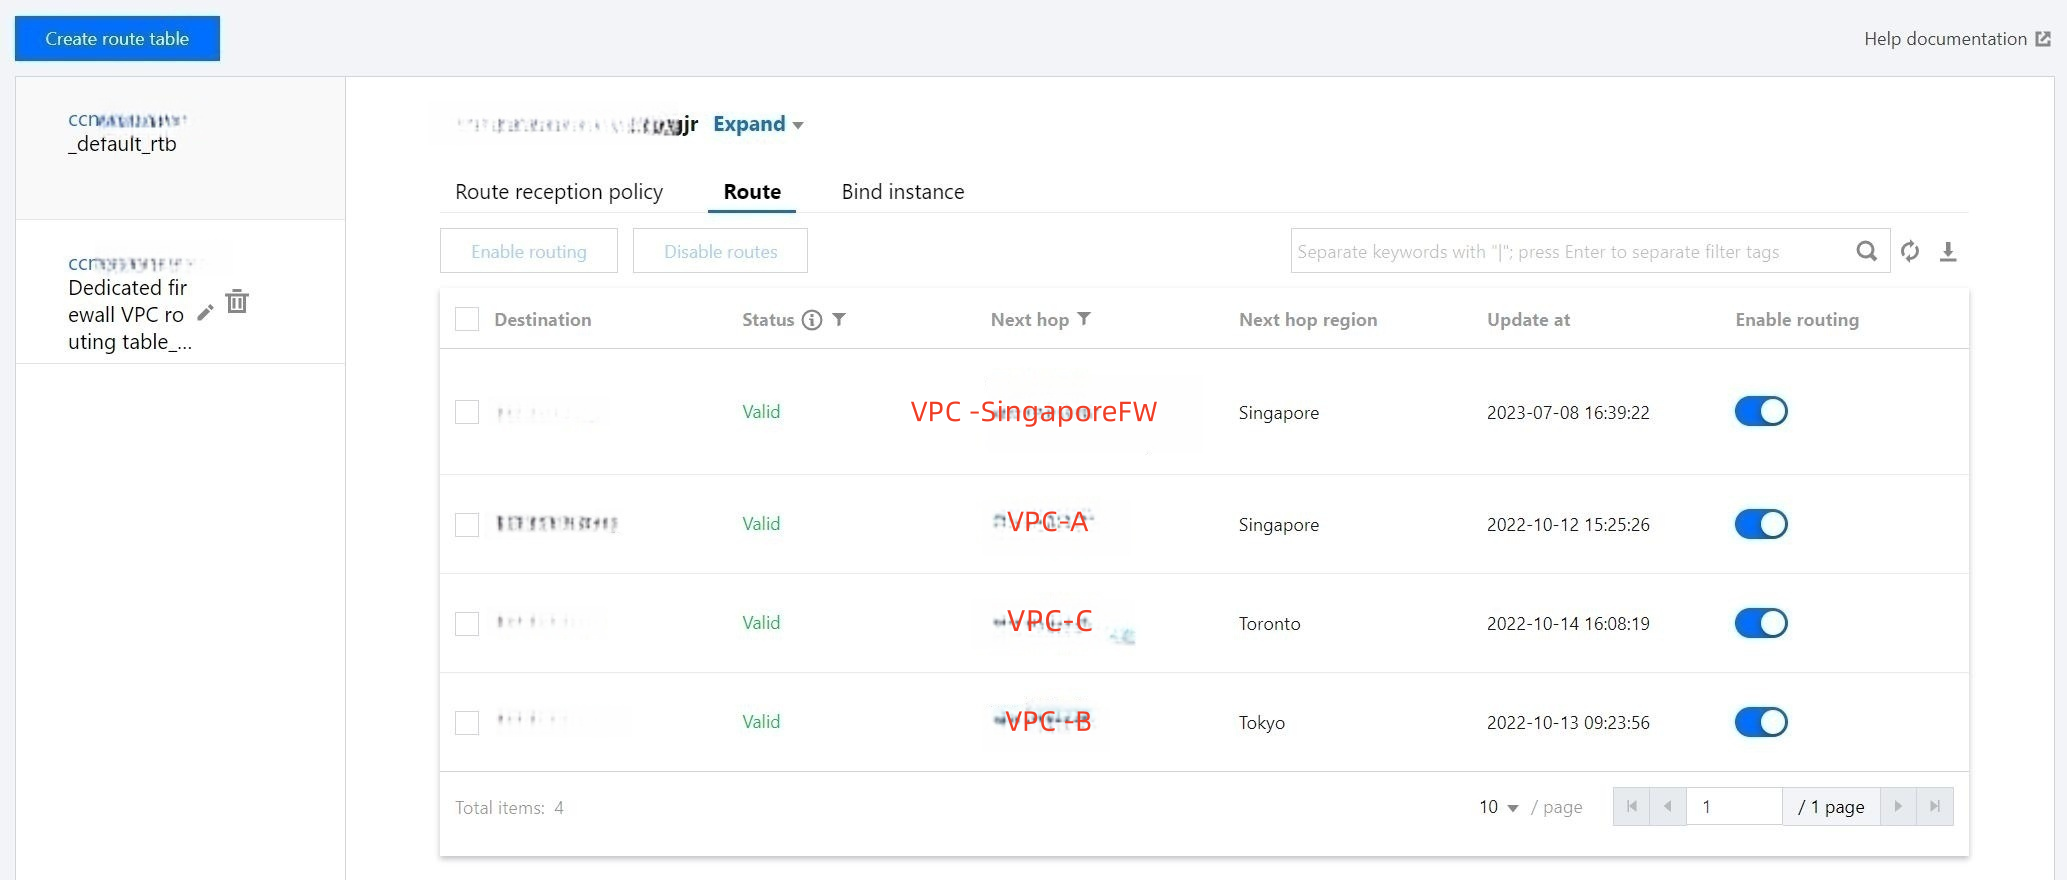
7. Publish the newly added routing policies to CCN. For more details, see Managing Routing Policies. After that, these policies can be viewed in the default routing table in the corresponding CCN instance. Notes
A new routing policy will override the original one.
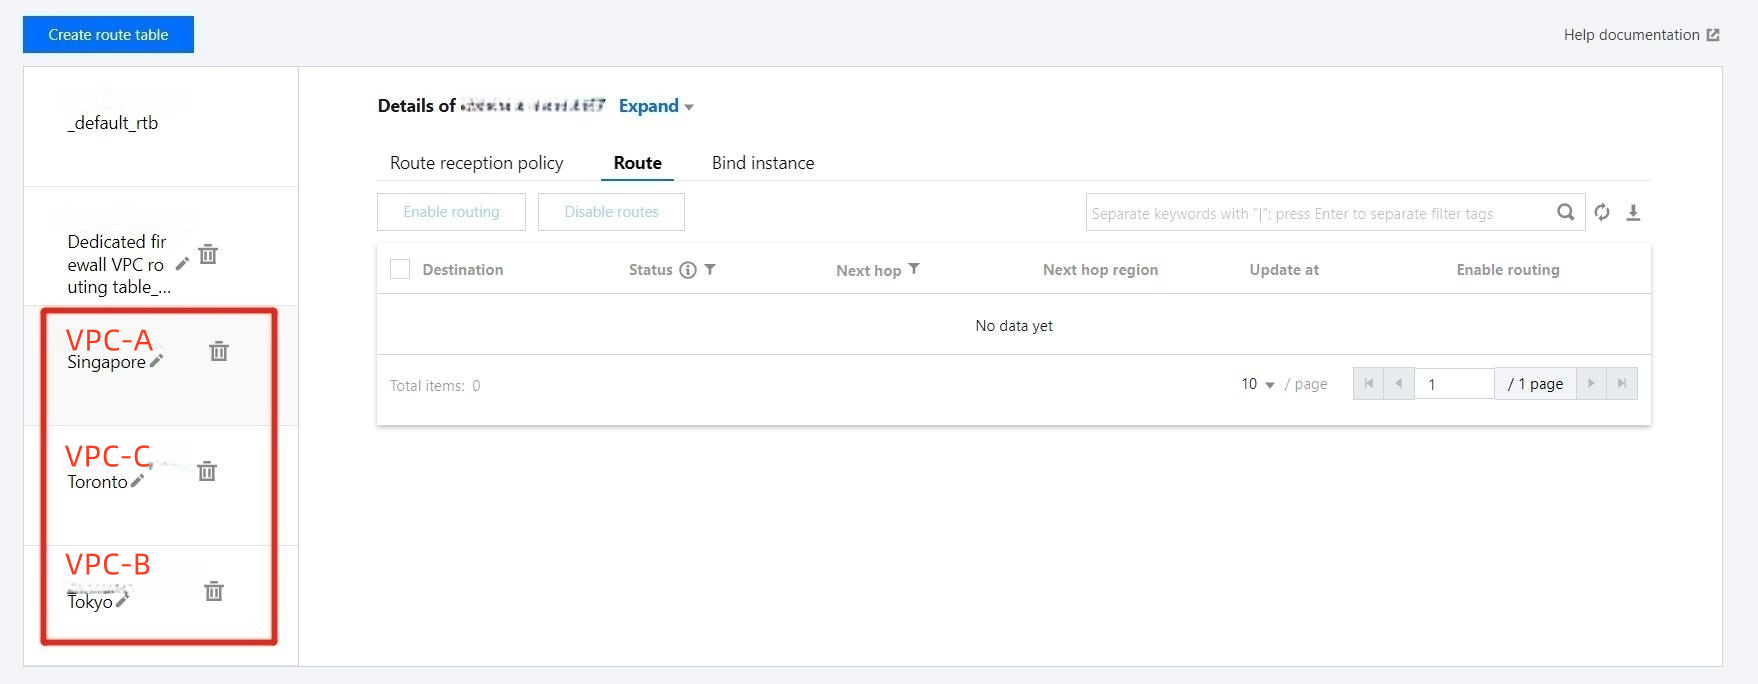
Step 3. Creating a Route Table to Connect Service VPCs
The purpose is to build connectivity between firewall networks and customer networks.
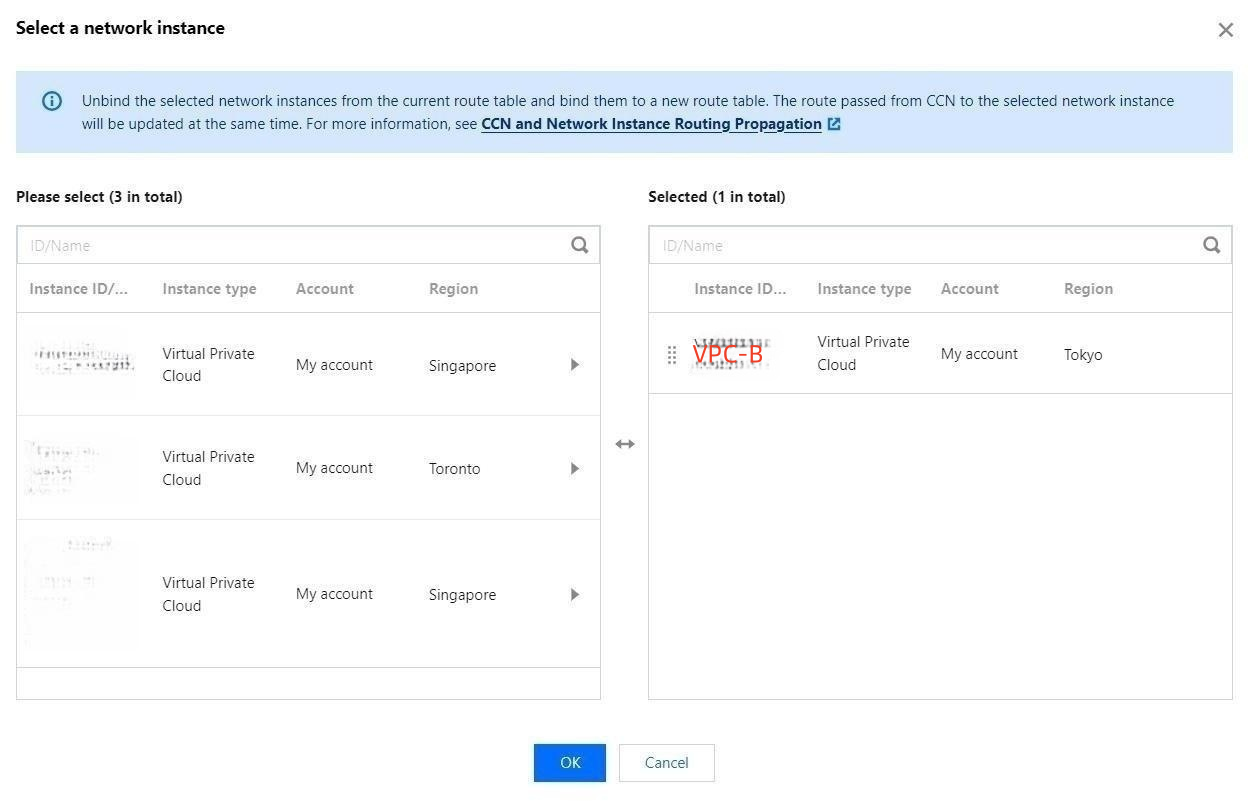
1. On the CCN page, create a route table for each service VPC. 2. Adjust the route reception policy. In the Route reception policy tab under the route table of a service VPC, click Add network instance to add its associated VPC instance and interconnected VPC instance.
Important
VPC instances associated with route tables and those unprotected by the firewall must be added first.
Example: Assuming that VPC-C is the service VPC unprotected by the firewall instance, you should first add VPC-A and VPC-C to the route table of VPC-A. Repeat the above operations and then add VPC -BJFW.
3. Make sure that each VPC has route entries configured properly within its route table.
4. Bind network instances. In the Bind instance tab under the route table of a service VPC, click Bind network instance to bind network instances to the route table. After that, the network traffic will be directed to the firewall.
Important
Be sure to set the routes properly before binding the route table.
Step 4. Verifying the Firewall
1. For information about accessing traffic logs, see Log Audit. 2. For information about checking intrusion defense, see Log Audit. Important
In the Custom route mode, the protection mode set in Intrusion Defense cannot be adjusted individually.
3. Configure internal rules and check whether they are hit normally.
Now the firewall should work properly. If your network structure is too complex or involves the application of Direct Connect, get a route solution by submitting a ticket. For further questions, contact us in the same way.