Using Your Own CLB to Access MQTT Service
Scenarios
When your client cannot access the VPC network, such as clients like sensors, vehicle-mounted terminals, or smart home appliances, which are in large quantity and widely distributed; clients are mobile devices; or hybrid cloud and cross-cloud environments without high-speed channels or dedicated lines. You can connect to the MQTT server via the public network. Cross-network production and consumption can be achieved by enabling public network routes. If public network access is enabled, it is recommended to configure a secure access policy to strictly limit access IPs and ensure data security.
Implementation Principles
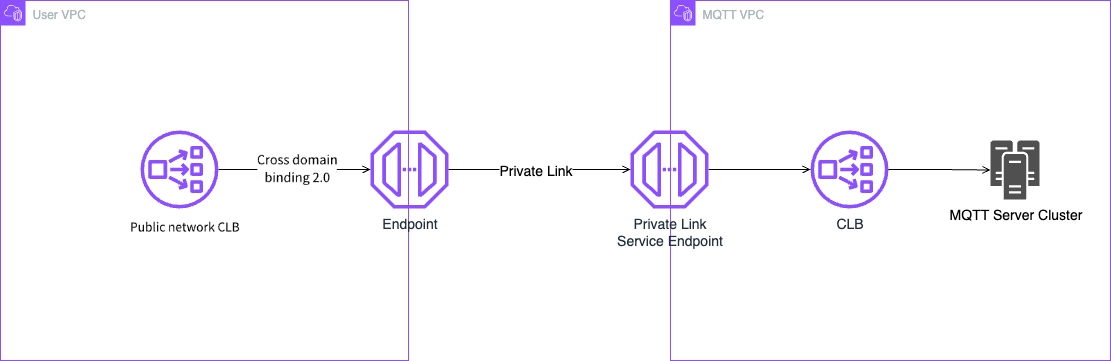
The core principle of this solution is to establish a secure communication channel between the user VPC and the MQTT VPC by combining the use of CLB's cross-domain binding 2.0 with the private link. The entire data flow ensures security and provides a stable access experience.
The details are as follows:
1. Traffic entry: Public network CLB
The public network CLB deployed in the user VPC serves as the sole entry for service exposure, receiving all connection requests from internet devices.
2. Cross-VPC connection
The public network CLB forwards requests to a unified endpoint (access point) via the cross-domain binding technology.
The endpoint establishes a private and secure dedicated tunnel with the private link service endpoint within the MQTT VPC via the private link service. This step ensures that user traffic traverses different VPCs entirely within the cloud provider's private network, without exposure to the public network.
3. Service distribution and processing:
After the traffic enters the MQTT VPC through the private link tunnel, it first reaches the service provider's internal CLB, which is responsible for load balancing connections to the backend MQTT server cluster for final business processing.
Operation Steps
Enable Cross-Domain Access 2.0 for CLB
Enable the service. For specific operations, refer to CLB Cross-Domain Access 2.0
Configure NAT
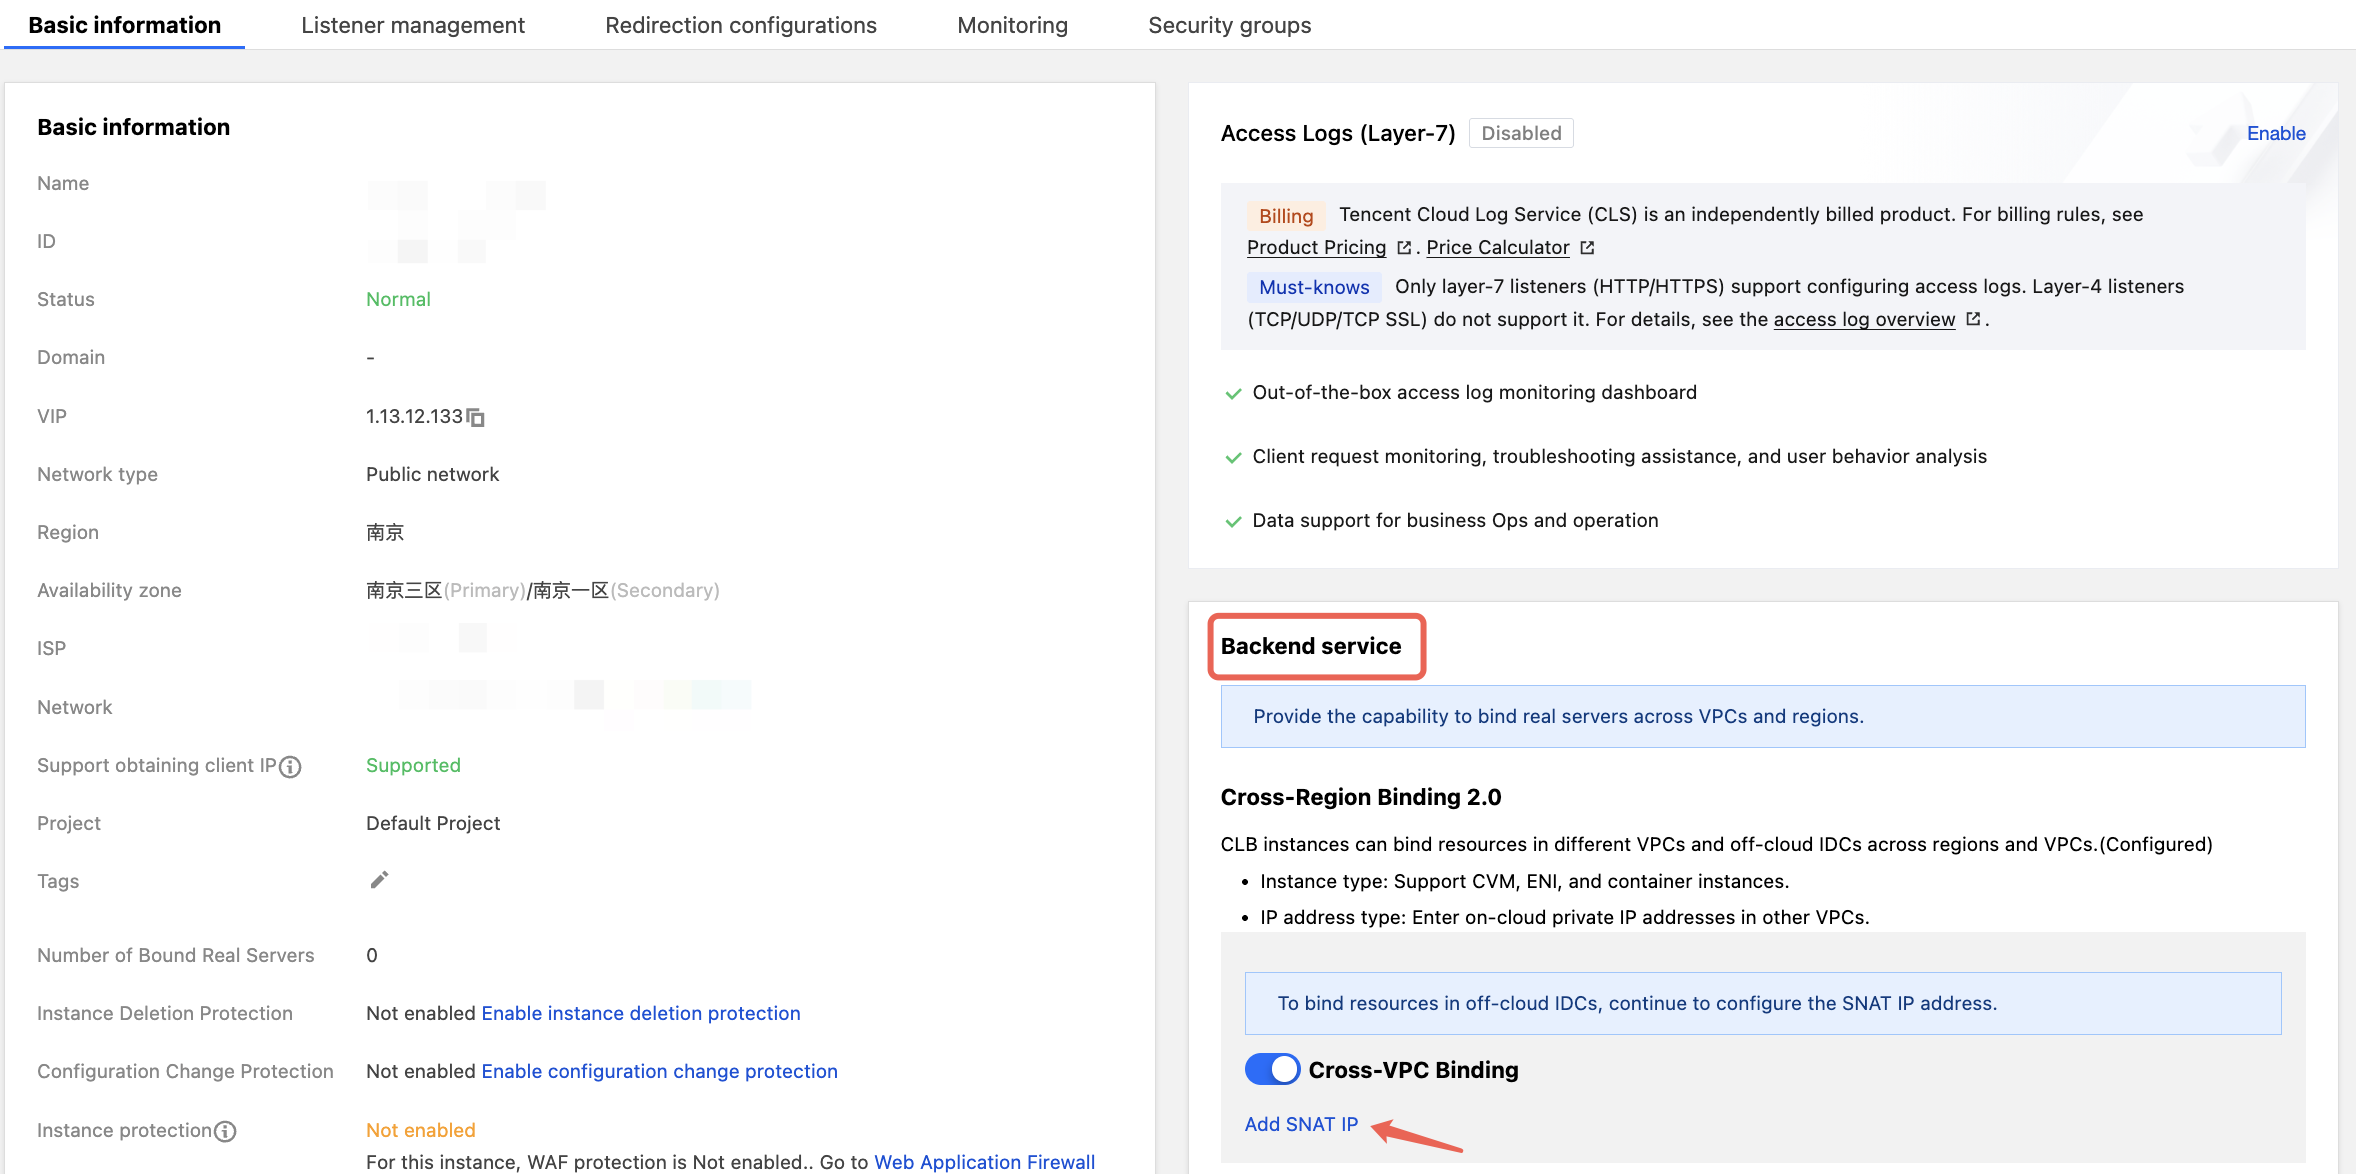
1. Log in to the CLB Console > Instance List, and enable the cross-region binding configuration in the backend service.
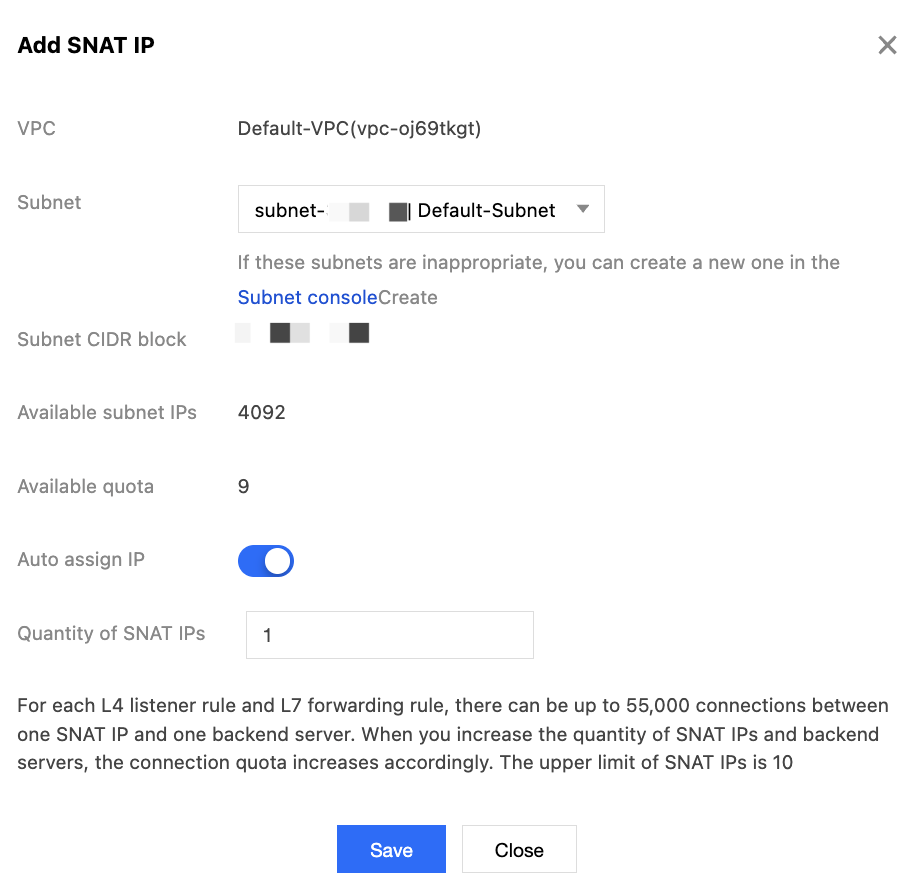
2. Click Add SNAT IP, select an available subnet in the current VPC, confirm other configurations, and click Save to complete the NAT configuration.
Query an endpoint IP address
1. Prerequisites: Ensure that the MQTT cluster has been successfully created. For specific operations, see the document Create a Cluster. After successfully purchasing an MQTT instance, the system will automatically establish the VPC network through the private link during the instance creation process and assign the corresponding endpoint IP address for the service.
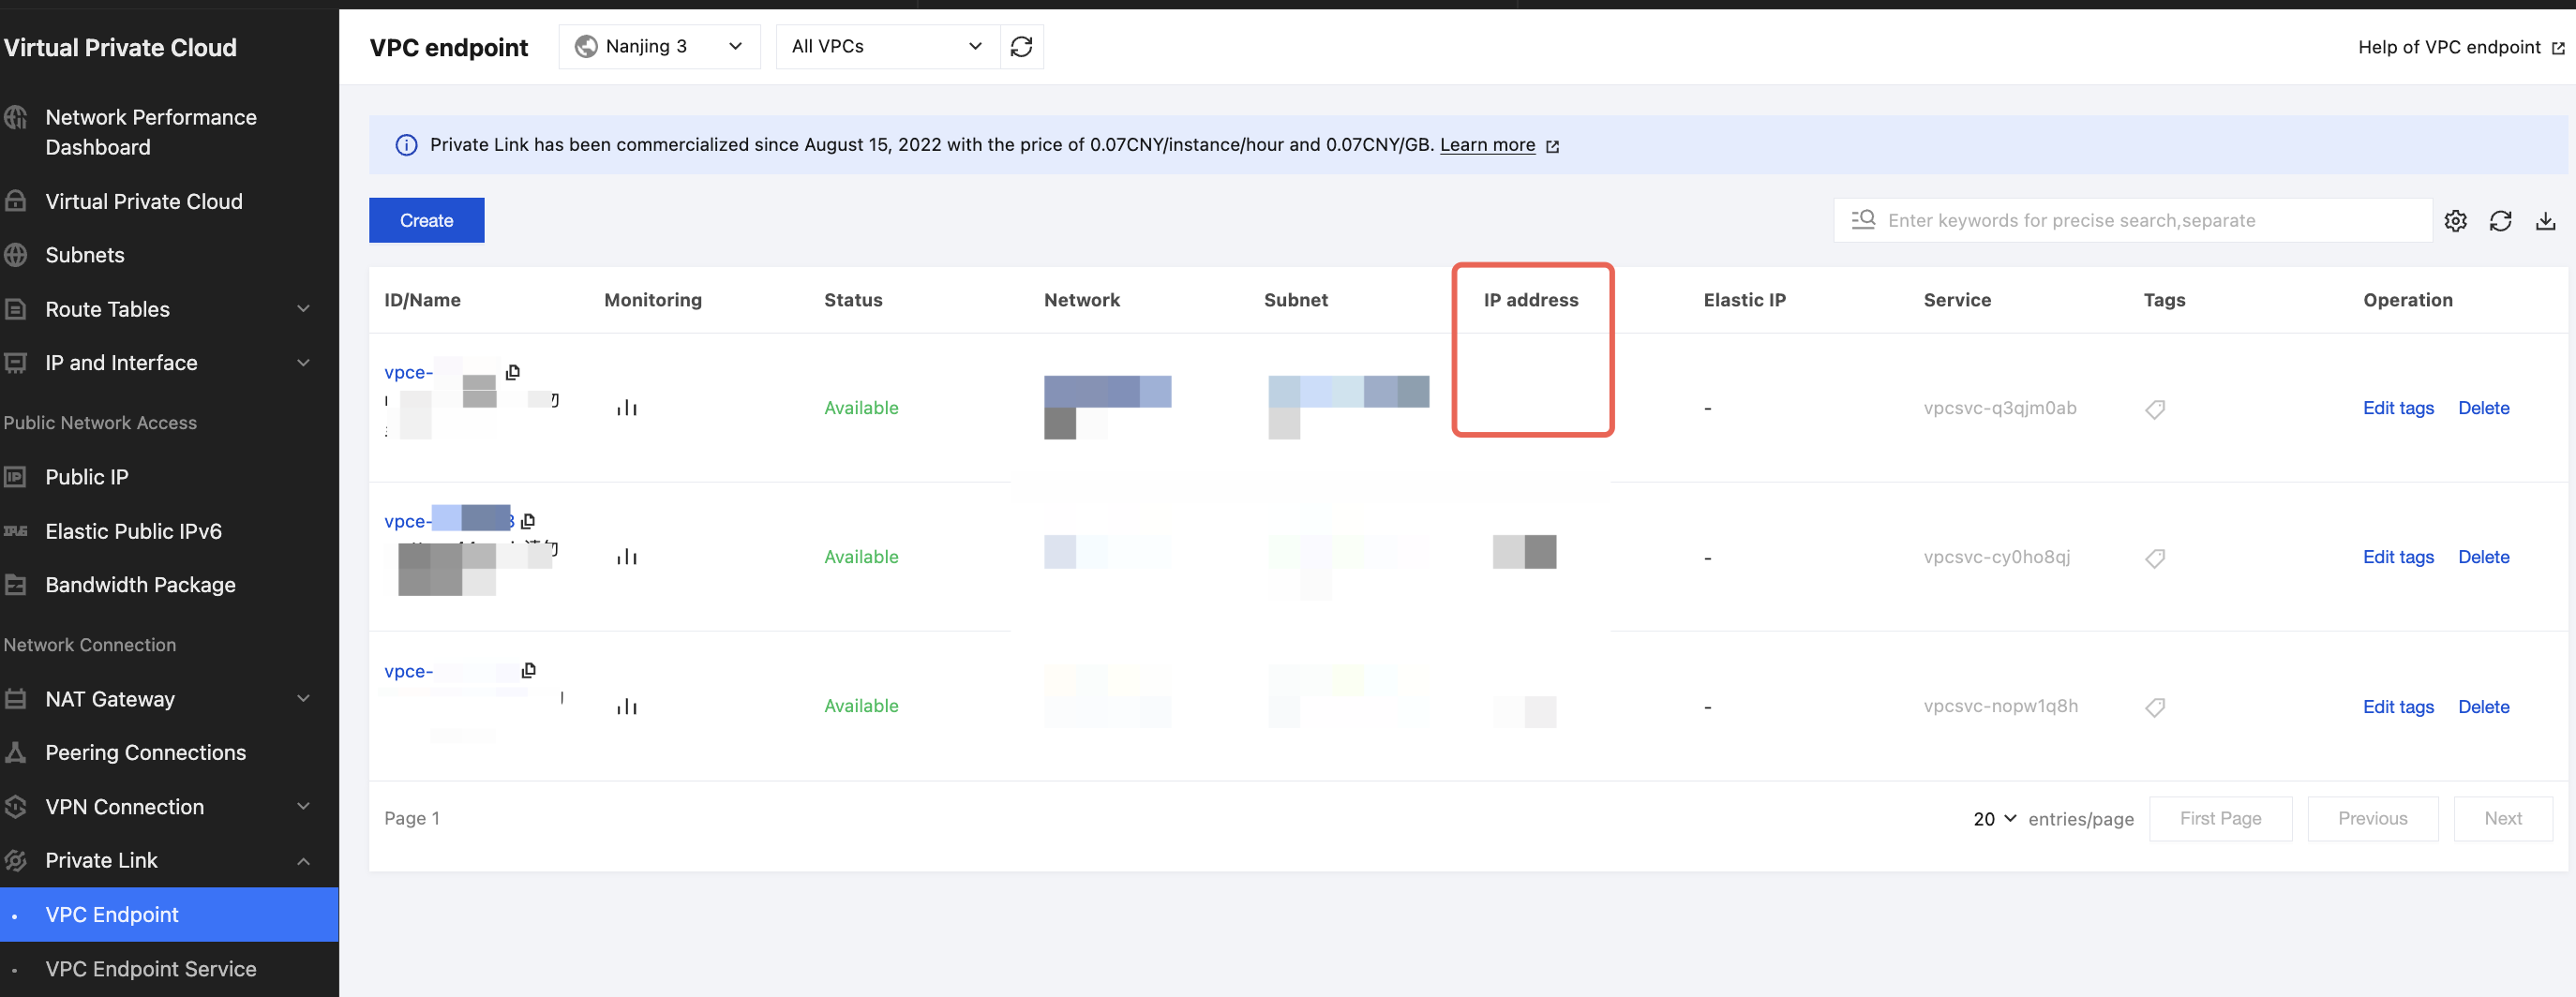
2. View IP address: Log in to the VPC Console and go to the "Endpoints" page. In the Endpoints list, you can view the IP address corresponding to the created MQTT instance.
Creating a Listener
When a client initiates a request, the load balancer receives it based on the frontend protocol and port for listening and forwards it to the backend server.
1. Log in to the CLB Console.
2. On the "Instance List" page, locate the target CLB instance and click Configure Listener.
3. On the "Listener Management" tab, under the "TCP/UDP/TCP SSL/QUIC Listeners" section, click Create, enter the name and available port, then click Next. After the health check is completed, enable "Session Persistence" in Step 3.

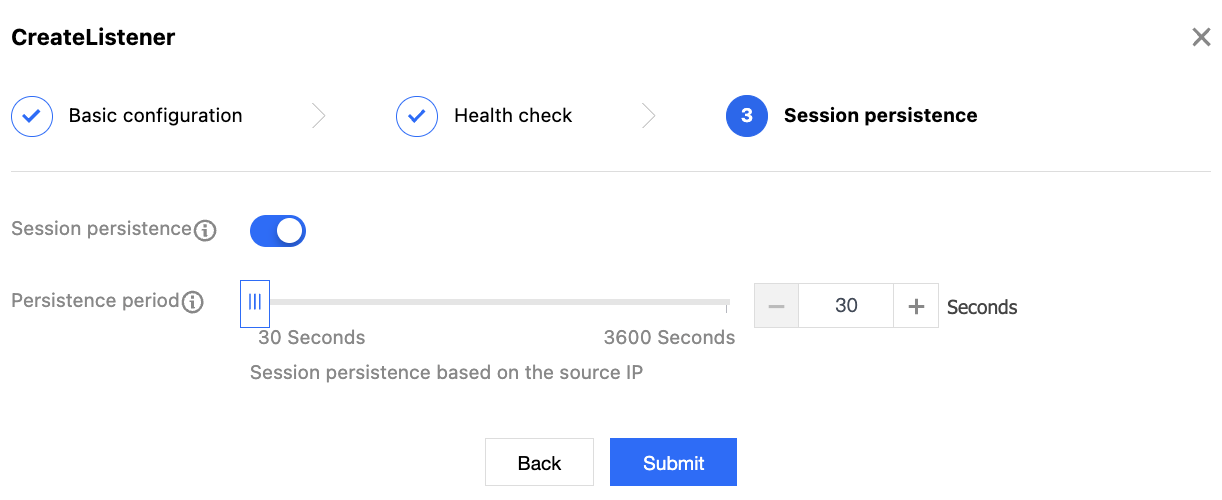
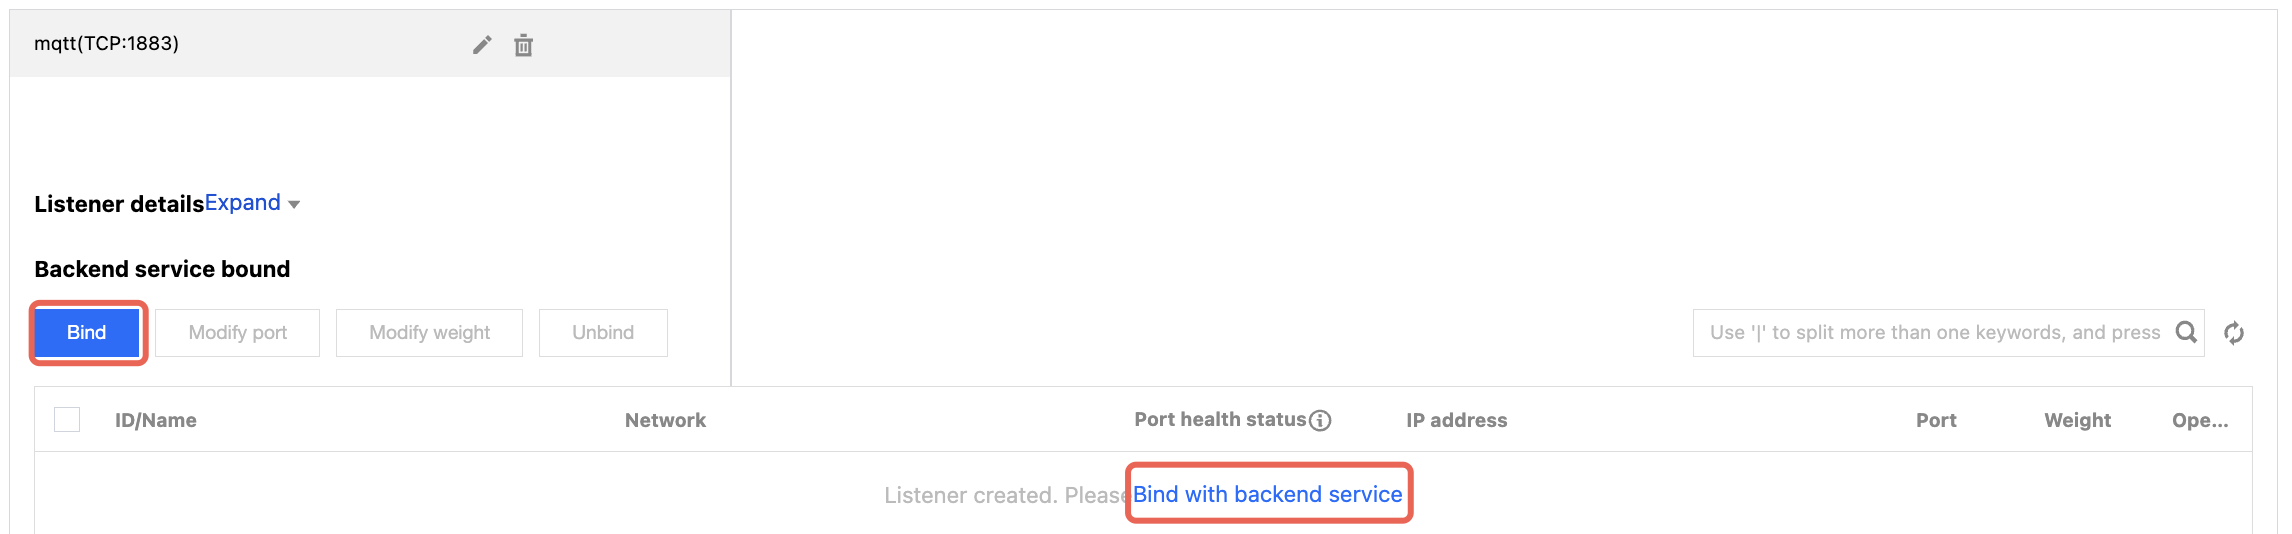
4. Click Submit to complete the listener creation. In the left list of the TCP/UDP/TCP SSL listener module, select the listener that needs to be bound to the backend cloud server, click Bind or "Bind with Backend Service".
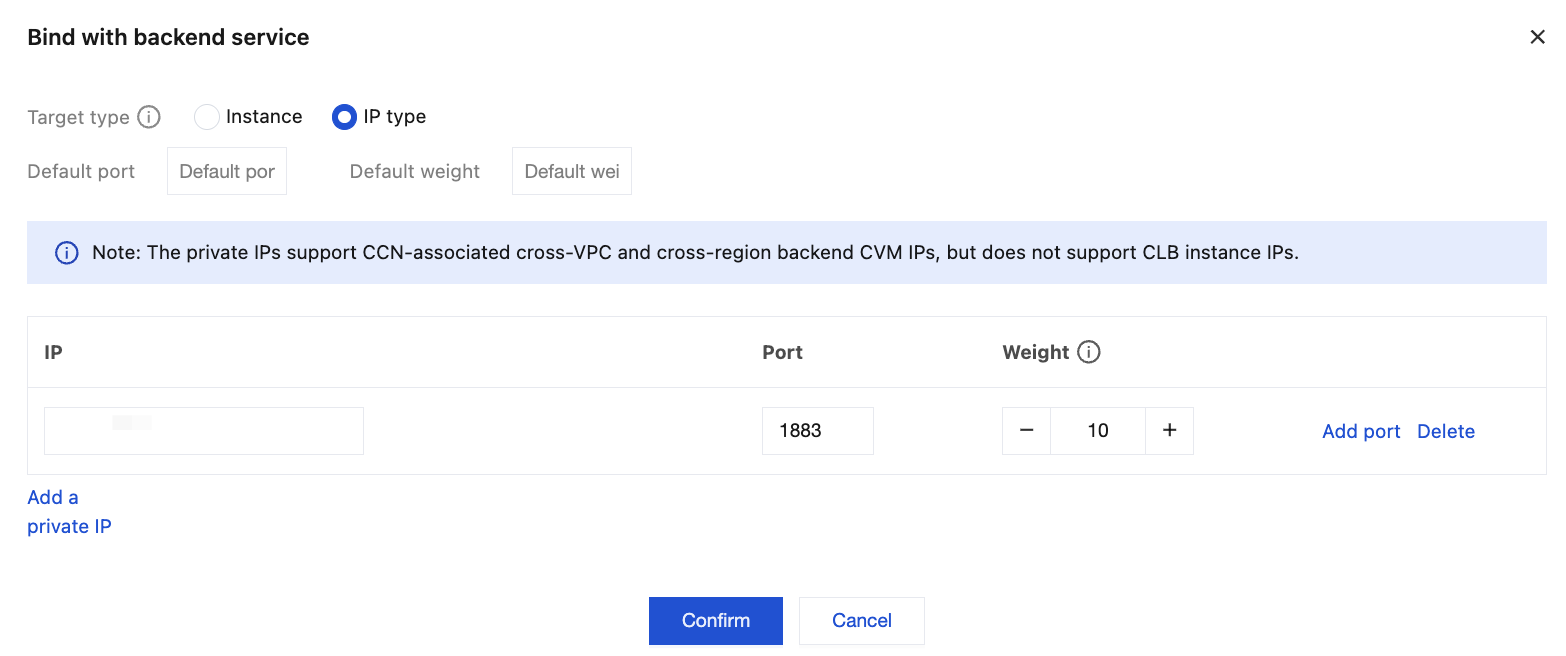
5. In the Bind with Backend Service pop-up window, select IP Type, enter the IP address of the MQTT instance obtained in Query an endpoint IP address, along with the port to be forwarded and the weight, and click OK.
6. In the details section, you can view the bound backend service and its health check status. When the port health status is "healthy", it indicates that the service can properly handle requests forwarded by the load balancer. Now, you can access the MQTT service through your own CLB.
Help and Support
Was this page helpful?
You can also Contact sales or Submit a Ticket for help.
Help us improve! Rate your documentation experience in 5 mins.
Feedback