DLC + WeData Distributed Batch Inference Practical Tutorial
Using the Iris dataset as an example, this document demonstrates how to implement distributed batch inference through the integration of Data Lake Compute (DLC) and WeData, relying on the Spark MLlib framework.
Note:
Currently, the DLC machine learning resource group and WeData Notebook exploration require you to apply for the allowlist feature. To use them, Submit a Ticket to contact the DLC and WeData teams to activate the machine learning resource group, Notebook, and MLflow services.
Overview
DLC supports using the Spark MLlib framework in machine learning resource groups to perform distributed batch inference, assisting users with model training for large-scale data (TB or PB level) scenarios.
Batch inference: A computing process where the model performs batch predictions on static data that is divided in batches in a single operation.
Distributed batch inference: An implementation approach of batch inference that uses distributed computing frameworks (including Spark) to distribute batch prediction tasks across multiple machines for parallel execution.
Preparations
1. Activating Accounts and Products: Users activate the DLC account, WeData account, and related features through the root account.
2. Configuring Data Access Policies: Users perform policy configurations for data access permissions in Cloud Access Management (CAM).
Going to DLC to Configure Resources and Prepare Datasets
Step 1: Purchasing Computing Resources and Creating Resource Groups
After preparation work is completed, proceed to purchase computing resources through DLC and create resource groups for the machine learning business scenario, relying on Spark MLlib.
1. Purchase computing resources:
Choose DLC > Standard Engine Page, and click Create Resources. In this scenario, the purchased engine version should be Standard Engine, the engine type should be Spark, and the kernel version should be Standard-S 1.1.
Note:
Purchases should be made with the root account or an account with financial permissions.
Billing mode can be selected based on the business scenario.
It is recommended to select a cluster specification of 64 CUs or higher.
The initial startup may require several minutes of waiting time after a successful purchase. If the startup cannot be completed for a long time, Submit a Ticket.
2. Create resource groups:
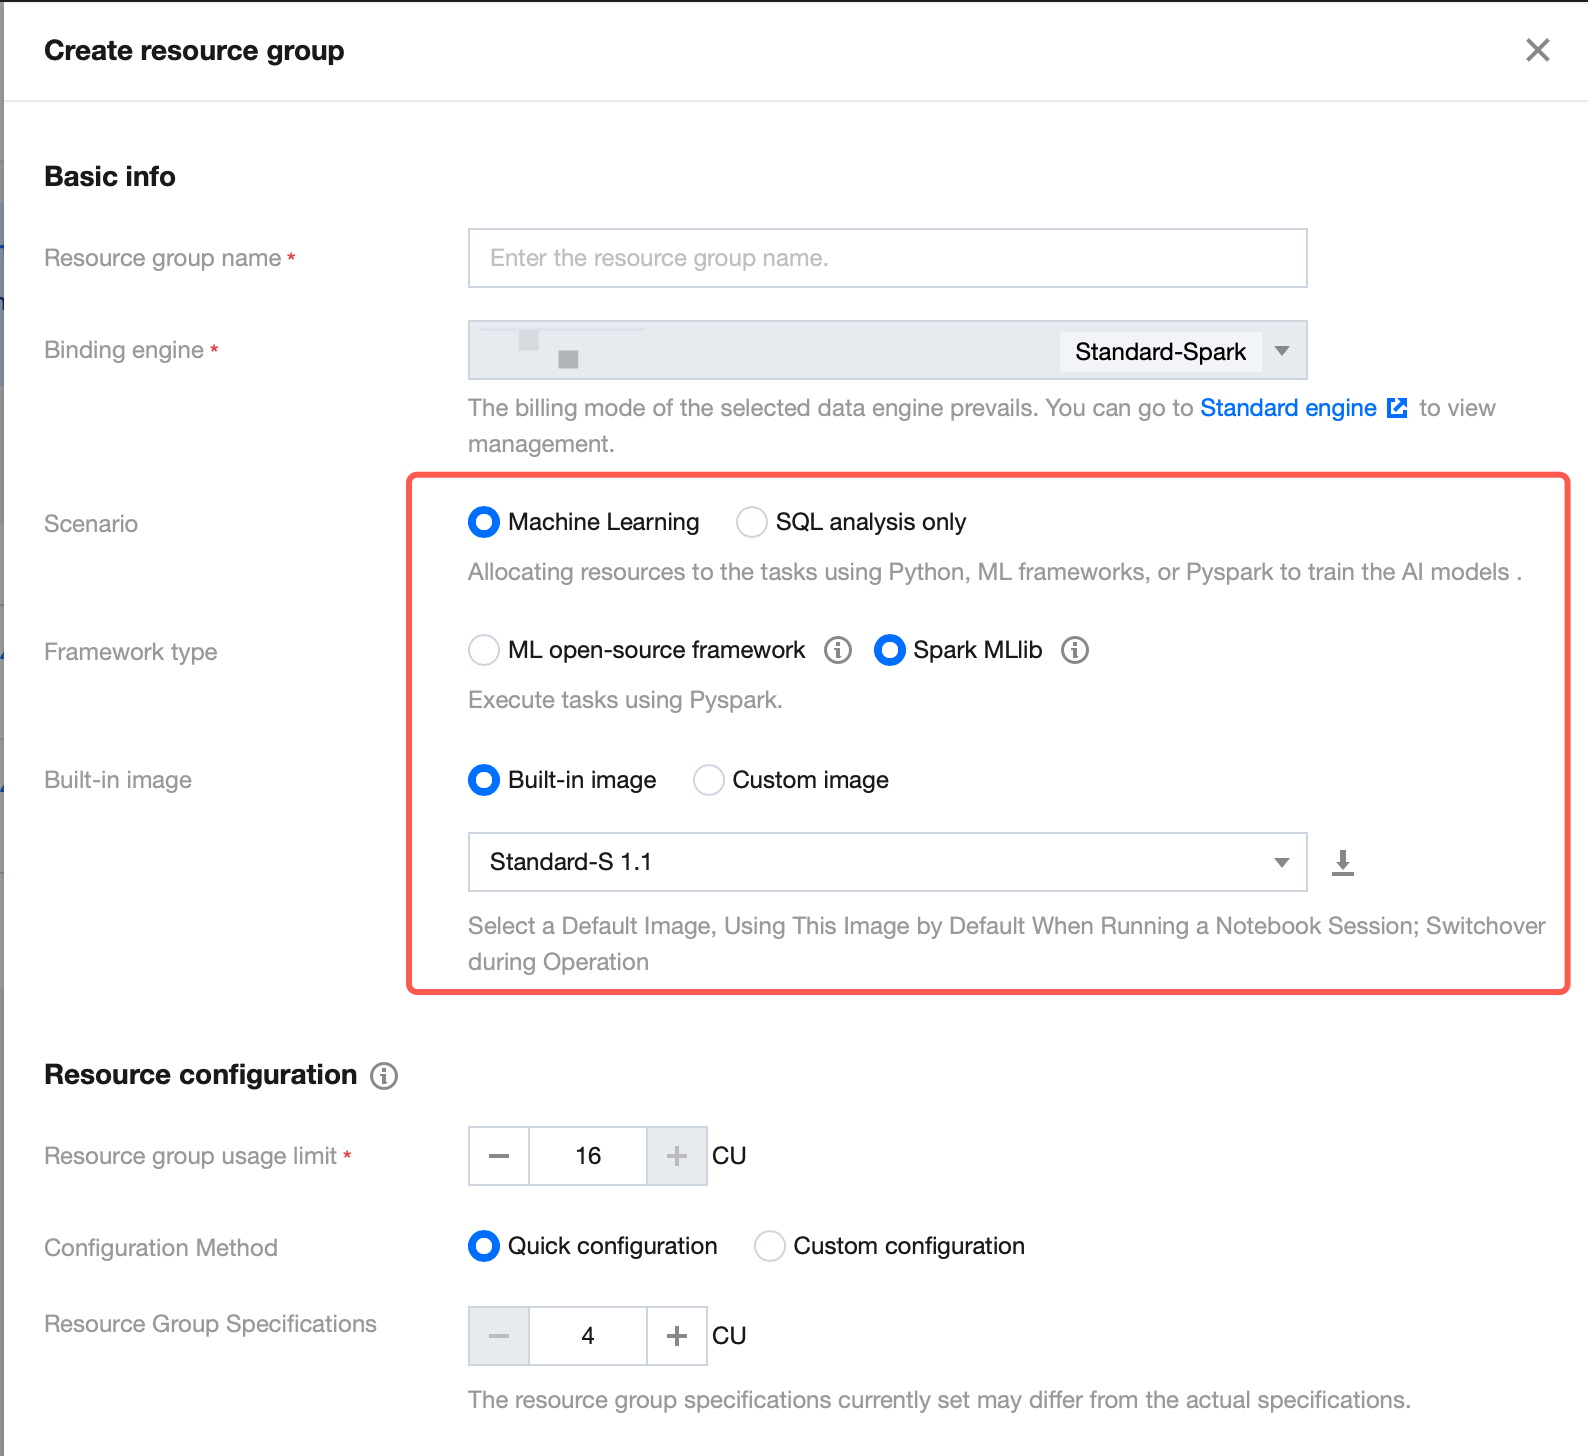
Return to the Standard Engine page. Under this engine, you need to create resource groups for machine learning business scenarios, relying on the Spark MLlib framework, to implement distributed batch inference. For the resource group creation procedure, refer to Creating Machine Learning Resource Groups. Note: Select Machine Learning as the business scenario, Spark MLlib as the framework type, and Standard-S 1.1 as the built-in image.
Step 2: Uploading Datasets in COS to DLC
If datasets are stored in COS, they can be uploaded to DLC by creating external tables, enabling these datasets to be called in WeData. For operation steps, refer to Uploading Machine Learning Datasets to COS.
Going to WeData to Perform Batch Inference
After creating the resource groups and datasets, go to WeData to perform batch inference via Notebook and MLflow.
Step 1: Creating WeData Projects and Associating Them with DLC Engines
1. Create projects or select existing ones. For details, refer to Project List.
2. Select the required DLC engine when configuring Compute and storage engines.
Step 2: Purchasing Execution Resource Groups and Associating Them with Projects
If you need to schedule Notebook tasks periodically in the orchestration space, purchase scheduling resource groups and associate them with designated projects. For specific operation steps, refer to Purchasing Execution Resource Groups and Associating them with Projects.
Step 3: Running Batch Inference Notebook Files
1. Create Notebook workspaces:
Within the project, select the Data Governance feature, click the Notebook feature to enter the Notebook exploration page, and click Create Workspaces.
On the Create Workspaces page, select and purchase the Standard Spark Engine (version Standard-S 1.1), select the Machine Learning option and MLflow Service. For details on configuration operations on this page, refer to Creating Notebook Workspaces.
2. Create Notebook files: In the left-side Resource Manager, you can create folders and Notebook files. Note: Notebook files must end with the extension (.ipynb). The Resource Manager includes two predefined big data series tutorials with out-of-the-box support for users.
3. Select kernels:
Click Select Kernel.

Select "DLC Resource Group" from the dropdown option.
In the next-level option, select the Spark MLlib resource group you created in the DLC data engine.
4. Click the "Run" button. A kernel configuration window will pop up, allowing you to customize the Spark session name (named "test2" here) for searching for this session in DLC. You can set the auto-release time and coordinate computing resources by editing advanced parameters.

5. Execute the practical tutorial: Load datasets in 2 ways, use the K-Nearest Neighbor (KNN) algorithm to classify different types of flowers, and output the classification result.
from pyspark.sql import SparkSessionfrom sklearn import datasetsfrom sklearn.neighbors import KNeighborsClassifierimport mlflowfrom mlflow.models import infer_signaturespark = SparkSession.builder.getOrCreate()# Load datasets.# Method 1: Load datasets via the machine learning library.X, y = datasets.load_iris(as_frame=True, return_X_y=True)# Method 2: Load data in DLC via tencentcloud-dlc-connector.# Install the driver.!pip install tencentcloud-dlc-connector!pip install --upgrade 'sqlalchemy<2.0'# Install the version.!pip install --upgrade pandas==2.2.3!pip install numpy!pip install matplotlibimport pandas as pdimport numpy as npimport tdlc_connectorfrom tdlc_connector import constantsmlflow.sklearn.autolog()# Use tdlc-connector to access in table mode.conn = tdlc_connector.connect(region="ap-***". # Fill in the correct address. For example, ap-Singapore and ap-Shanghai.secret_id="*******",secret_key="*******",engine="your engine". # Fill in the purchased engine name.resource_group=None,engine_type=constants.EngineType.AUTO,result_style=constants.ResultStyles.LIST,download=True)query = """SELECT `sepal.length`, `sepal.width`,`petal.length`,`petal.width`,species FROM at_database_testnotebook.demo_test_sklearn"""iris = pd.read_sql(query, conn)spark_iris = spark.createDataFrame(iris)# Divide the feature column and the target column.feature_cols = ["sepal_length", "sepal_width", "petal_length", "petal_width"]X = spark_iris.select(feature_cols)X = spark_iris.select(feature_cols)y = spark_iris.select("species")# Use the KNN algorithm for classification.model = KNeighborsClassifier()model.fit(X, y)predictions = model.predict(X)signature = infer_signature(X, predictions)with mlflow.start_run():model_info = mlflow.sklearn.log_model(model, artifact_path="model", signature=signature)infer_spark_df = spark.createDataFrame(X)pyfunc_udf = mlflow.pyfunc.spark_udf(spark, model_info.model_uri)result = infer_spark_df.select(pyfunc_udf(*X.columns).alias("predictions")).toPandas()print(result)
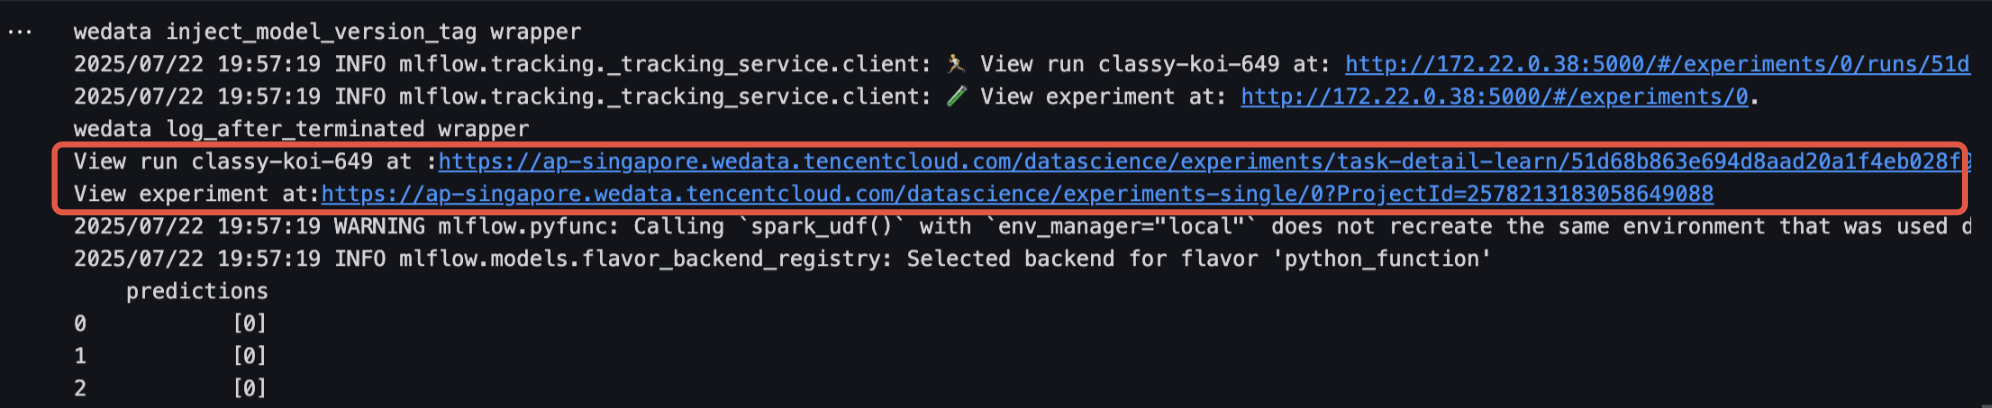
Step 4: Viewing Run Results and Managing Models
1. Click the URL in the run results to go to the Model Experiment interface, which displays the model's detailed information. Click Model Registration to save this model to Model Management.
2. The Model Experiment interface allows you to view registered models and model versions.
Going to DLC to View Spark Sessions
1. Return to the Standard Engine page, go to the details page of your purchased engine, and select Resource Group Management.
2. Click the created resource group (relying on the Spark MLlib framework), select Spark session, and view the auto-termination time of the Spark session. You can also terminate the Spark session by clicking Kill under the operation column.

Help and Support
Was this page helpful?
You can also Contact sales or Submit a Ticket for help.
Help us improve! Rate your documentation experience in 5 mins.
Feedback