tencent cloud

Tencent Cloud Observability Platform

Release Notes and Announcements
Release Notes
Product Introduction
Overview
Strengths
Basic Features
Basic Concepts
Use Cases
Use Limits
Purchase Guide
Tencent Cloud Product Monitoring
Application Performance Management
Mobile App Performance Monitoring
Real User Monitoring
Cloud Automated Testing
Prometheus Monitoring
Grafana
EventBridge
PTS
Quick Start
Monitoring Overview
Instance Group
Tencent Cloud Product Monitoring
Application Performance Management
Real User Monitoring
Cloud Automated Testing
Performance Testing Service
Prometheus Getting Started
Grafana
Dashboard Creation
EventBridge
Alarm Service
Cloud Product Monitoring
Tencent Cloud Service Metrics
Operation Guide
CVM Agents
Cloud Product Monitoring Integration with Grafana
Troubleshooting
Practical Tutorial
Application Performance Management
Product Introduction
Access Guide
Operation Guide
Practical Tutorial
Parameter Information
FAQs
Mobile App Performance Monitoring
Overview
Operation Guide
Access Guide
Practical Tutorial
Tencent Cloud Real User Monitoring
Product Introduction
Operation Guide
Connection Guide
FAQs
Cloud Automated Testing
Product Introduction
Operation Guide
FAQs
Performance Testing Service
Overview
Operation Guide
Practice Tutorial
JavaScript API List
FAQs
Prometheus Monitoring
Product Introduction
Access Guide
Operation Guide
Practical Tutorial
Terraform
FAQs
Grafana
Product Introduction
Operation Guide
Guide on Grafana Common Features
FAQs
Dashboard
Overview
Operation Guide
Alarm Management
Console Operation Guide
Troubleshooting
FAQs
EventBridge
Product Introduction
Operation Guide
Practical Tutorial
FAQs
Report Management
FAQs
General
Alarm Service
Concepts
Monitoring Charts
CVM Agents
Dynamic Alarm Threshold
CM Connection to Grafana
Documentation Guide
Related Agreements
Application Performance Management Service Level Agreement
APM Privacy Policy
APM Data Processing And Security Agreement
RUM Service Level Agreement
Mobile Performance Monitoring Service Level Agreement
Cloud Automated Testing Service Level Agreement
Prometheus Service Level Agreement
TCMG Service Level Agreements
PTS Service Level Agreement
PTS Use Limits
Cloud Monitor Service Level Agreement
API Documentation
History
Introduction
API Category
Making API Requests
Monitoring Data Query APIs
Alarm APIs
Legacy Alert APIs
Notification Template APIs
TMP APIs
Grafana Service APIs
Event Center APIs
TencentCloud Managed Service for Prometheus APIs
Monitoring APIs
Data Types
Error Codes
Glossary

Receiving Alarm Notifications Through a DingTalk Group

PDF
Focus Mode
Font Size
Last updated: 2024-12-06 17:31:19
To be able to receive alarm notifications through the DingTalk group, you may add the DingTalk group's Webhook address of the DingTalk chatbot, and configure this address in the alarm notification template.

Step 1: Adding a Robot in a DingTalk Group

1. Open the DingTalk group in which you want to receive alarm notifications on the DingTalk desktop version.
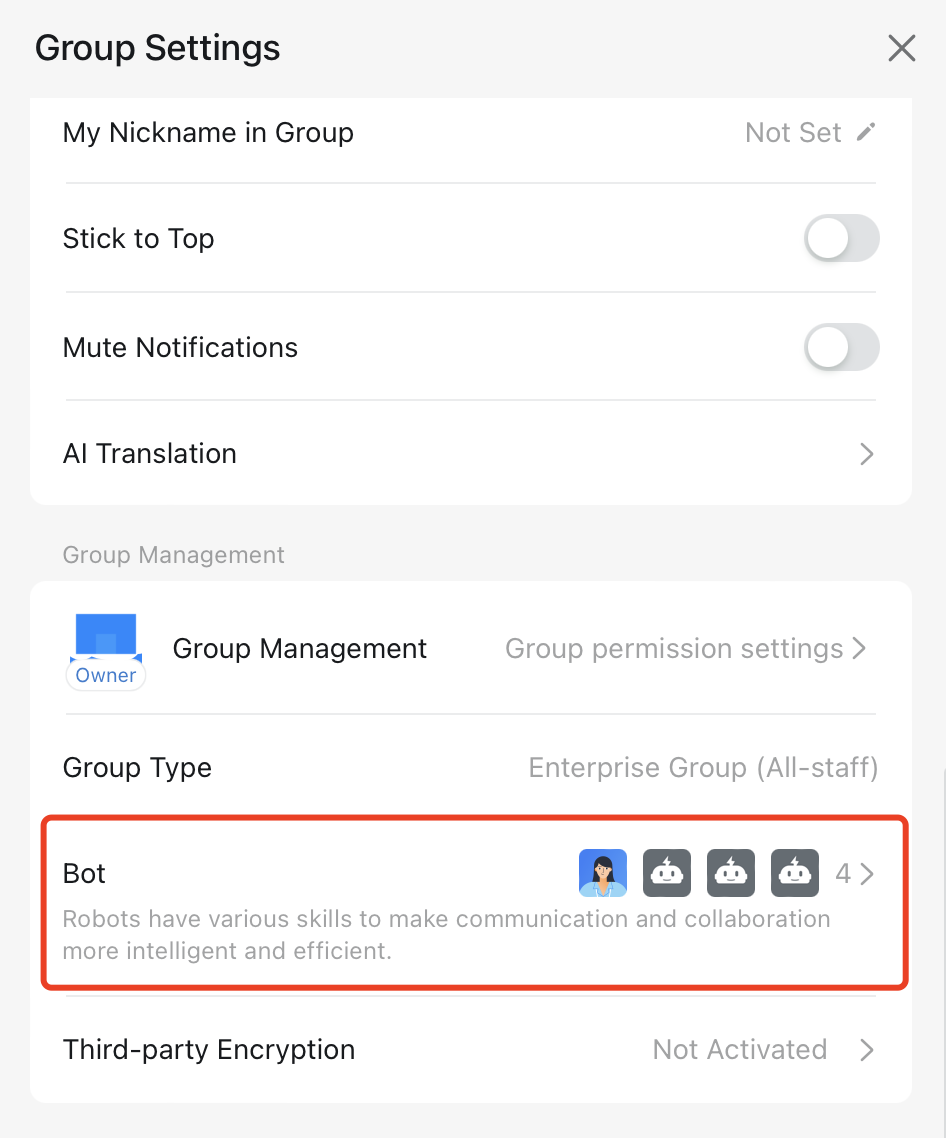
2. Click Group Settings at the top right corner.
3. In the smart group assistant popup dialog, click Bot.


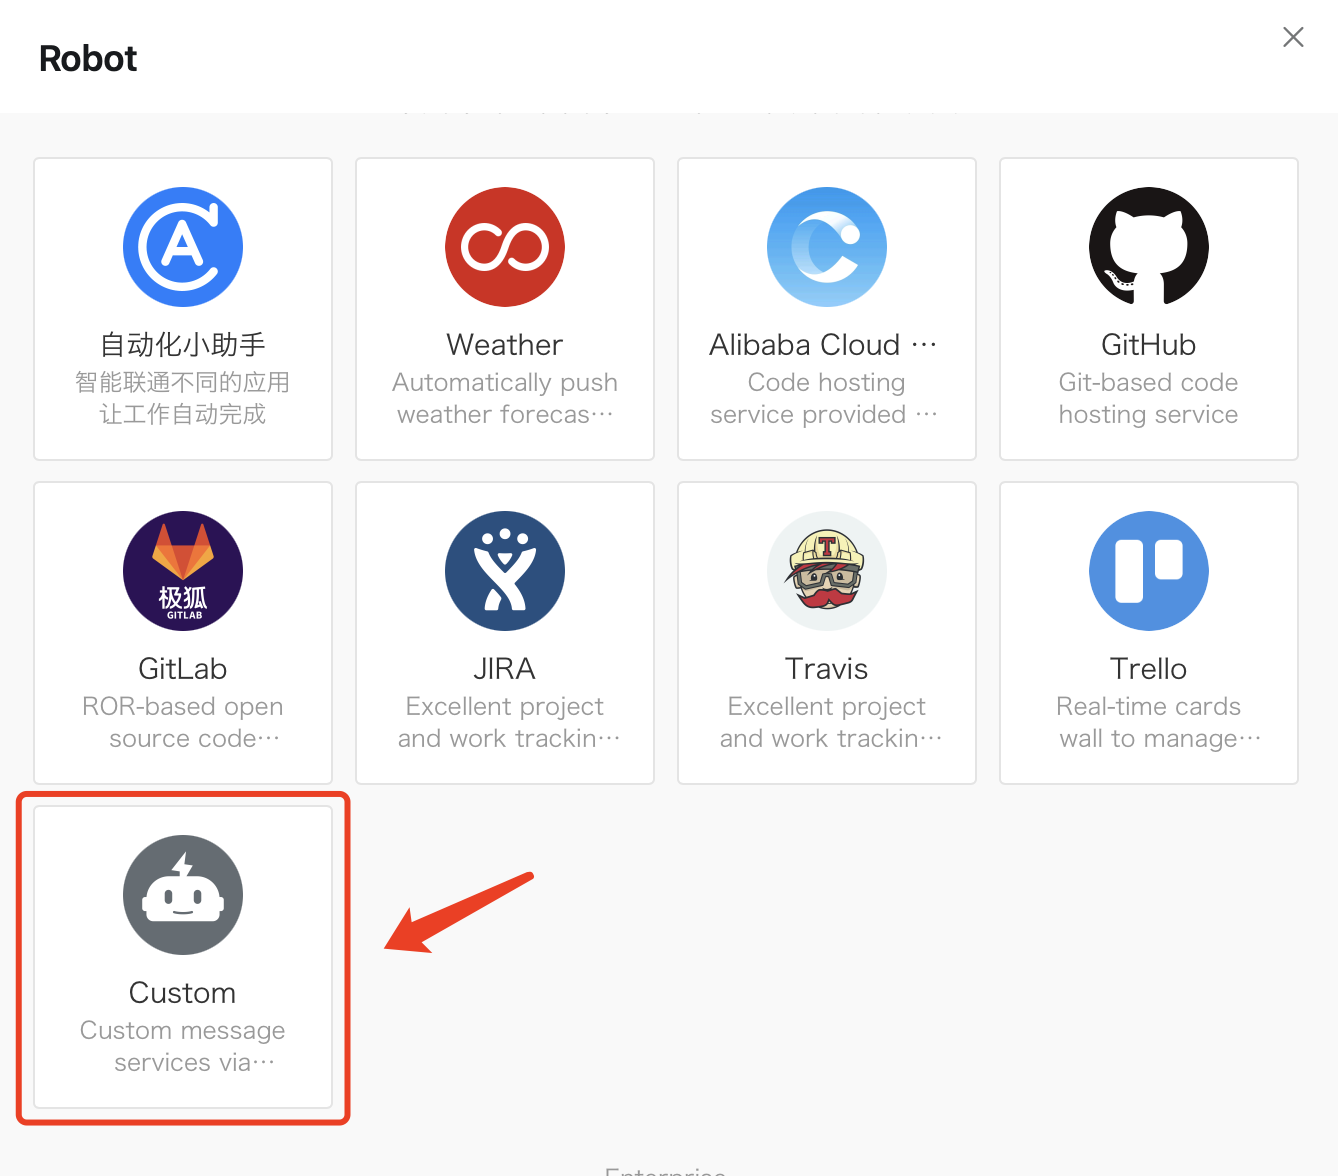
4. In the pop-up dialog of the robot, click Add Robot and select Custom.


Note:
Custom robots can be added in internal groups only.
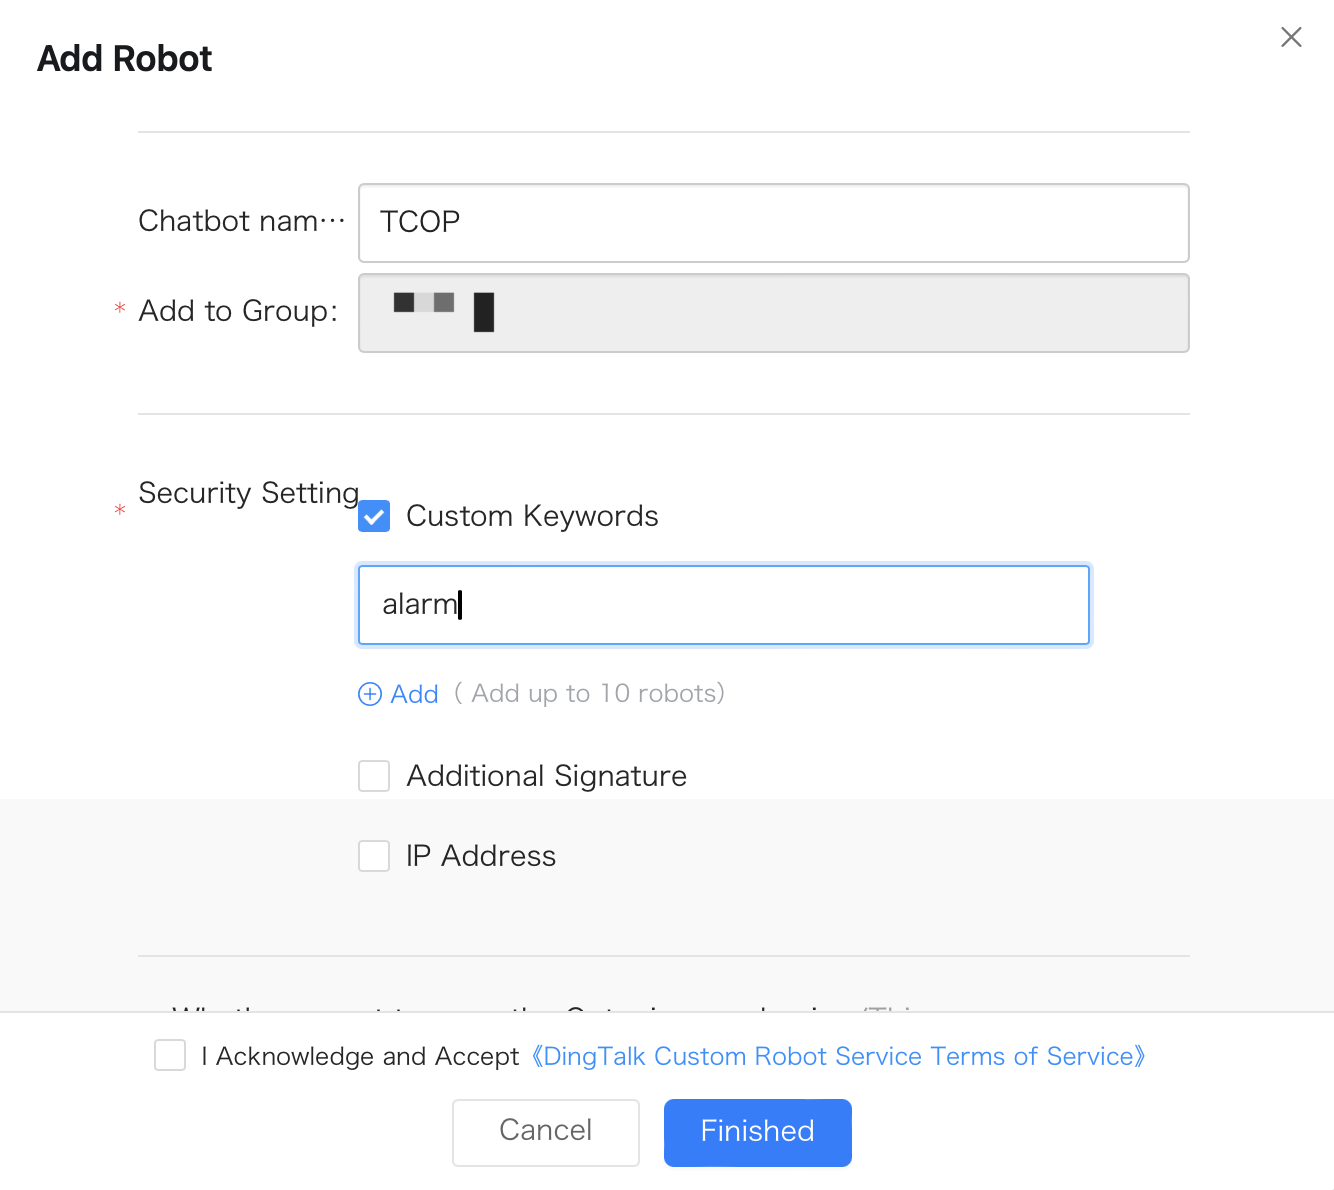
5. On the robot details page, click Add and set the robot information.
Enter the Robot Name, for example: TCOP Alarm.
Select the Custom Keywords checkbox, and enter the keywords (up to 10 keywords can be added). To be sent successfully, the message must contain at least one of these keywords. For example, if you add a custom keyword: alarm, then the message sent by the robot must contain the word alarm to be sent successfully.


6. View Custom Robot Service and Disclaimer and select the checkbox next to I Acknowledge and Accept.
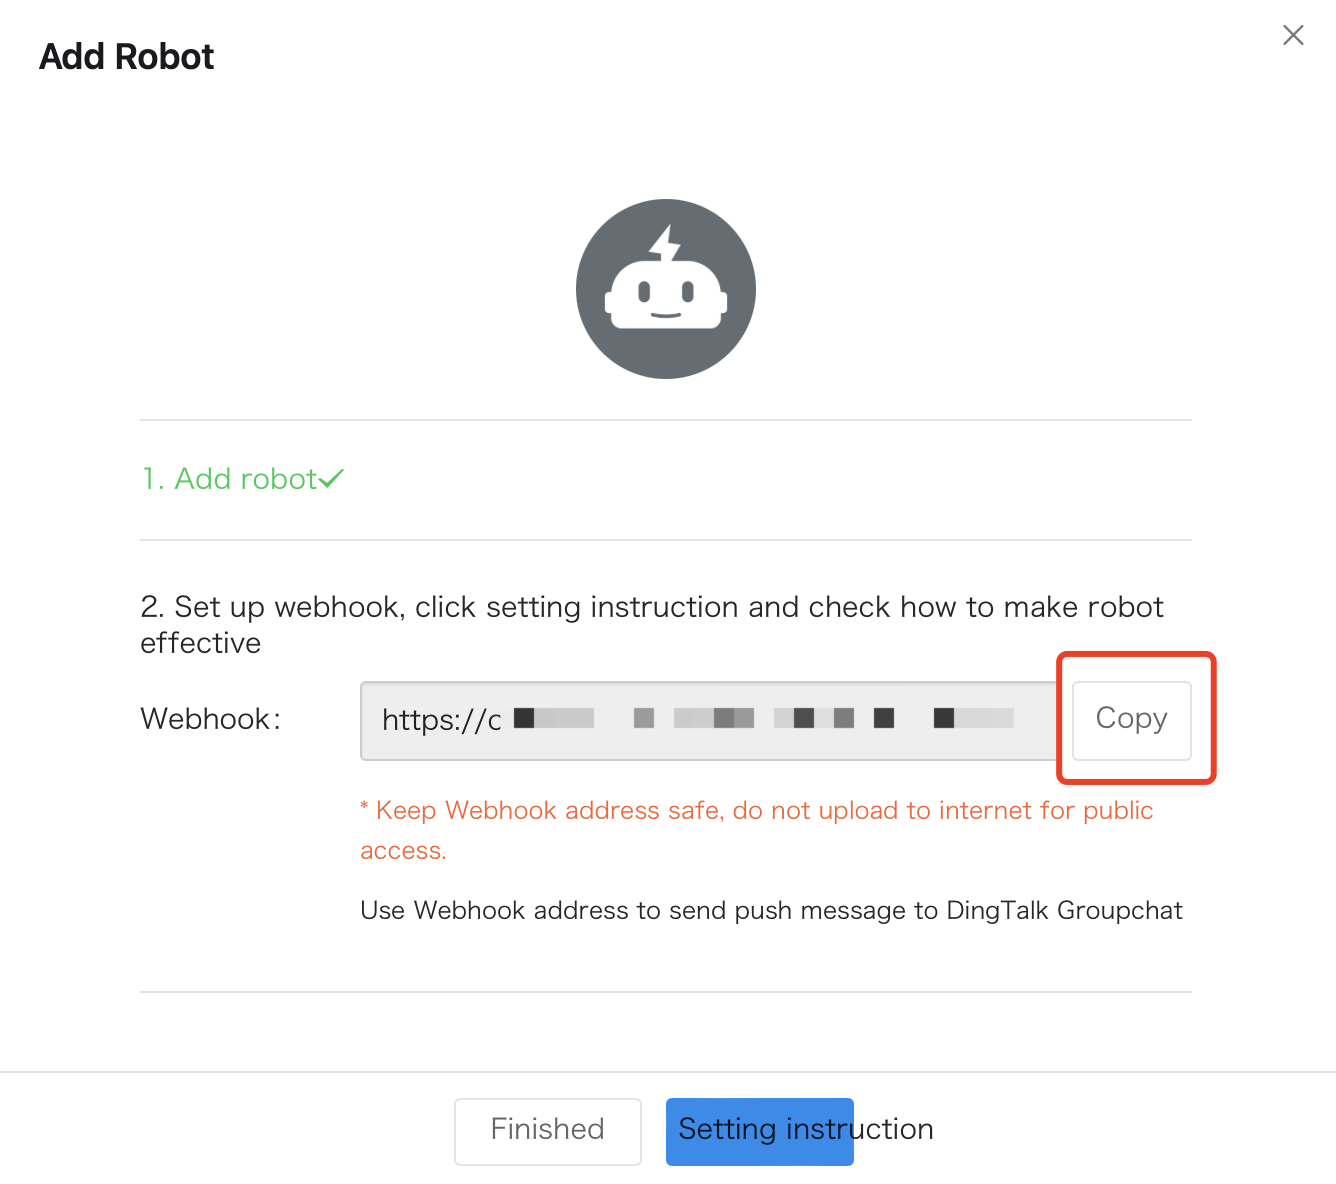
7. Click Finished, and copy the Webhook address through the redirection symbol.


Note:
You can only add a custom robot in the DingTalk desktop version. For more DingTalk robot settings, please refer to the DingTalk Custom Robot Documentation.

Step 2: Configuring the API Callback for Alarm Notifications

1. Go to TCOP > Alarm Management > Alarm Configuration > Notification Template.
2. Click Create Notification Template to create a notification template.
3. After configuring the basic information, fill in the copied webhook address into the textbox next to API Callback URL.
4. If you need to remind the group members to view the alarm notification, you can enter the corresponding group members' user IDs. Multiple user IDs are separated by commas. If you need to remind all group members, you can enter 'all' to remind everyone in the group. If you do not want to remind anyone, this field can be left blank. For how to obtain the group member user IDs, please refer to Getting Group Member User IDs.


5. Go to Alarm Policy, click the name of the policy that needs to bind the alarm callbacks, and enter the alarm policy management page. Bind the notification template in the alarm policy page.


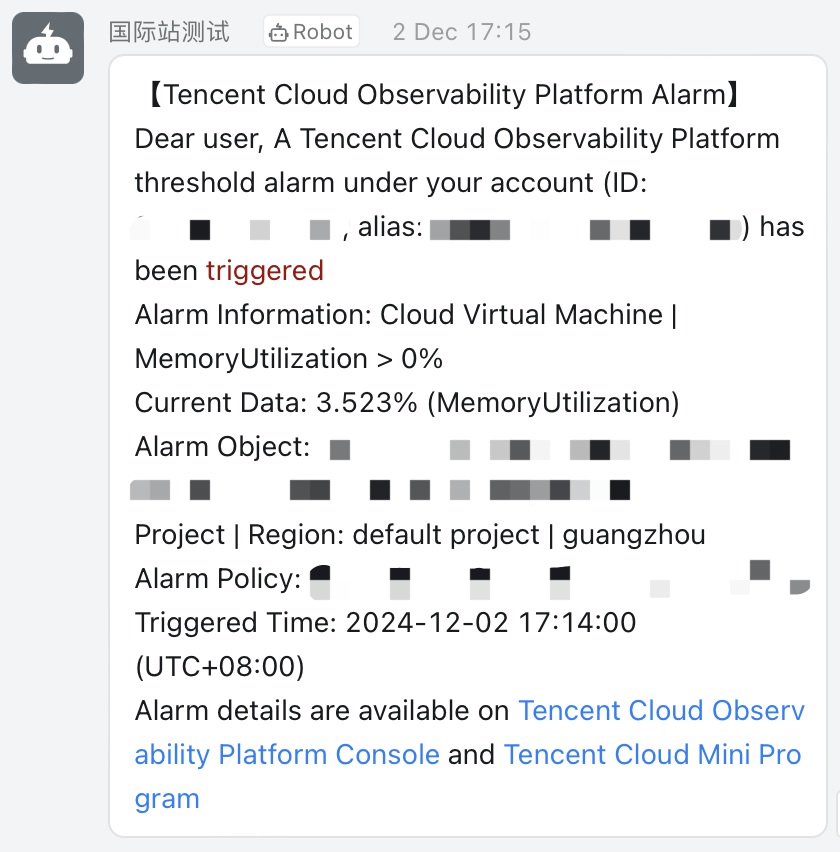
6. After the configuration is completed, you will receive the alarm notifications sent by the DingTalk group robot when an alarm policy is triggered or the alarm is resolved, as shown in the following figure:


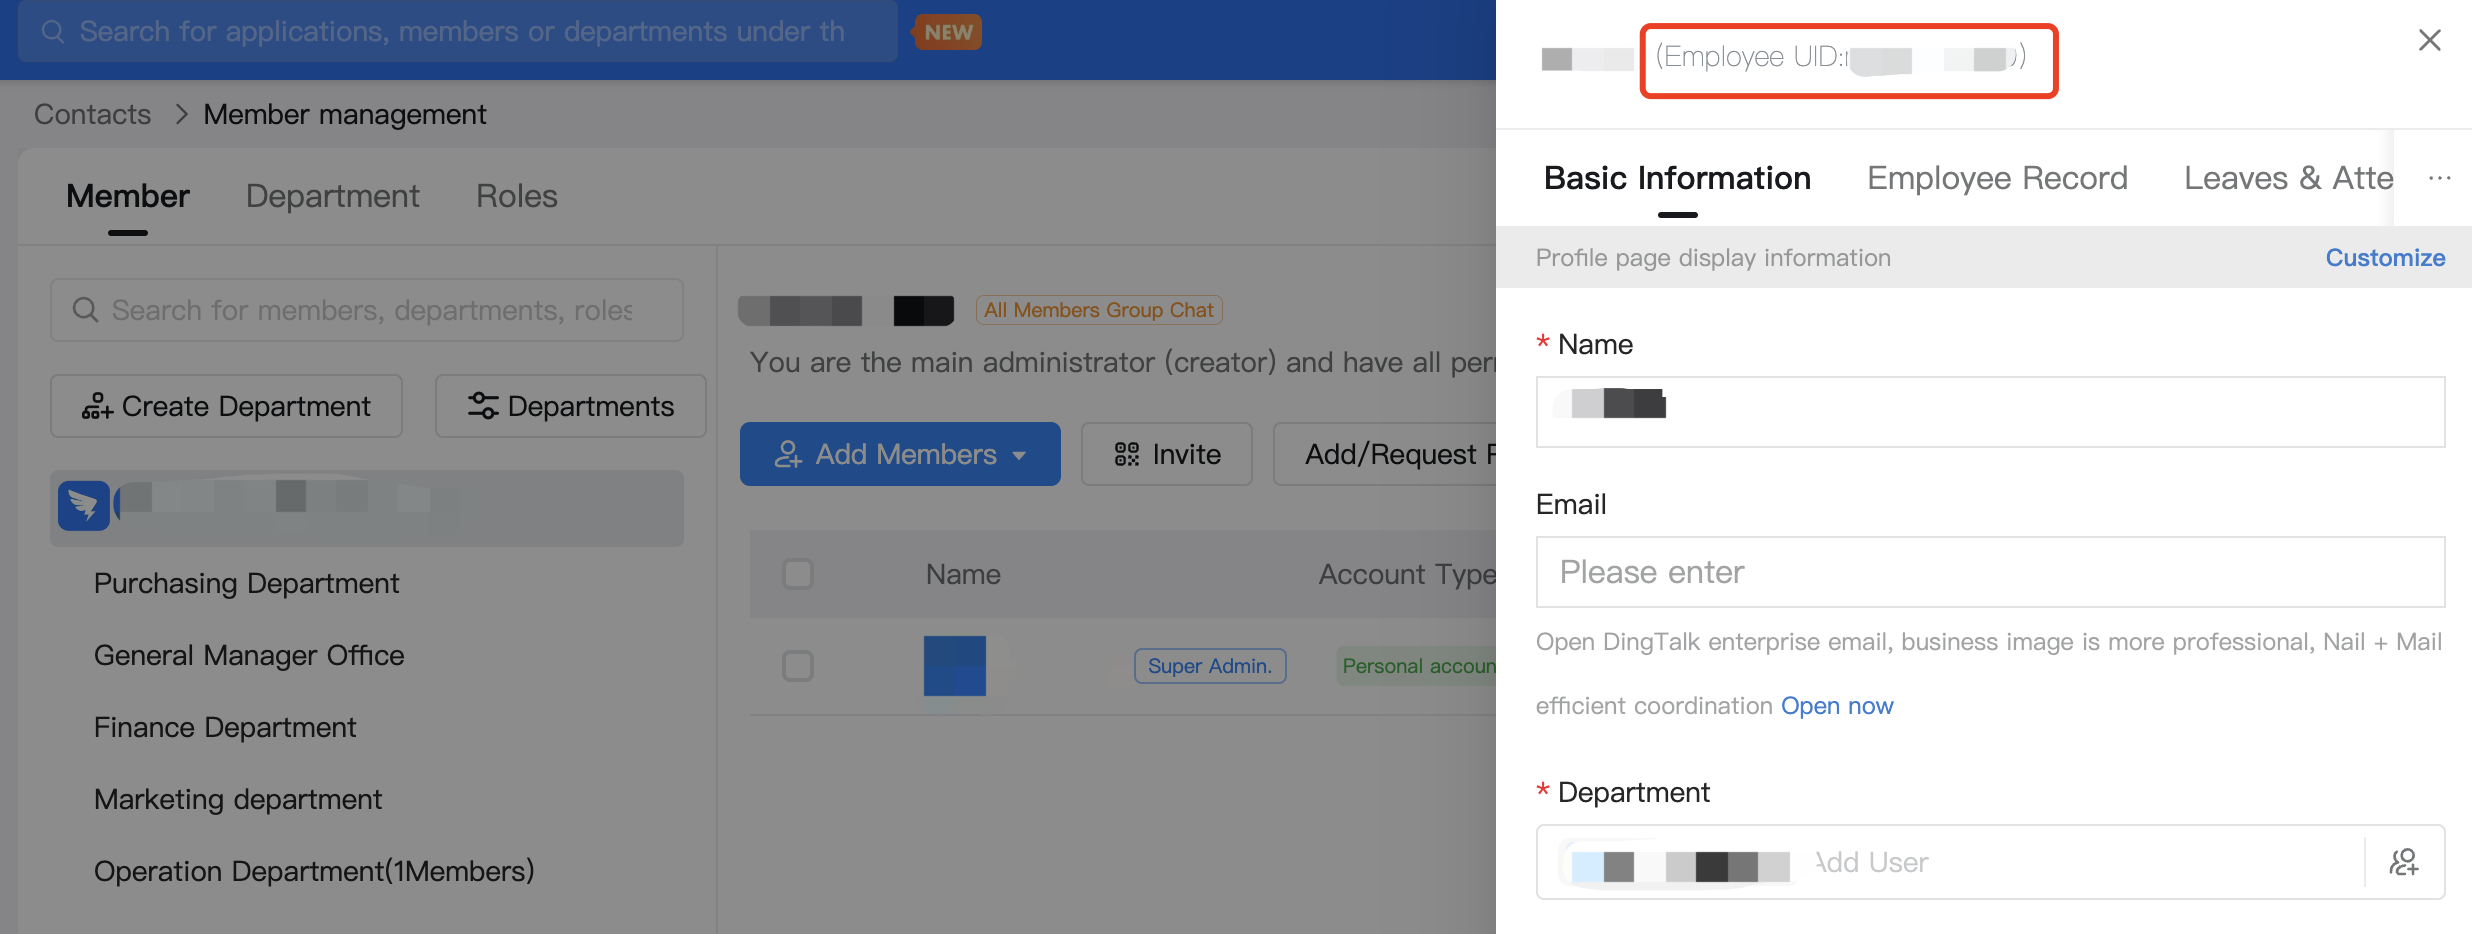
Getting Group Member userid

Log in to the DingTalk Management Backend, go to the Contacts > Member Management page, and click the member to view the member's userid.


Help and Support

Was this page helpful?

Help us improve! Rate your documentation experience in 5 mins.

Feedback