- Release Notes and Announcements
- Product Introduction
- Purchase Guide
- RocketMQ 5.x
- RocketMQ 4.x
- Product Introduction
- Purchase Guide
- Getting Started
- Operation Guide
- Development Guide
- SDK Documentation
- Migration to Cloud
- API Documentation
- FAQs
- TDMQ FOR ROCKETMQ SERVICE LEVEL AGREEMENT
- Contact Us
Definition
The "role" in RocketMQ is a proprietary concept in RocketMQ and distinct from Tencent Cloud's "role". It is the smallest unit of authority partitioning performed by the user in RocketMQ. Users can assign different production and consumption permissions under multiple clusters to numerous roles. Each role has its unique corresponding access key. Users can access RocketMQ for message production and consumption by adding these keys into the client.
The application scenarios are as follows:
Users require to securely employ RocketMQ for message production and consumption.
Users require to define production consumption permissions of varying roles for diverse clusters.
For instance, a company comprises Department A and Department B. The system operated by Department A generates transaction data. The system operated by Department B performs data analysis and presentation based on these transaction data. To comply with the principle of least permission, two roles could be configured, providing Department A with exclusive permission to produce messages in the transaction system cluster, while Department B would be granted permission solely to consume messages. Such a setup significantly avoids issues related to data confusion or business dirty data that could arise from ambiguities in permission.
Steps
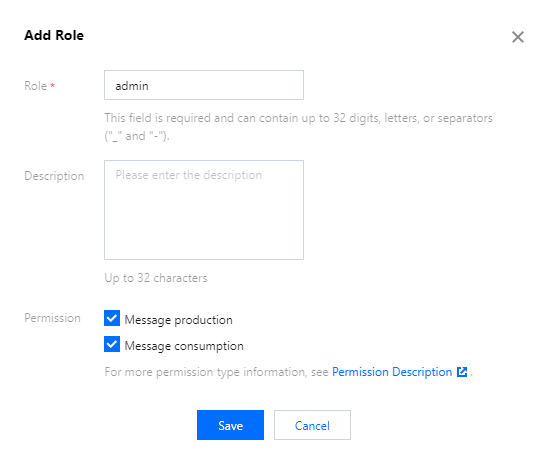
Add roles and assign permissions
1. Log in to the Console for RocketMQ.
2. From the left sidebar, select Cluster List. After selecting the region, click the "ID" of the desired cluster to configure roles for and proceed to the basic information page.
3. At the top of the page, select the Cluster Permissions tab. Click Add Role, enter a role name, and configure production and consumption permissions.
4. Click Save to complete role creation.
Verify the effectiveness of permissions
1. Copy the role key from the cluster permission list.
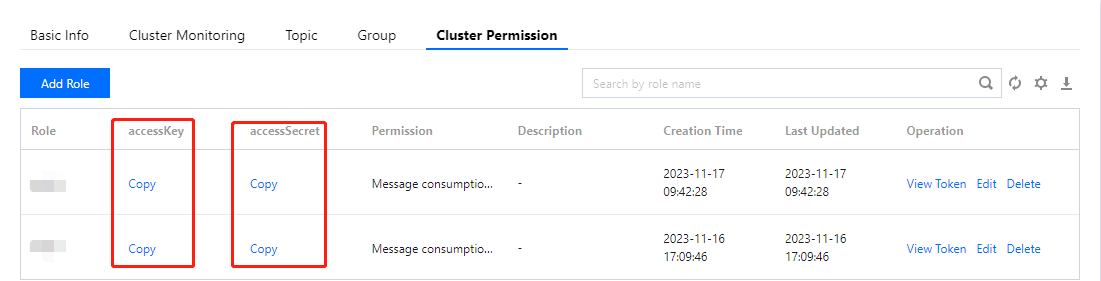
Note:
Key leakage may lead to data leakage. Please keep your key well.
2. Add the copied role key into the parameters of the client. For guidance on how to add the key parameter in the client code, please refer to Sample Code from RocketMQ.
The following provides a suggested approach.
2.1 Declare two fields,
ACL_SECRET_KEY and ACL_SECRET_ACCESS. When using various frameworks, it is recommended to read these from the configuration files.private static final String ACL_ACCESS_KEY = "eyJr****";private static final String ACL_SECRET_KEY = "xxx"; /
2.2 Declare a static function to load a RocketMQ Client
RPCHook object.static RPCHook getAclRPCHook() {return new AclClientRPCHook(new SessionCredentials(ACL_ACCESS_KEY, ACL_SECRET_KEY));}
2.3 When creating RocketMQ's
producer, pushConsumer, or pullConsumer, import the RPCHook object.
Here is a code example for creating a producer:DefaultMQProducer producer = new DefaultMQProducer("rocketmq-mw***|namespace", "ProducerGroupName", getAclRPCHo
3. Run the configured client to draw upon topic resources in the relevant cluster, adhering to recently established permissions for production or consumption. If no 'permission denied' error message is generated, this denote a successfully set configuration.
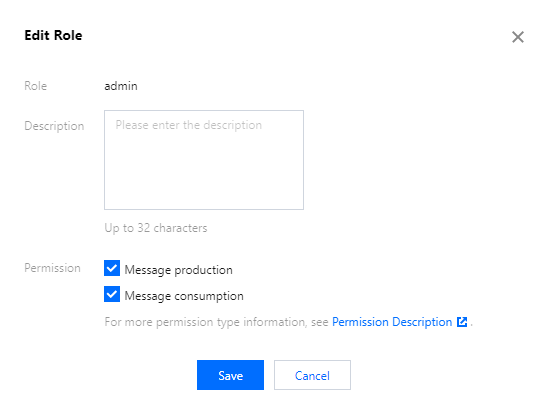
Edit permission
1. In the cluster permissions list, locate the desired role to edit the permission, then click Edit in the action column.

2. In the edit pop-up window, after modifying the permission details, click Save.
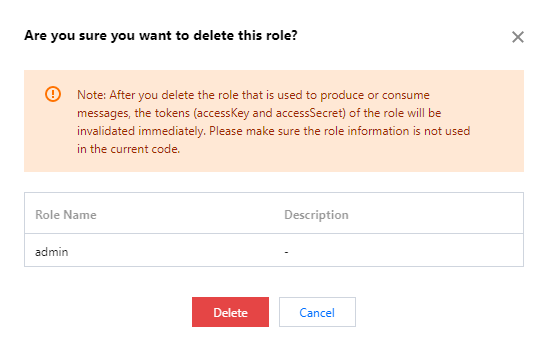
Delete role
Note:
After role deletion, any keys (accessKey and accessSecret) used to produce or consume messages under the role will become defunct instantly. Please ensure that the current line of business no longer relies on this role for message production or consumption, failing which, client exceptions could emerge due to an inability to produce or consume messages.
1. In the cluster permission list, locate the role that requires permission deletion. Click Delete in the action column.
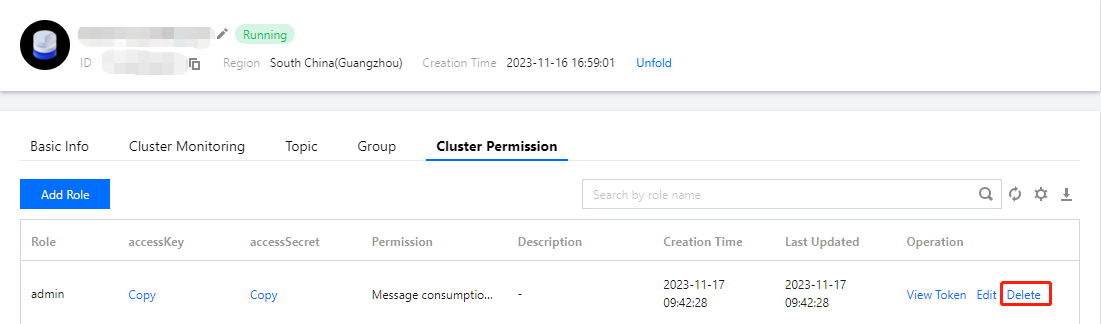
2. In the deletion pop-up window, click Delete to remove the role.

 Yes
Yes
 No
No
Was this page helpful?