tencent cloud

Feedback

Use of Java SDK

Last updated: 2024-01-17 16:56:33

    Overview

    This document describes how to use an open-source SDK to send and receive messages with the SDK for Java 4.0 serving as example, for you to better understand the complete procedure involved in message sending and receiving.
    Note:
    The Java client is used as an example. For clients of other languages, see the SDK Documentation.

    Prerequisites

    You have created and prepared the required resources.

    Directions:

    Step 1: Installing the Java Dependency Library

    Incorporate the relevant dependencies in the Java project. A Maven project is used as an example. Add the following dependencies to pom.xml:
    <!-- in your <dependencies> block -->
    <dependency>
    <groupId>org.apache.rocketmq</groupId>
    <artifactId>rocketmq-client</artifactId>
    <version>4.9.7</version>
    </dependency>
    
    <dependency>
    <groupId>org.apache.rocketmq</groupId>
    <artifactId>rocketmq-acl</artifactId>
    <version>4.9.7</version>
    </dependency>

    Step 2: Producing Messages

    // Instantiate the message producer
    DefaultMQProducer producer = new DefaultMQProducer(
    groupName,
    new AclClientRPCHook(new SessionCredentials(accessKey, secretKey)) // ACL permission
    );
    // Set the NameServer's address. The address is in the format of an access address: xxx.tencenttdmq.com:8080
    producer.setNamesrvAddr(nameserver);
    // Start the producer instance.
    producer.start();
    
    for (int i = 0; i < 10; i++) {
    // Create a message instance, and configure the topic and message content.
    Message msg = new Message(topic_name, ("Hello RocketMQ " + i).getBytes(RemotingHelper.DEFAULT_CHARSET));
    // Send the message
    SendResult sendResult = producer.send(msg);
    System.out.printf("%s%n", sendResult);
    }

    Step 3: Consuming Messages

    The following code sample uses Push Consumer as example. For other codes, see the more detailed 4.x documentation.
    // Instantiate the consumer
    DefaultMQPushConsumer pushConsumer = new DefaultMQPushConsumer(
    groupName,
    new AclClientRPCHook(new SessionCredentials(accessKey, secretKey))); // ACL permissions
    // Set the NameServer address
    pushConsumer.setNamesrvAddr(nameserver);
    // Subscribe to a topic
    pushConsumer.subscribe(topic_name, "*");
    // Register a callback implementation class to process messages pulled from the broker
    pushConsumer.registerMessageListener((MessageListenerConcurrently) (msgs, context) -> {
    // Message processing logic
    System.out.printf("%s Receive New Messages: %s %n", Thread.currentThread().getName(), msgs);
    // Mark the message as successfully consumed, and return consumption status based on the consumption situation
    return ConsumeConcurrentlyStatus.CONSUME_SUCCESS;
    });
    // Start the consumer instance
    pushConsumer.start();

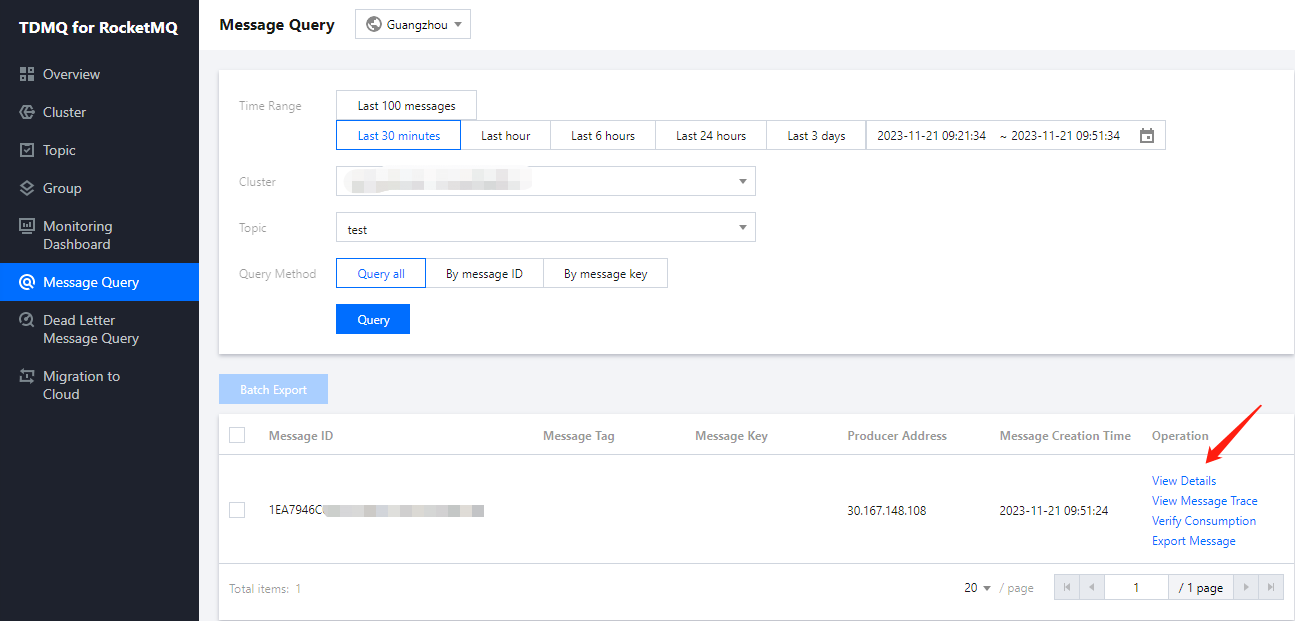
    Step 4: Viewing Message Details

    After the message is sent, you will receive a message ID (messageID). Developers can query the recently sent messages on the Message Query page, as shown in the following figure. Information such as details and traces for specific messages is also available. For details, see Message Query section.


    Contact Us

    Contact our sales team or business advisors to help your business.

    Technical Support

    Open a ticket if you're looking for further assistance. Our Ticket is 7x24 avaliable.

    7x24 Phone Support