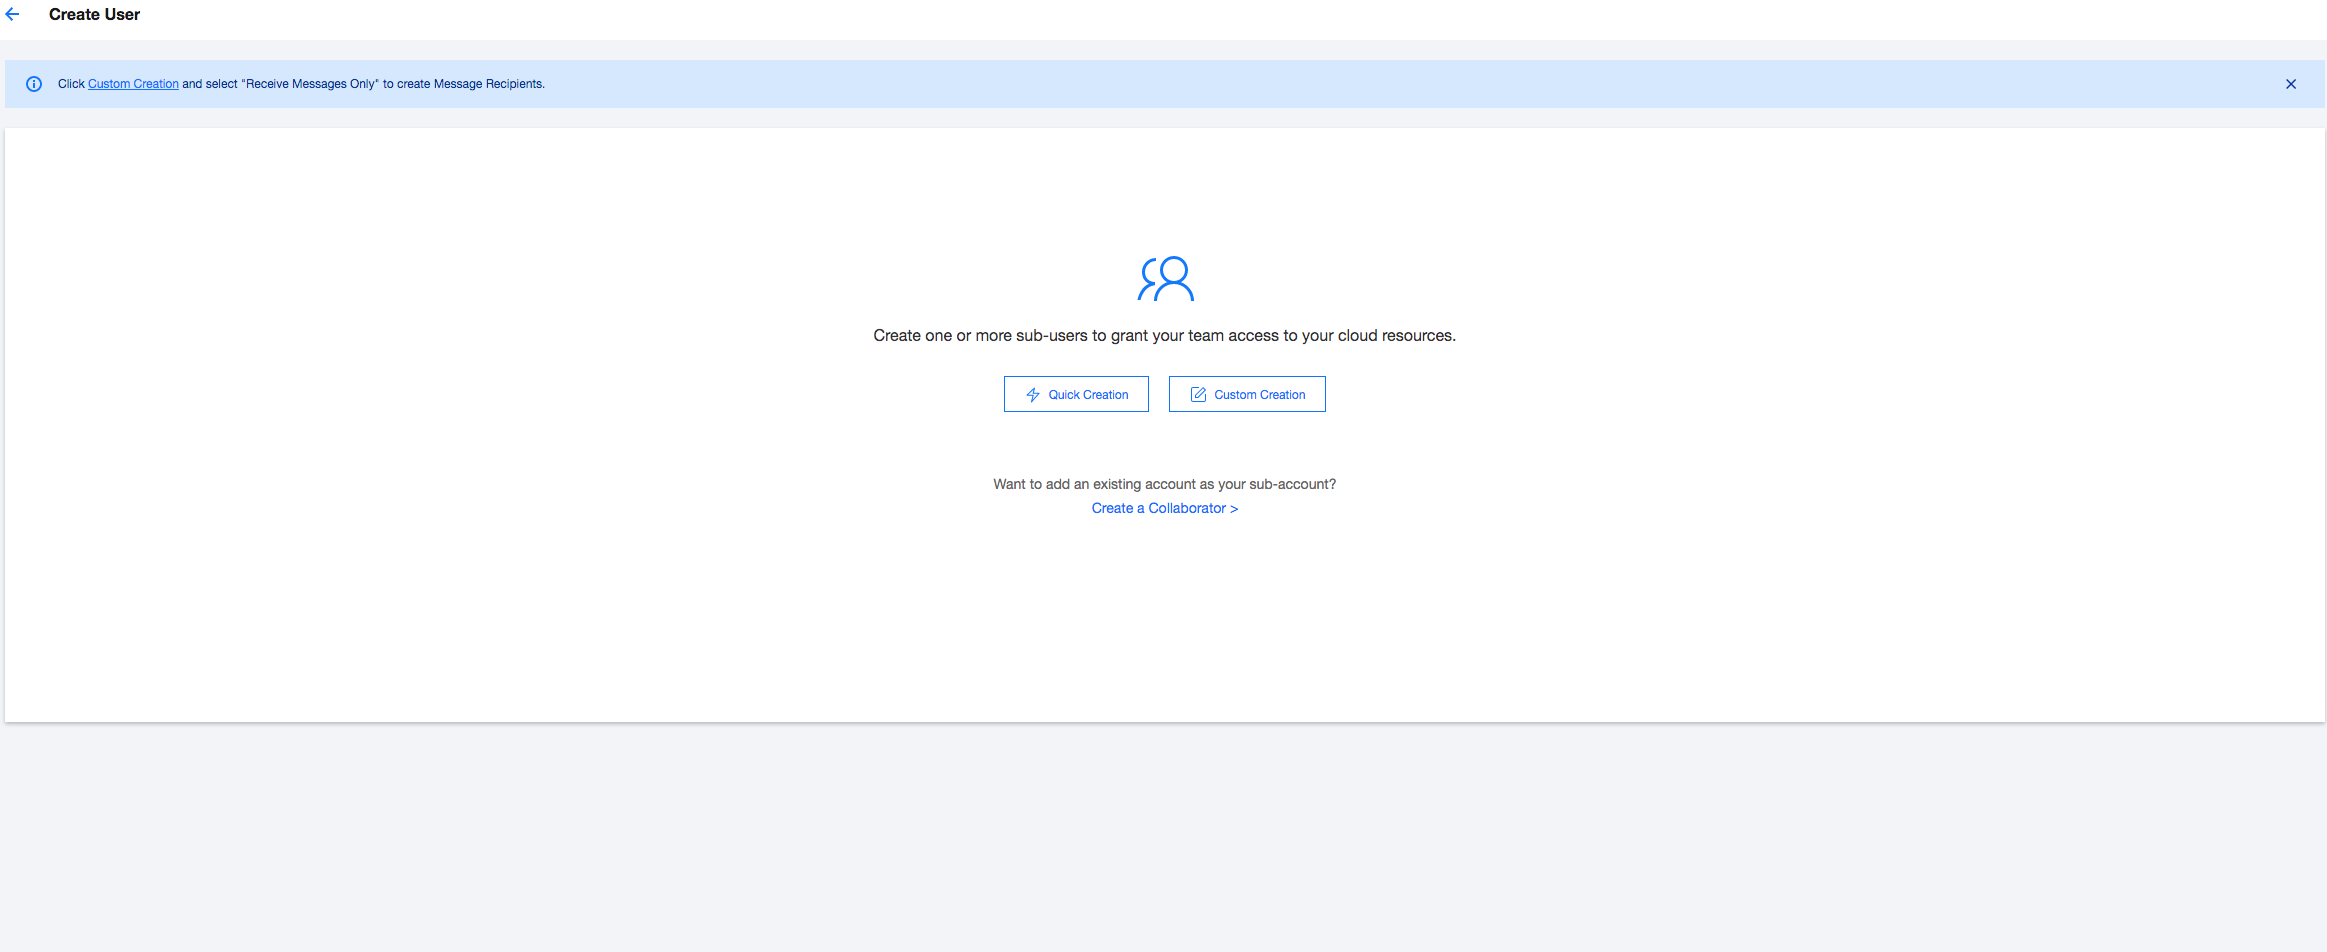
This document describes how to create and authorize sub-users. If you have never used Tencent Cloud Access Management (CAM), read this document for more information on the configuration.
Tencent Push Notification Service uses CAM for permission management. You need to authorize applications, create sub-users, and grant application permissions to the sub-users. For detailed directions, see the following sections.
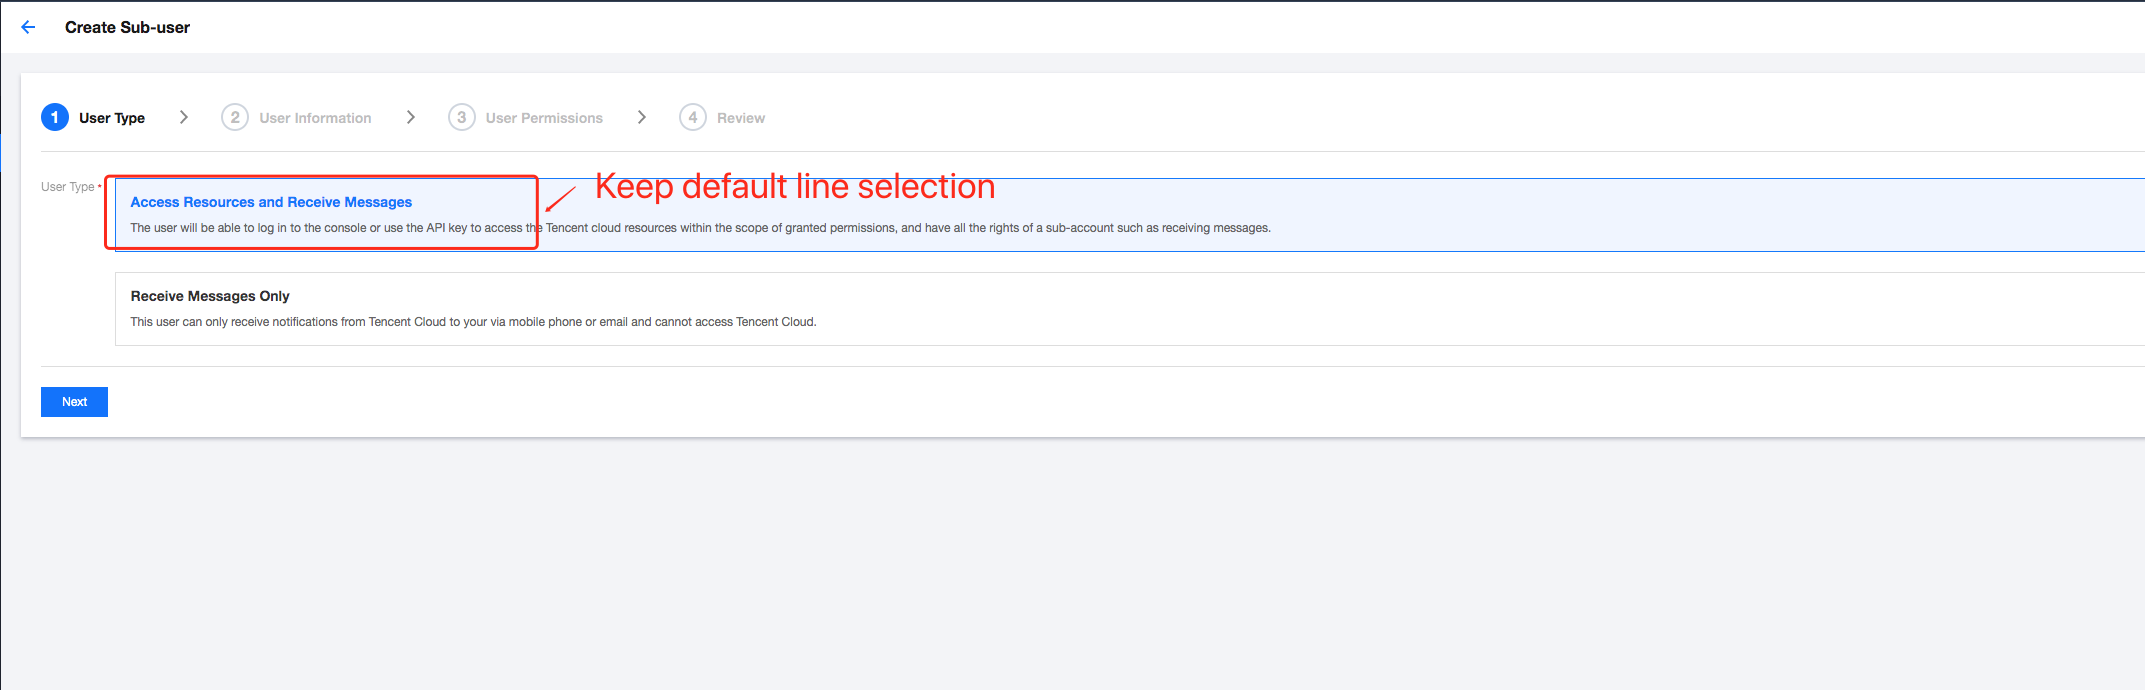
2. Click Custom Creation to enter the Create Sub-user page (this example is based on the custom creation method).
3. Configure the login information of the sub-user as instructed and grant the sub-user application permissions in the User Permissions step.
Granting Application Permissions
Granting permissions of all applications in a centralized manner
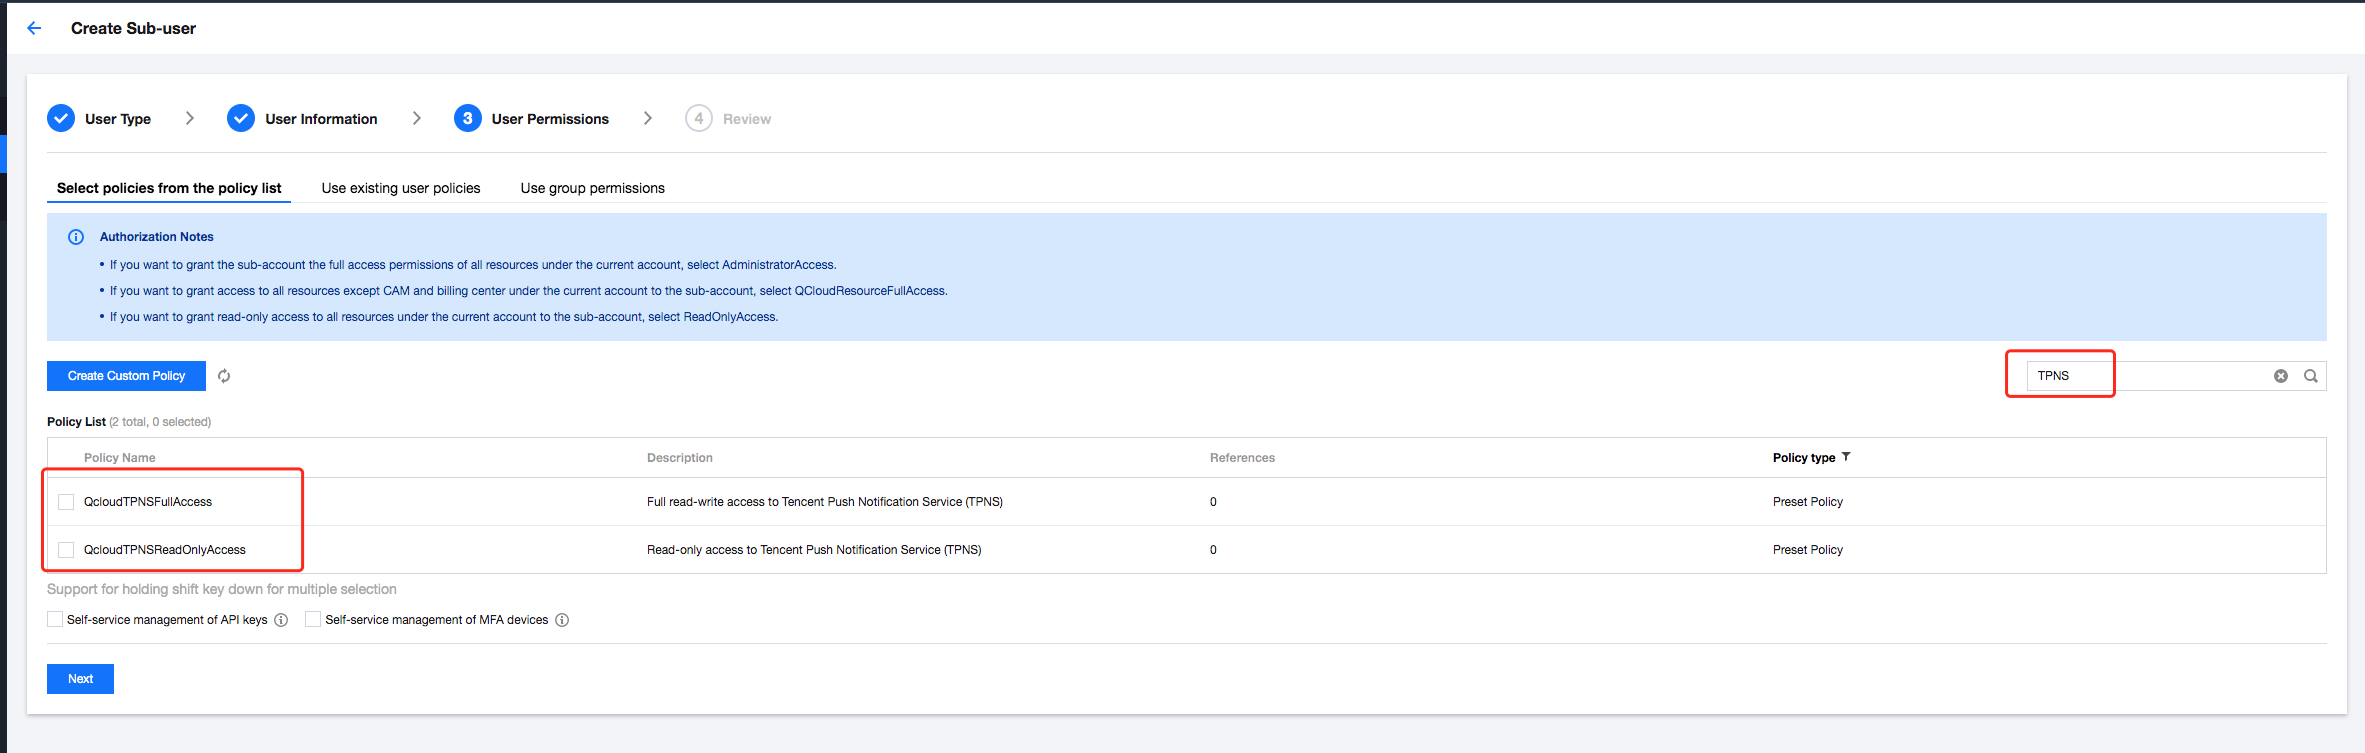
1. Continue with the User Permissions page mentioned in the previous step.
2. Enter Tencent Push Notification Service in the search box. In the search results, there are two default preset permissions as listed below:
Policy Name
Permission Scope
QcloudTPNSFullAccess
All permissions on all the applications under the root account
QcloudTPNSReadOnlyAccess
Data read and push permissions on all applications under the root account
Granting permissions of selected applications
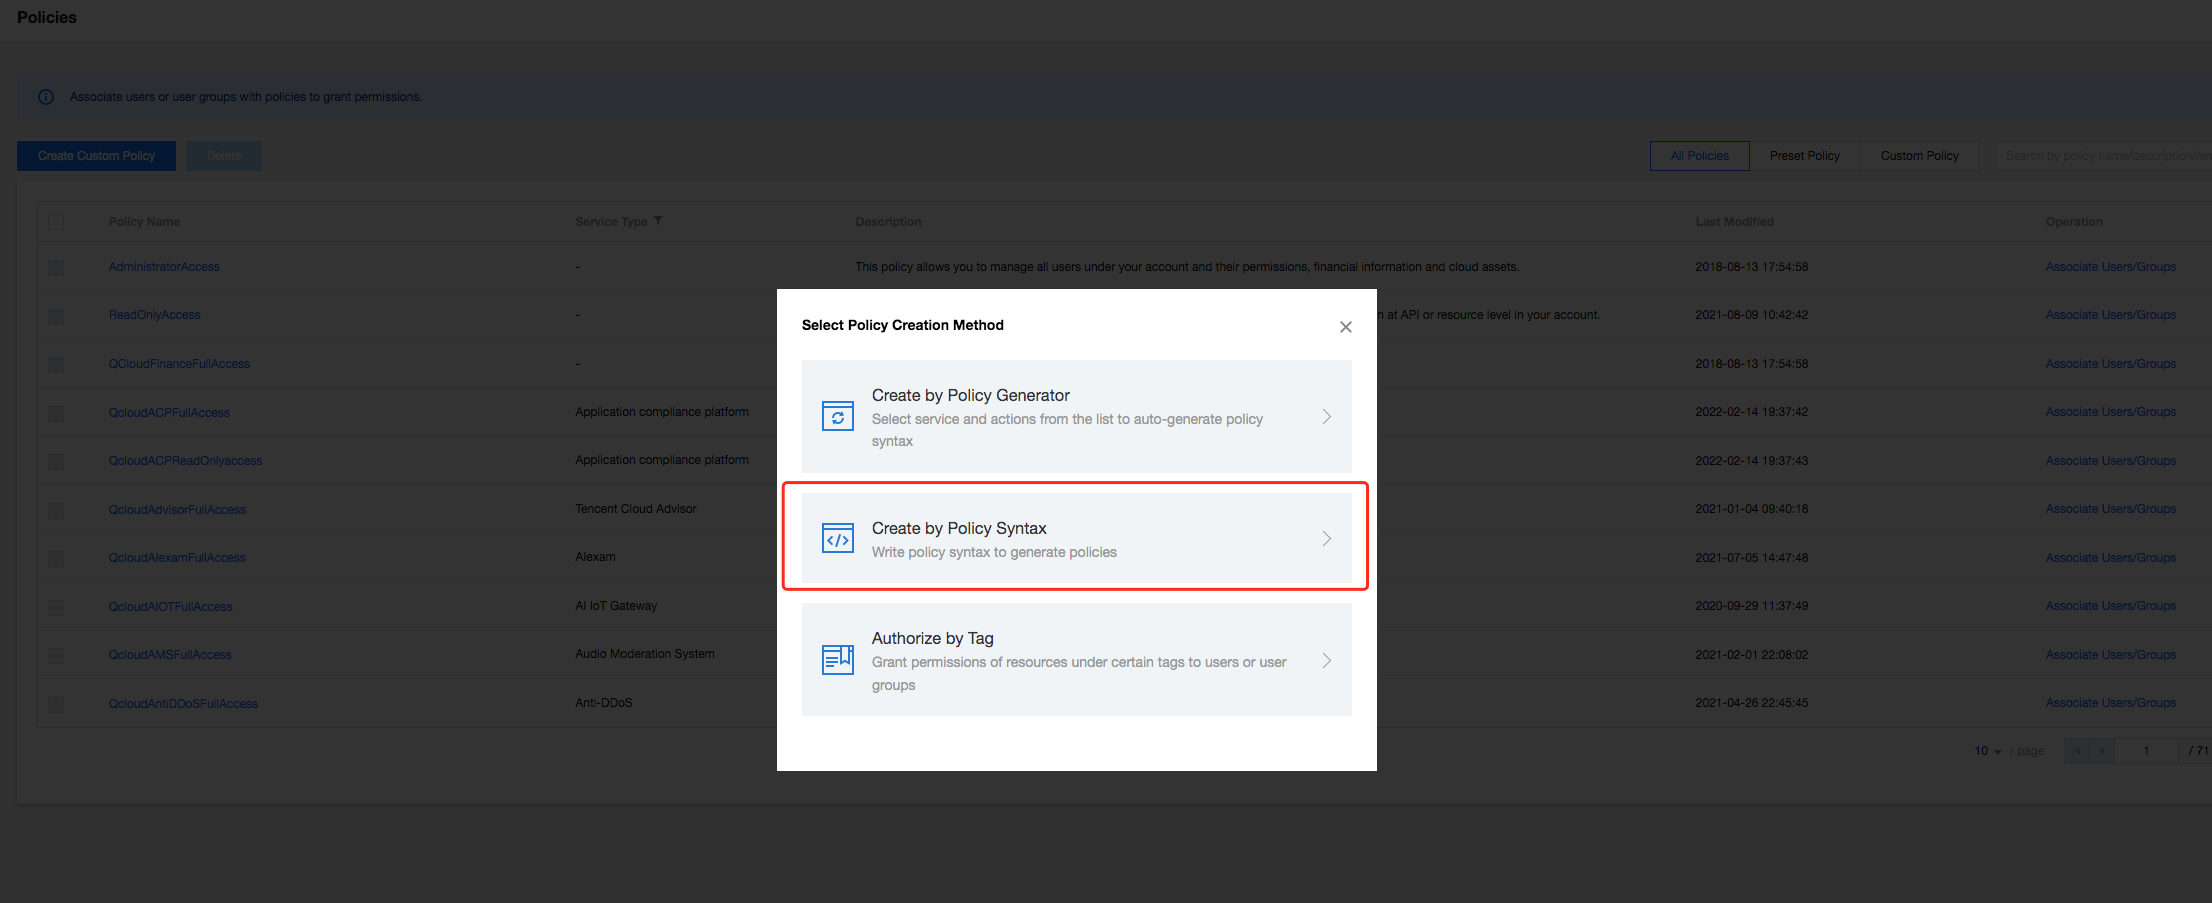
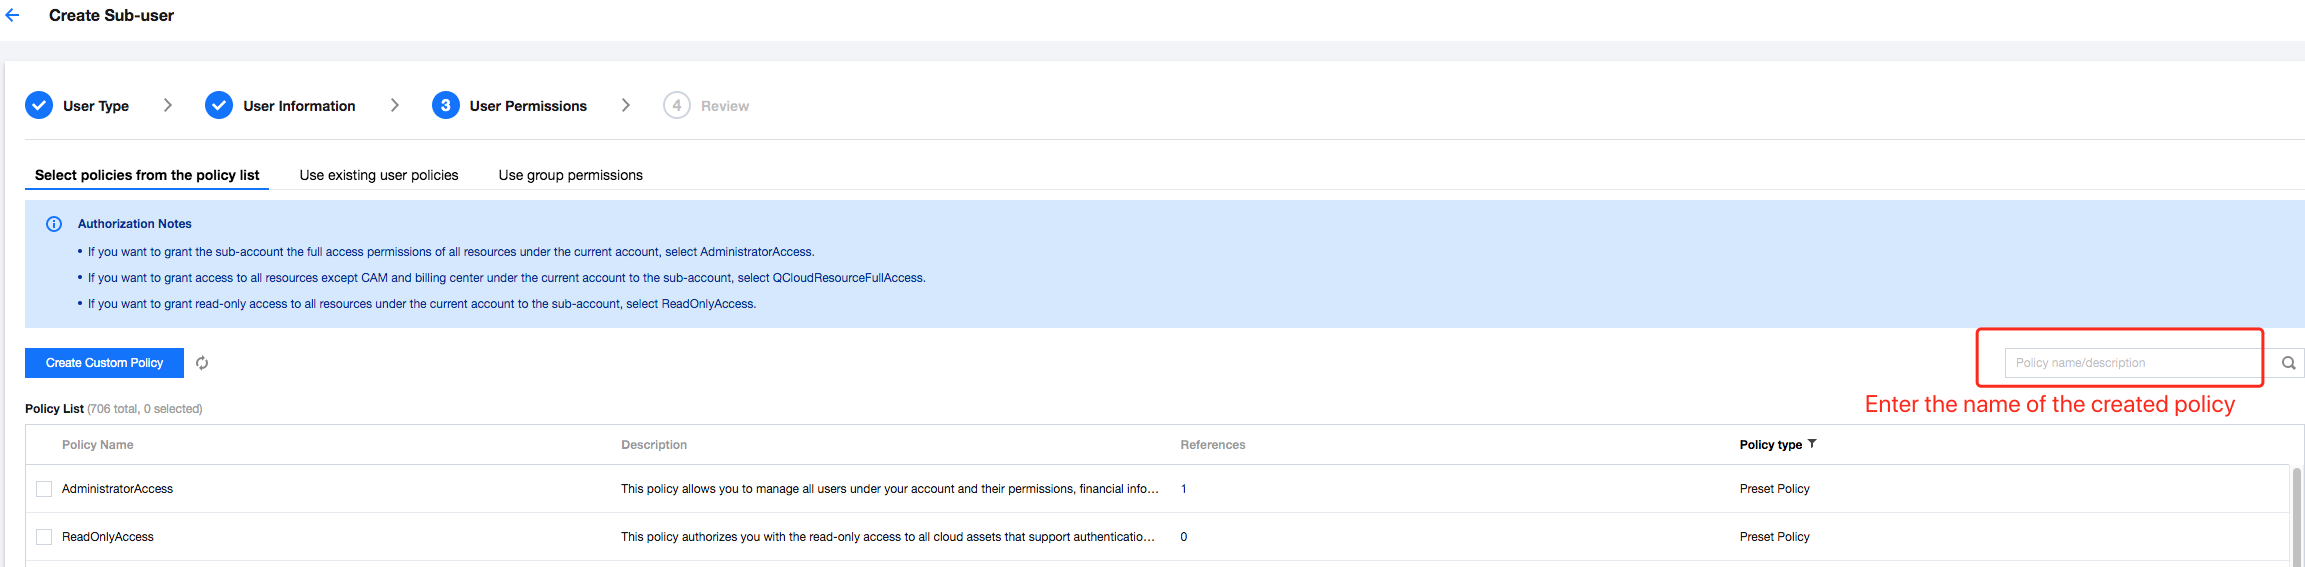
1. Click Create Custom Policy.
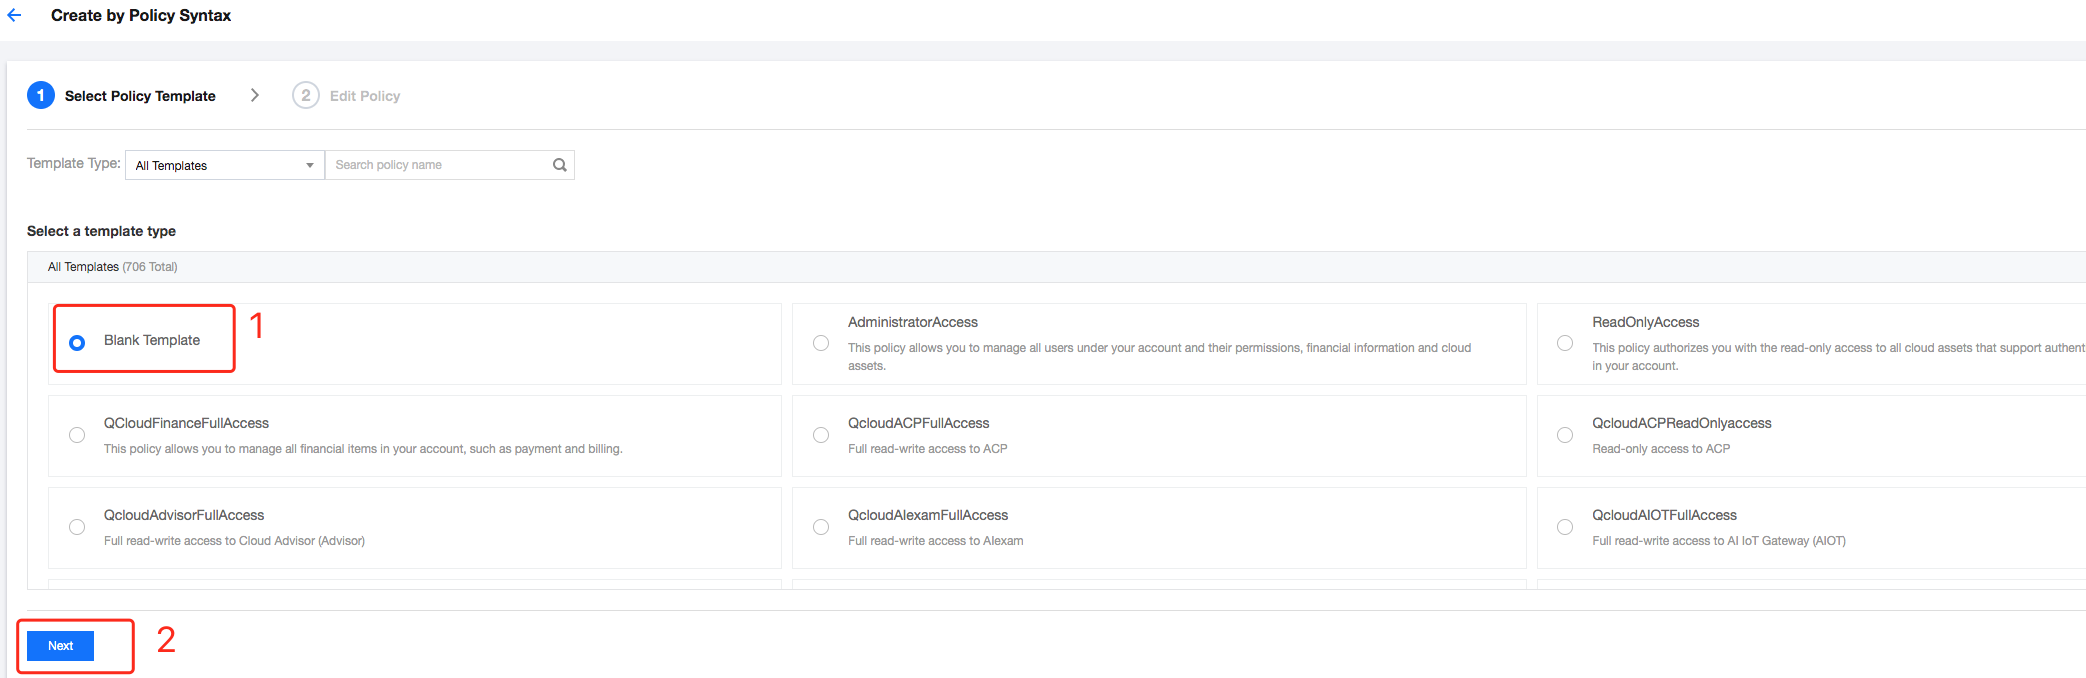
2. On the displayed page, select Create by Policy Syntax.
3. Select Blank Template.
4. Click Next to enter the syntax creation page.
Note:
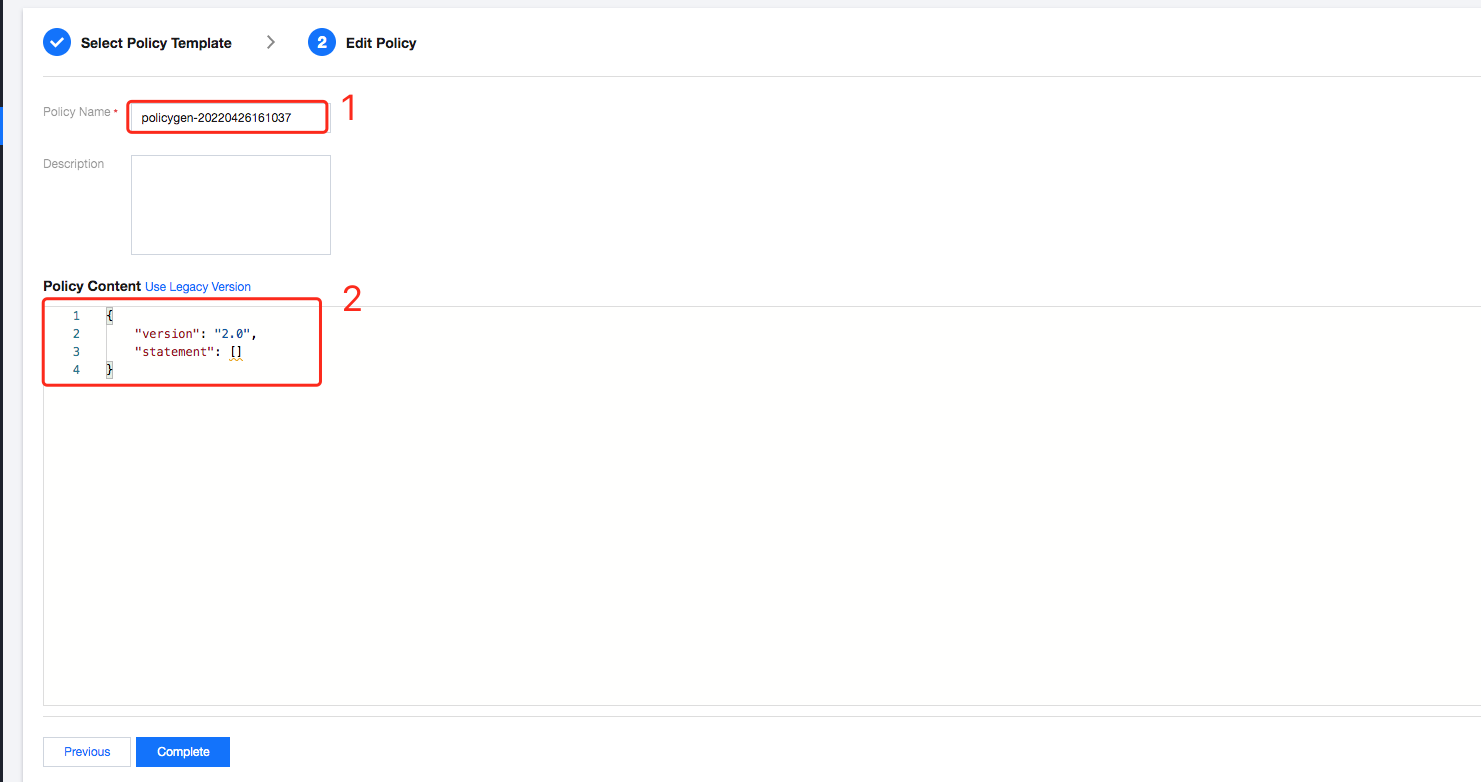
Enter an easy-to-remember policy name.
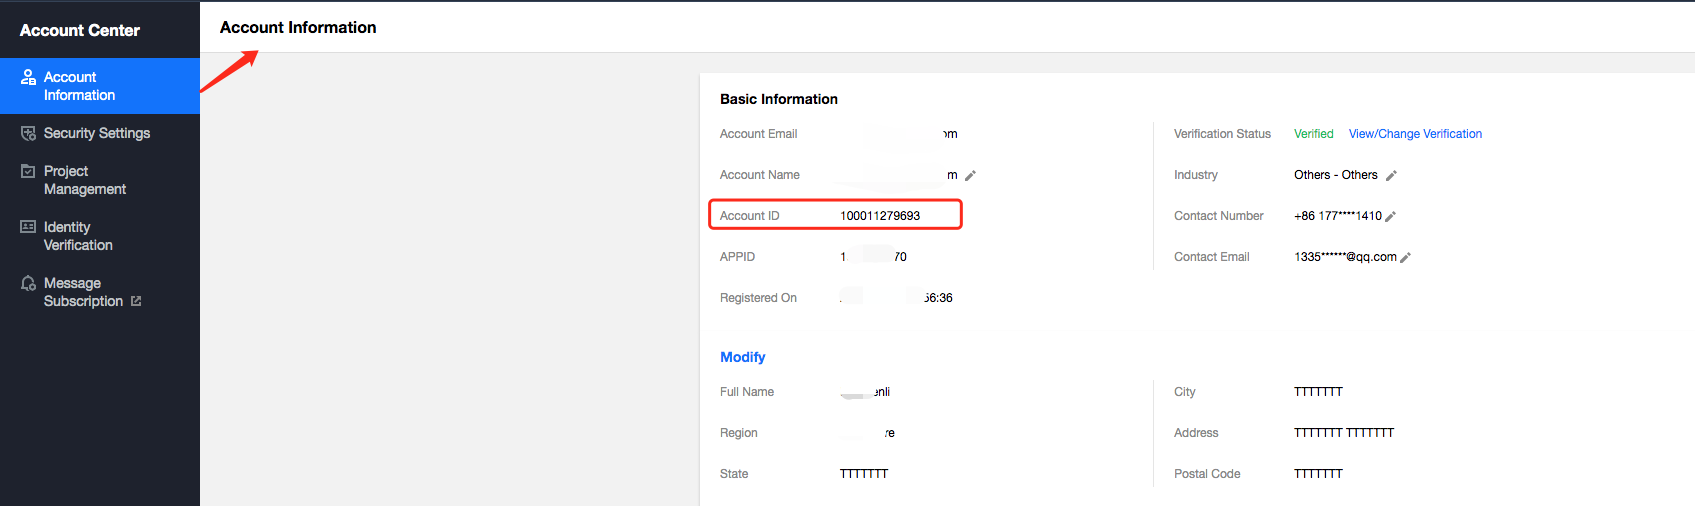
Copy the code provided in this document and replace the account ID and Access_ID in it with your own account ID and Access_ID, which can be found on the account information page under the current root account and the Tencent Push Notification Service product management page in the console respectively.
Copy the following syntax code:
{
"version":"2.0",
"statement":[
{
"action":[
"tpns:Describe*",
"tpns:CancelPush",
"tpns:DownloadPushPackage",
"tpns:CreatePush",
"tpns:UploadPushPackage"
],
"resource":[
"qcs::tpns::uin/1000000000:app/1500000000"
],
"effect":"allow"
},
{
"action":[
"tpns:Describe*"
],
"resource":[
"qcs::tpns::uin/1000000000:/*"
],
"effect":"allow"
}
]
}
Replace parameters in the syntax code as follows:
Replace the ID of the root account: enter the Account Information page under the current root account, copy the account ID, and replace 1000000000 in the syntax above with it.
Note:
If your current login account is a collaborator or sub-account, you need to get the account ID from the owner of the root account that grants you permissions.
Replace the application Access_ID: go to the Product Management page in the Tencent Push Notification Service console, copy the Access_ID of the application whose permissions you want to grant, and replace 1500000000 in the syntax above with it. If you want to grant permissions of multiple applications, you can change resource to:
"qcs::tpns::uin/1000000000:app/{Application Access_ID 1}","qcs::tpns::uin/1000000000:app/{Application Access_ID 2}"