Resource tag is a resource management tool provided by Tencent Cloud. You can assign tags to Tencent Push Notification Service applications and then manage all applications under a certain resource tag in a unified way.
Resource tag divides into tag keys and tag values. One tag key can correspond to multiple tag values. You can authorize and allocate cost by tag in the following steps.
Use Cases
For example, if both the application 1 and application 2 created in Tencent Push Notification Service are owned by the product department, you can assign the tag Department: Product Department to both of them. Then, you can:
1. View the aggregated bill for all Tencent Cloud resources under the Department: Product Department tag, i.e., the total usage of the product department in Tencent Cloud.
2. Directly grant Tom (a new employee in the product department) permissions to manage all resources under the tag Department: Product Departmen.
The following describes how to use resource tags on the Tencent Push Notification Service platform:
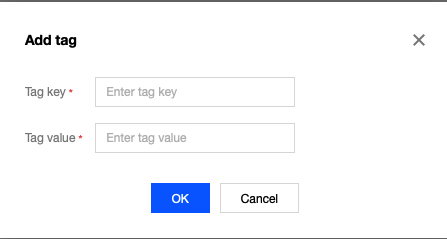
2. Click Create to access the tag creation page and enter the tag key and the corresponding tag value.
3. Click OK. You can view the creation result in the list at the bottom of the page.
Step 2. Assign tags to resources
You can assign tags to Tencent Push Notification Service applications in the Tag or Tencent Push Notification Service console.
Tag console
1. After creating a tag, click Resource Tag on the left sidebar to enter the resource tag page.
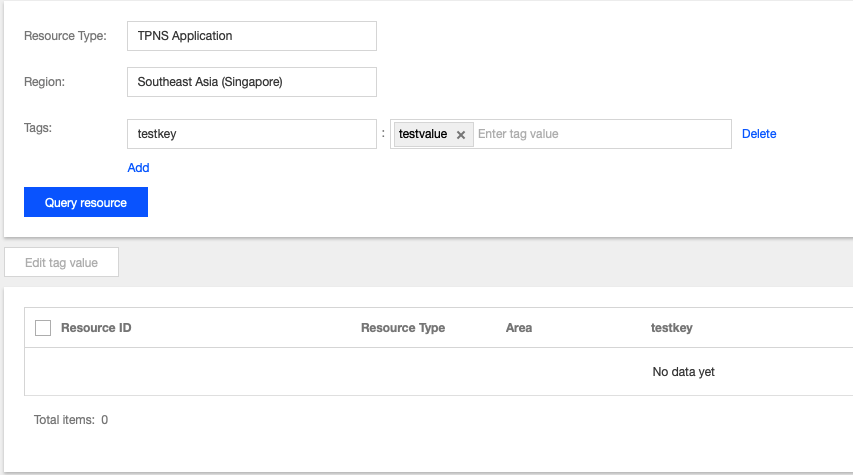
2. You can enter the tag assignment page:
Resource Type: select "TPNS application".
Region: select the "service access point" you selected when creating the product in the Tencent Push Notification Service console.
3. After selecting Resource Type and Region, click Query resource to view all the applications you have created on the Tencent Push Notification Service platform. The Resource ID corresponds to the AccessID of a Tencent Push Notification Service application.
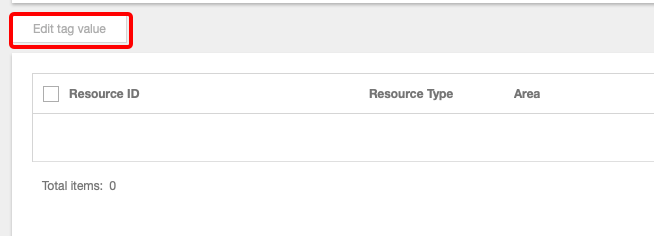
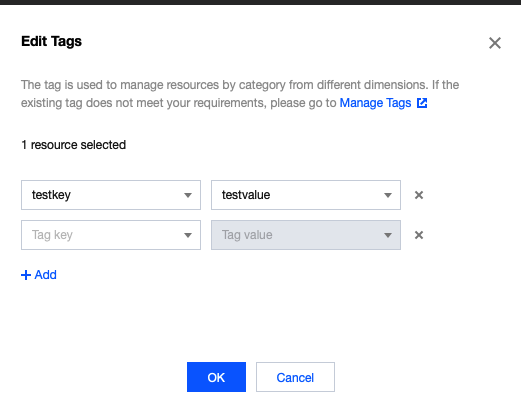
4. Select multiple applications in the list below and click Edit tag value above the list to assign the corresponding tag key-value pair to the selected applications.
Tencent Push Notification Service console
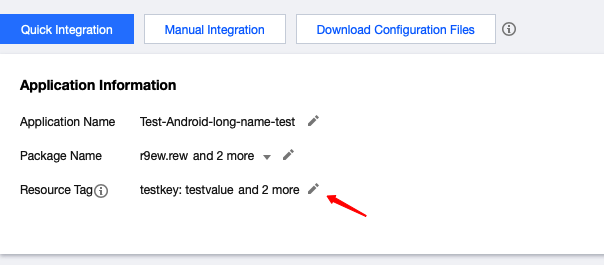
1. Log in to the Tencent Push Notification Service console, click Configuration Management > Basic Configuration on the left sidebar to view the basic configuration items of an application. (You can use the application selector at the top of the page to select the application for which to assign a tag.)
2. Click the edit icon on the right of the Tag attribute in the Application Information block.
3. Then, the tag management module will pop up, where you can assign tags to the application.
Cost Allocation by Tag
Step 1. Set a cost allocation tag
1. To use the tag feature for bills, you need to go to the Billing Center and select Bills > ** Cost Allocation Tags** on the left sidebar. The tag key set as a cost allocation tag will be displayed as a separate column of the bill. You can filter and categorize bills based on this tag key.
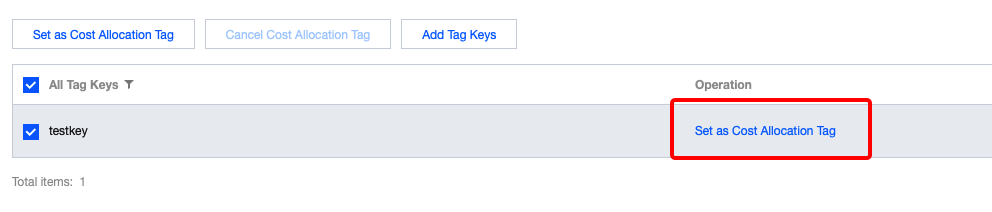
2. On this page, you can view the list of created tag keys. Select the tag key to be displayed and click Set as Cost Allocation Tag to set the tag key as a cost allocation tag in the bill.
Note:
You can set 5 cost allocation tags at most. We recommend that you select one tag key as the cost allocation tag, which makes it easier for you to manage your expenses.
Step 2. Display bills by tag
You can view and click the new option By Tag on the Bill Overview page. Then, you can select a specific tag key to view the histogram and list of relevant resources aggregated by the tag key.
Authorization by Tag
Authorization by tag means to quickly authorize resources under the same tag to a user or user group. The steps are as follows:
1. Go to the Policy page and click Create Custom Policy in the top-left corner.
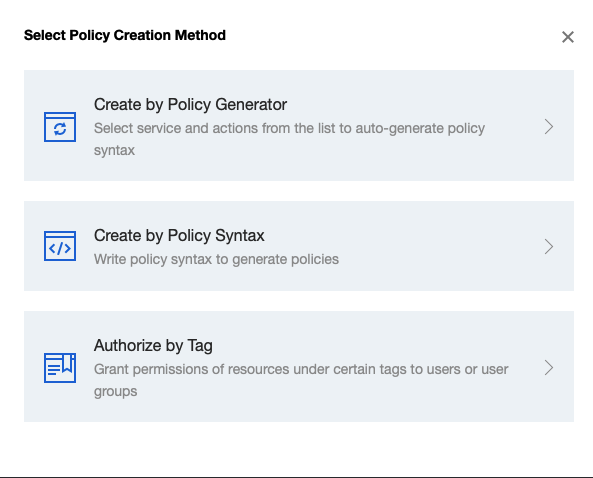
2. In the creation method selection window that pops up, click Authorize by Tag to enter the "Authorize by Tag" page.
3. On the "Authorize by Tag" page, select the following information and click Next to enter the check page.
Authorized Users/User Groups: select the users/user groups to be authorized (choose one option).
Tag Keys: select the tag key to be authorized (required).
Tag Values: select the tag value to be authorized (required).
4. Click Next, check the policy (whose name can be customized), and click Complete.
At this point, you have completed authorization by tag. For more use cases of the tag feature, please see Product Overview.