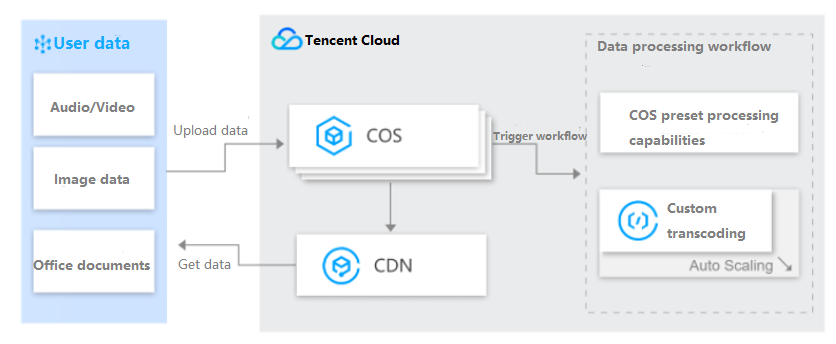
As the largest part of traffic in information dissemination, audio and video are very important in all industries, and the processing logic of audio and video in different business scenarios may be specific to the industry. Although public cloud provides a large number of video processing services for users to choose from, it still cannot fully cover users' requirements for special processes and customization. Using the workflow processing of Cloud Object Storage (COS) combined with the customization logic of Serverless Cloud Function (SCF) is an excellent choice to help users quickly create a variety of audio and video processing businesses to meet their needs.
Applications
Fast access to users' self-built transcoding clusters, compatible with their existing businesses
Formats and processing logic for special industries are supported, including movie and media.
Supports custom processing logic, meeting process customization requirements of various scenarios
Workflow for template-based batch processing, meeting common audio and video processing requirements of video websites, education, and social networking industries
Solution Strengths
Accelerated development: Eliminates the need to focus on resource Ops and component overhead, greatly reducing the complexity for constructing service structures.
Reduced overhead: When the platform is idle, no resource is executed. When a function is executed, the service fee is determined by the number of requests and the running time of the computing resource. The price advantage is obvious.
High availability and scalability: The platform automatically adjusts service resources in parallel based on requests, thus implementing near-infinite scalability and eliminating the risk of service interruption inherent in single-availability zone operations.
Directions
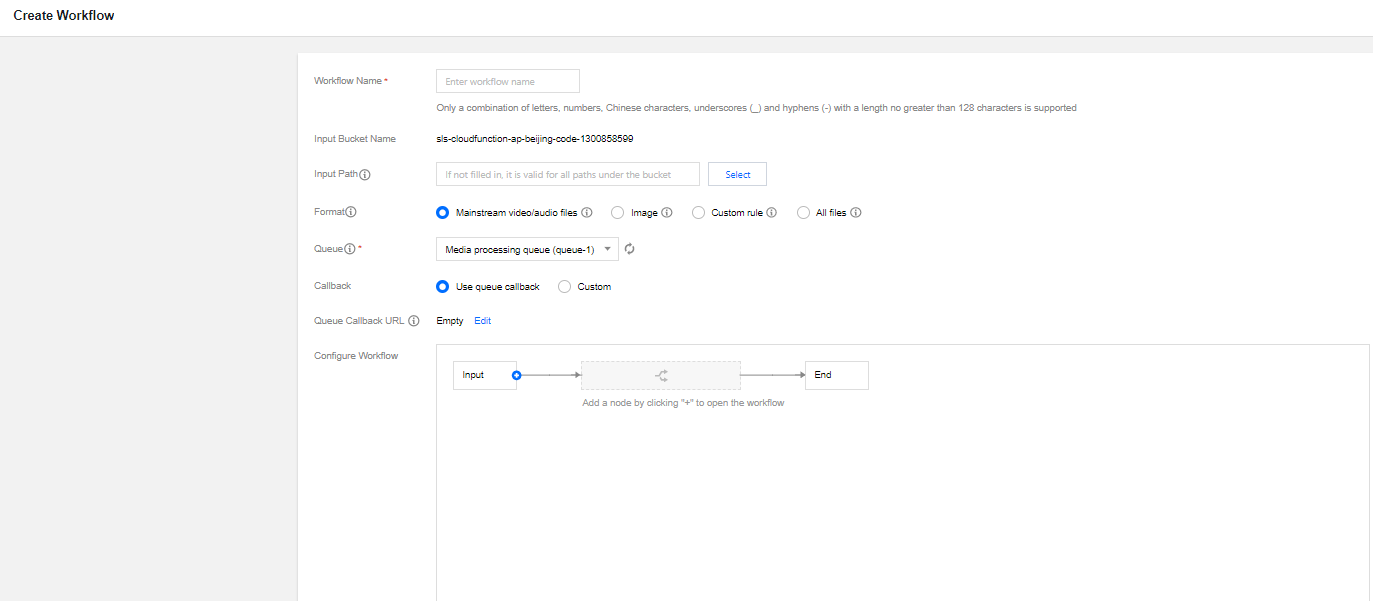
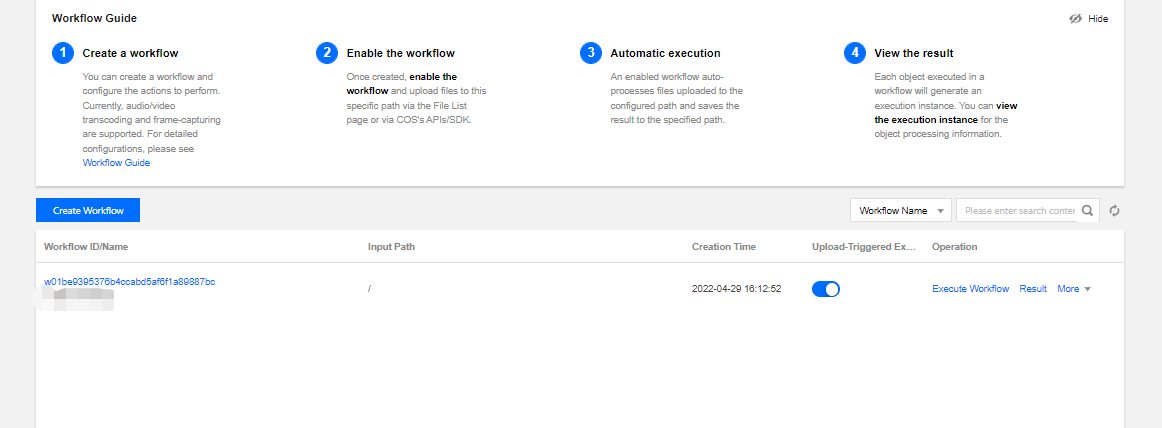
1. Log in to the COS console, create a workflow, customize the filter rule, and create a custom function node. For detailed directions, see Configuring Workflow.
2. In the function node pop-up window, click Add Function.
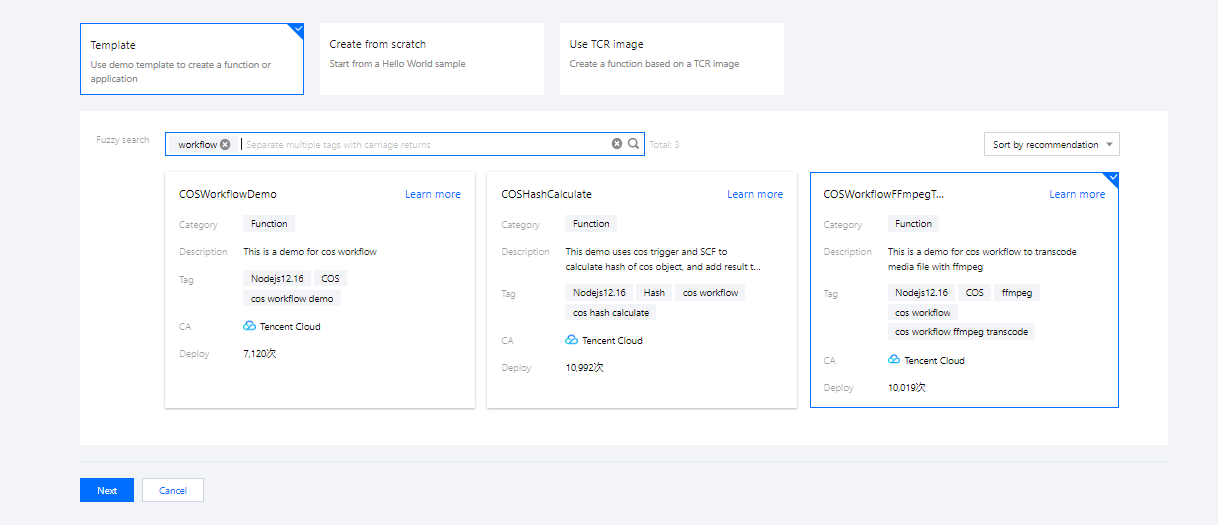
3. On the function creation page, select the template for COSWorkflowFFmpegT....
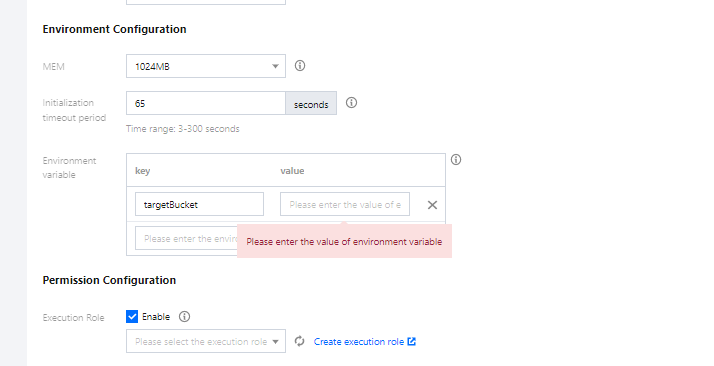
4. Based on the user's file size, configure the execution timeout duration in the basic settings and configure sufficient memory in the advanced settings.
5. Configure environment variables in Advanced configuration > Environment configuration. The function template supports the following environment variables:
targetBucket: Target bucket. Required.
targetRegion: Region of the target bucket. Required.
targetKeyTemplate: Target path template. Optional. Defaults to ${InputPath}${InputName}_transcode.${ext}.
localTmpPath: Temporary save path. When CFS is bound, you can change the temporary path. Optional. Defaults to /tmp.
6. Enable permission configuration and bind a role that has the read/write permission of the current bucket. To create an execution role, see Role and Authorization.
7. Click Complete.
8. Go back to the previous workflow page, select the custom transcoding function created just now, and save the workflow. Start the workflow on the workflow list page.
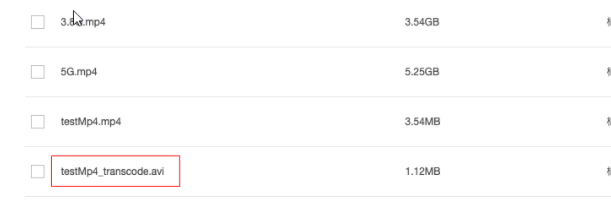
9. Upload the file. After the workflow processing is successful, you can see that the uploaded video is successfully transcoded and is saved as a new file.