Combined Application of WAF and Anti-DDoS Pro
Download
Focus Mode
Font Size
Scenarios
Web Application Firewall (WAF) is able to defeat CC attacks. WAF can work with Anti-DDoS Pro to provide an all-out protection against non-HTTP requests.
With DDoS protection capability of hundreds of Gbps, Anti-DDoS Pro can easily deal with DDoS attacks and ensure the availability of your business.
WAF can block web attacks in real time to ensure the security of your business data and information.
Directions
Step 1. Configure WAF
1. Log in to the WAF Console and select Instance Management -> Instance List on the left sidebar to enter the instance list.
2. On the page, select an instance, and click Domain Name Connection to add a domain name.

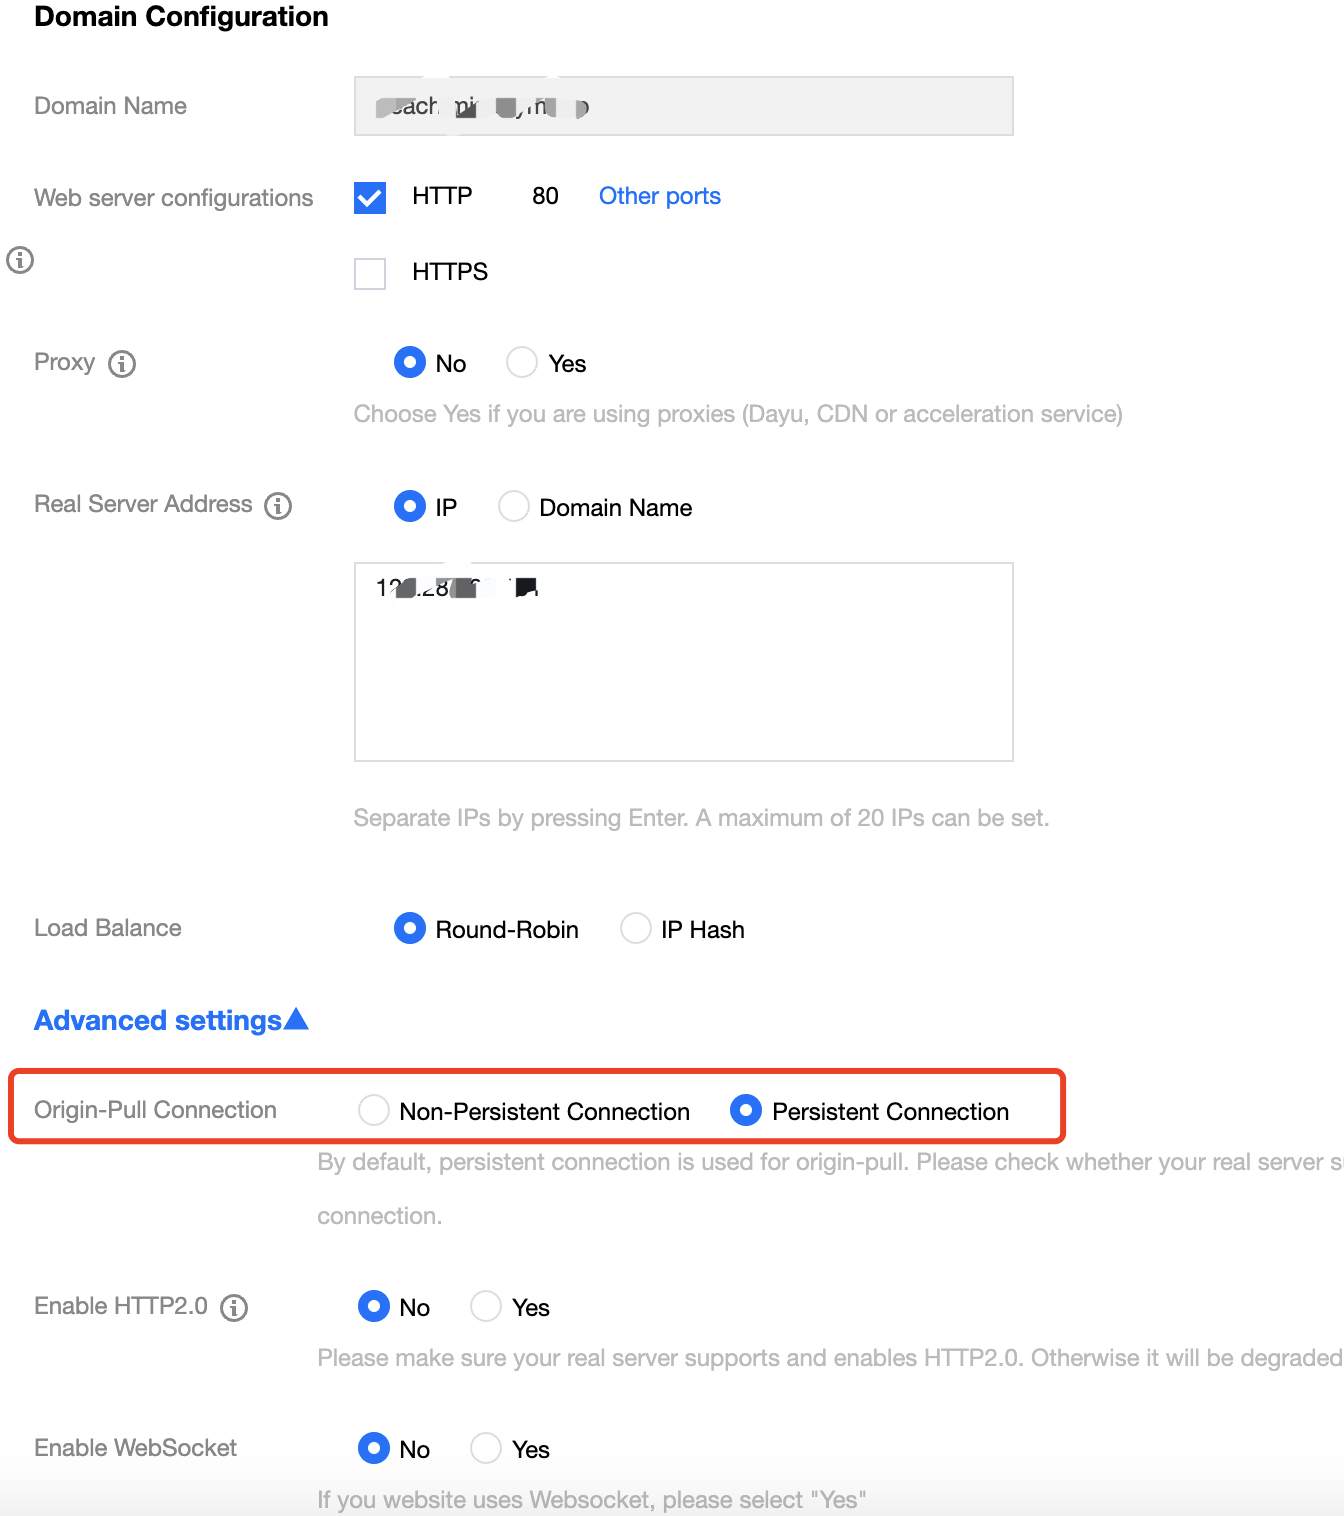
3. On the domain name connection page, click Add Domain Name and configure the following parameters as needed:
Domain Name Configuration
Domain Name: enter the domain name to be protected.
Web Server Configurations: select a protocol type and port as needed.
Enable HTTP 2.0: select according to your situation.
Server Port: select according to your situation.
Origin Server Address: enter the real IP address of the origin server of the website to be protected, which is the public IP of the origin server.
Other Configurations
Proxy: select "No". If WAF works with Anti-DDoS Advanced, select "Yes".
Enable WebSocket and Load Balancer: select according to your situation.
Note:
If the real server has multiple intermediate IPs, choose a load balancing strategy as needed. The round-robin strategy will distribute requests of the source IP across real servers in order, while the IP hash strategy will forward requests of the source IP to the same real server. Round-robin is used by default.
4. After the configuration, click Save.
Step 2. Configure Anti-DDoS Pro
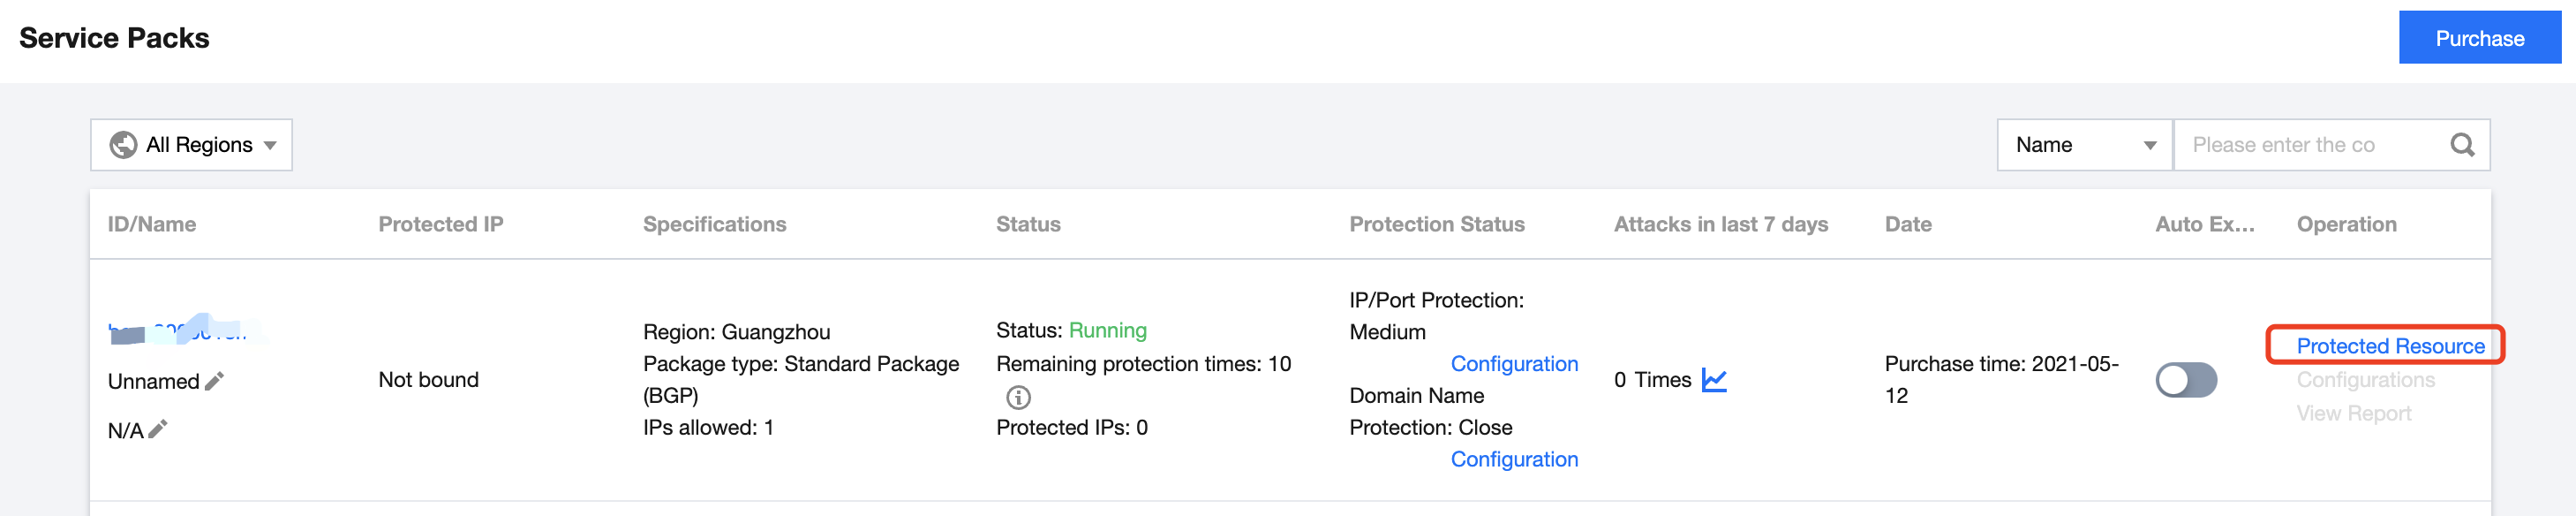
1. Log in to Anti-DDoS Pro Console and select Anti-DDoS Pro > Service Packs on the left sidebar.
2. Select a region of the target Anti-DDoS Pro instance and click Protected Resource on the right of the instance.
3. Select "Web Application Firewall" as the resource type, and set the IP address of the WAF instance.
Note:
For a CLB WAF instance, select "Load Balancing" as the resource type, and set the public IP address of the instance.
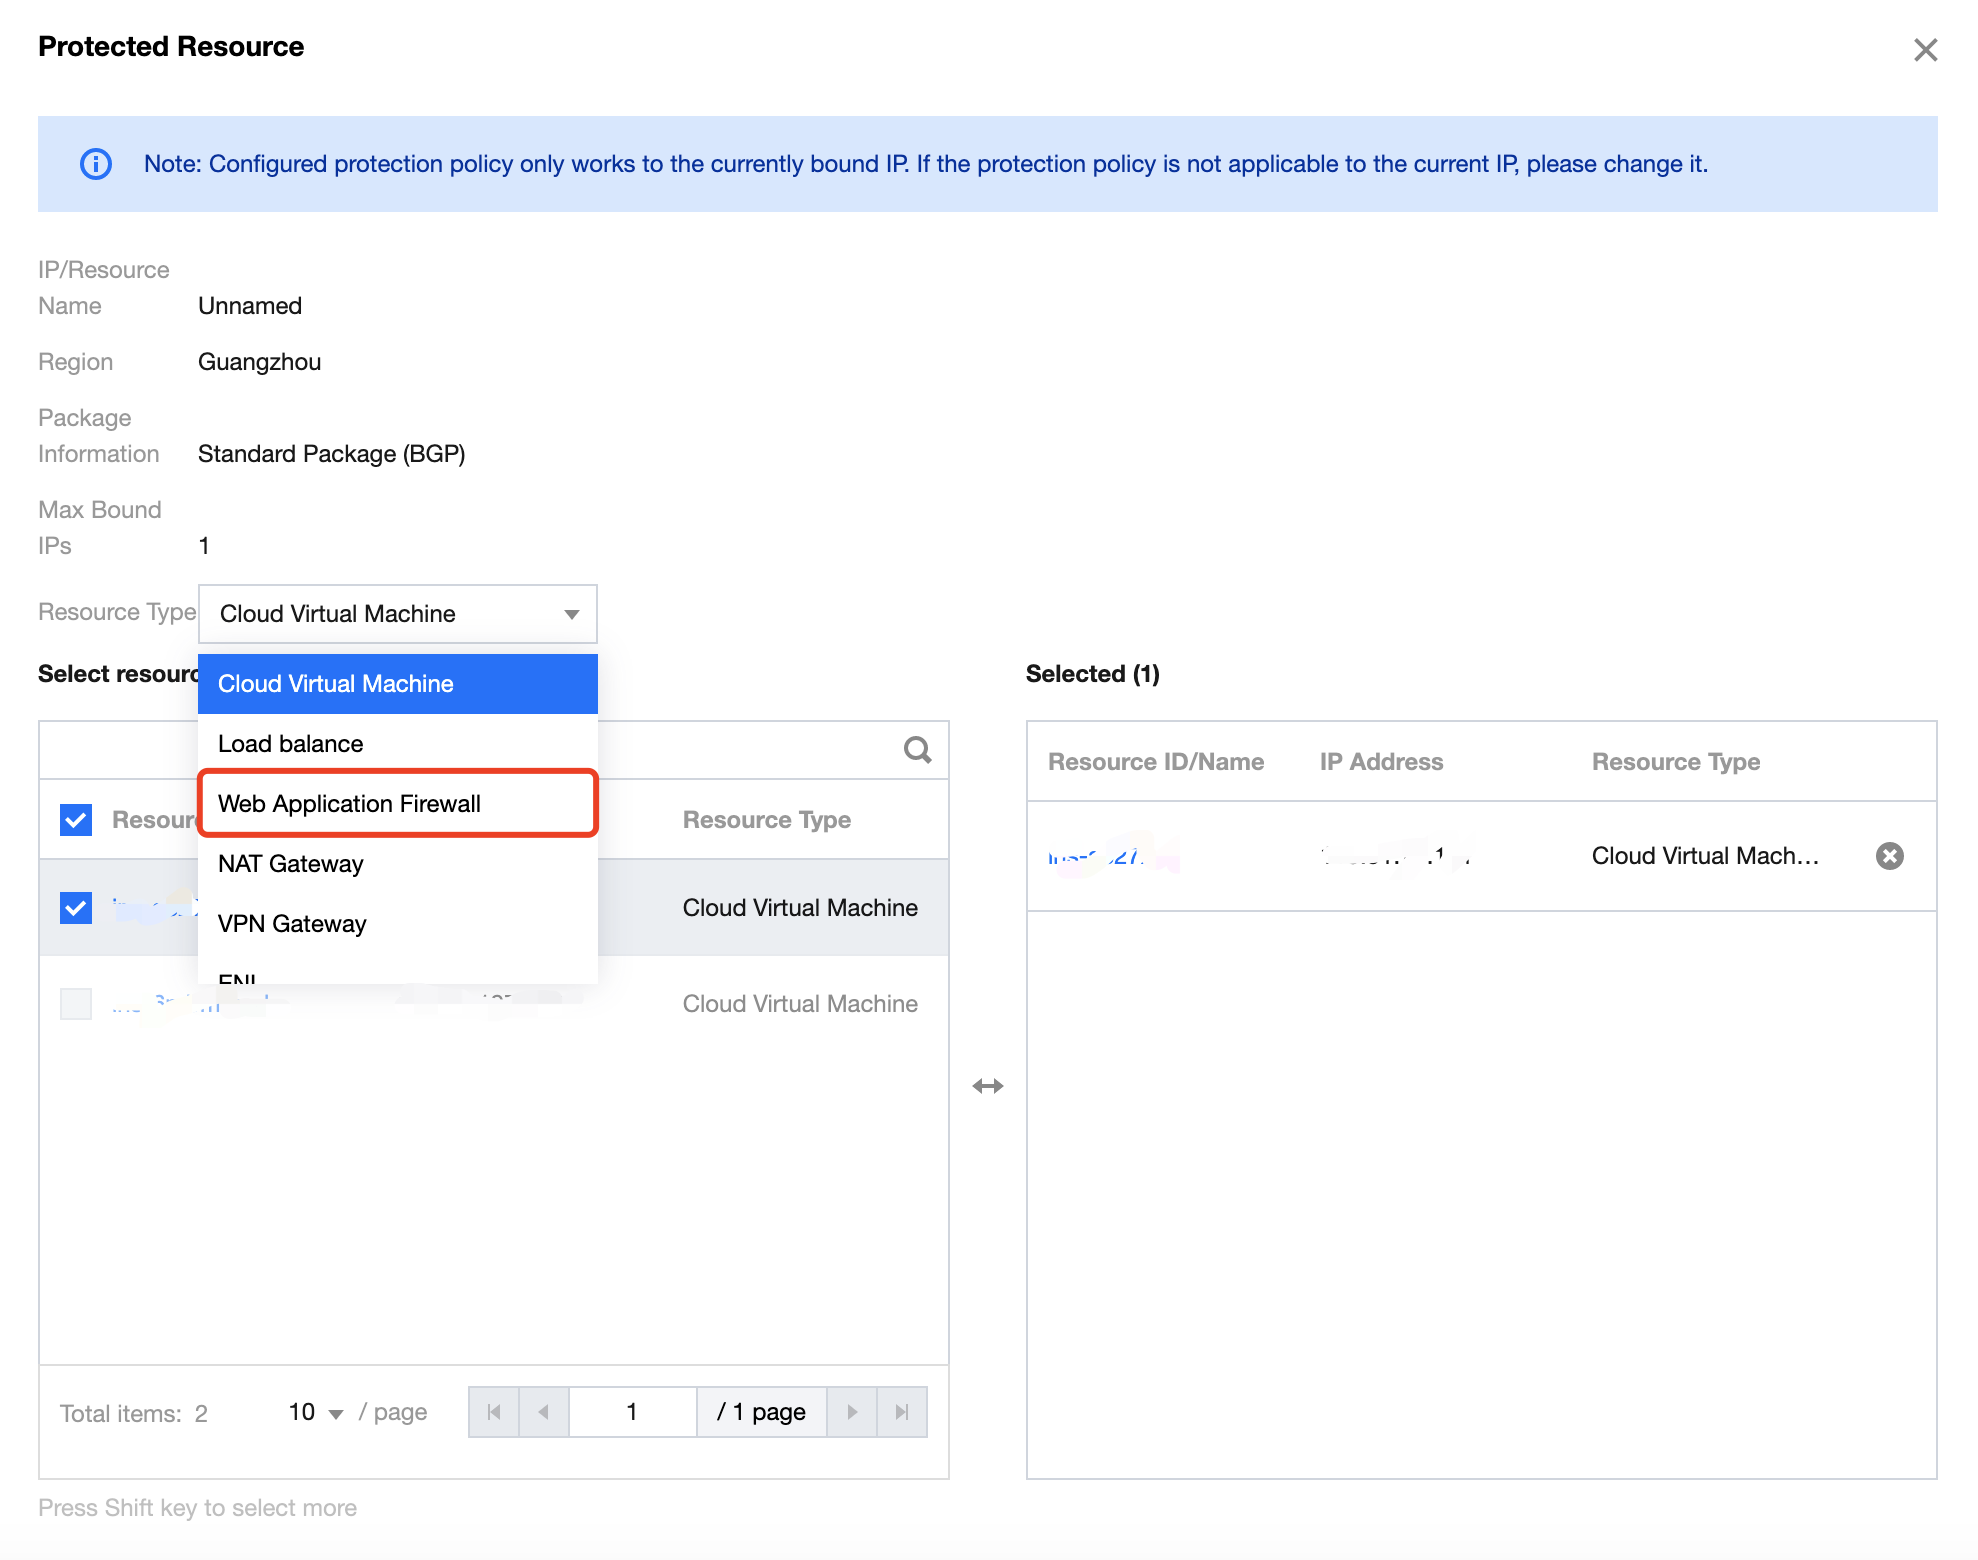
4. After you complete the configuration, click OK.
Help and Support
Was this page helpful?
You can also Contact sales or Submit a Ticket for help.
Help us improve! Rate your documentation experience in 5 mins.
Feedback