Overview
With over 20 years of Tencent's expertise in network and audio/video technologies, Tencent Real-Time Communication (TRTC) offers solutions for group audio/video calls and low-latency interactive live streaming. With TRTC, you can quickly develop cost-effective, low-latency, and high-quality interactive audio/video services.
Group audio/video call
Built on Tencent Cloud’s Direct Connect network, this solution allows global connection and offers client SDKs and cloud-based APIs for both mobile and desktop platforms. Users can also easily access TRTC services on webpages.
Low-latency interactive live streaming
This solution leverages Tencent Cloud's industry-leading network and audio/video technologies as well as high-quality node resources to help you build interactive live streaming services with minimal lag and latency below 1 second, taking live streaming into the era of CDN 2.0.
Product Architecture
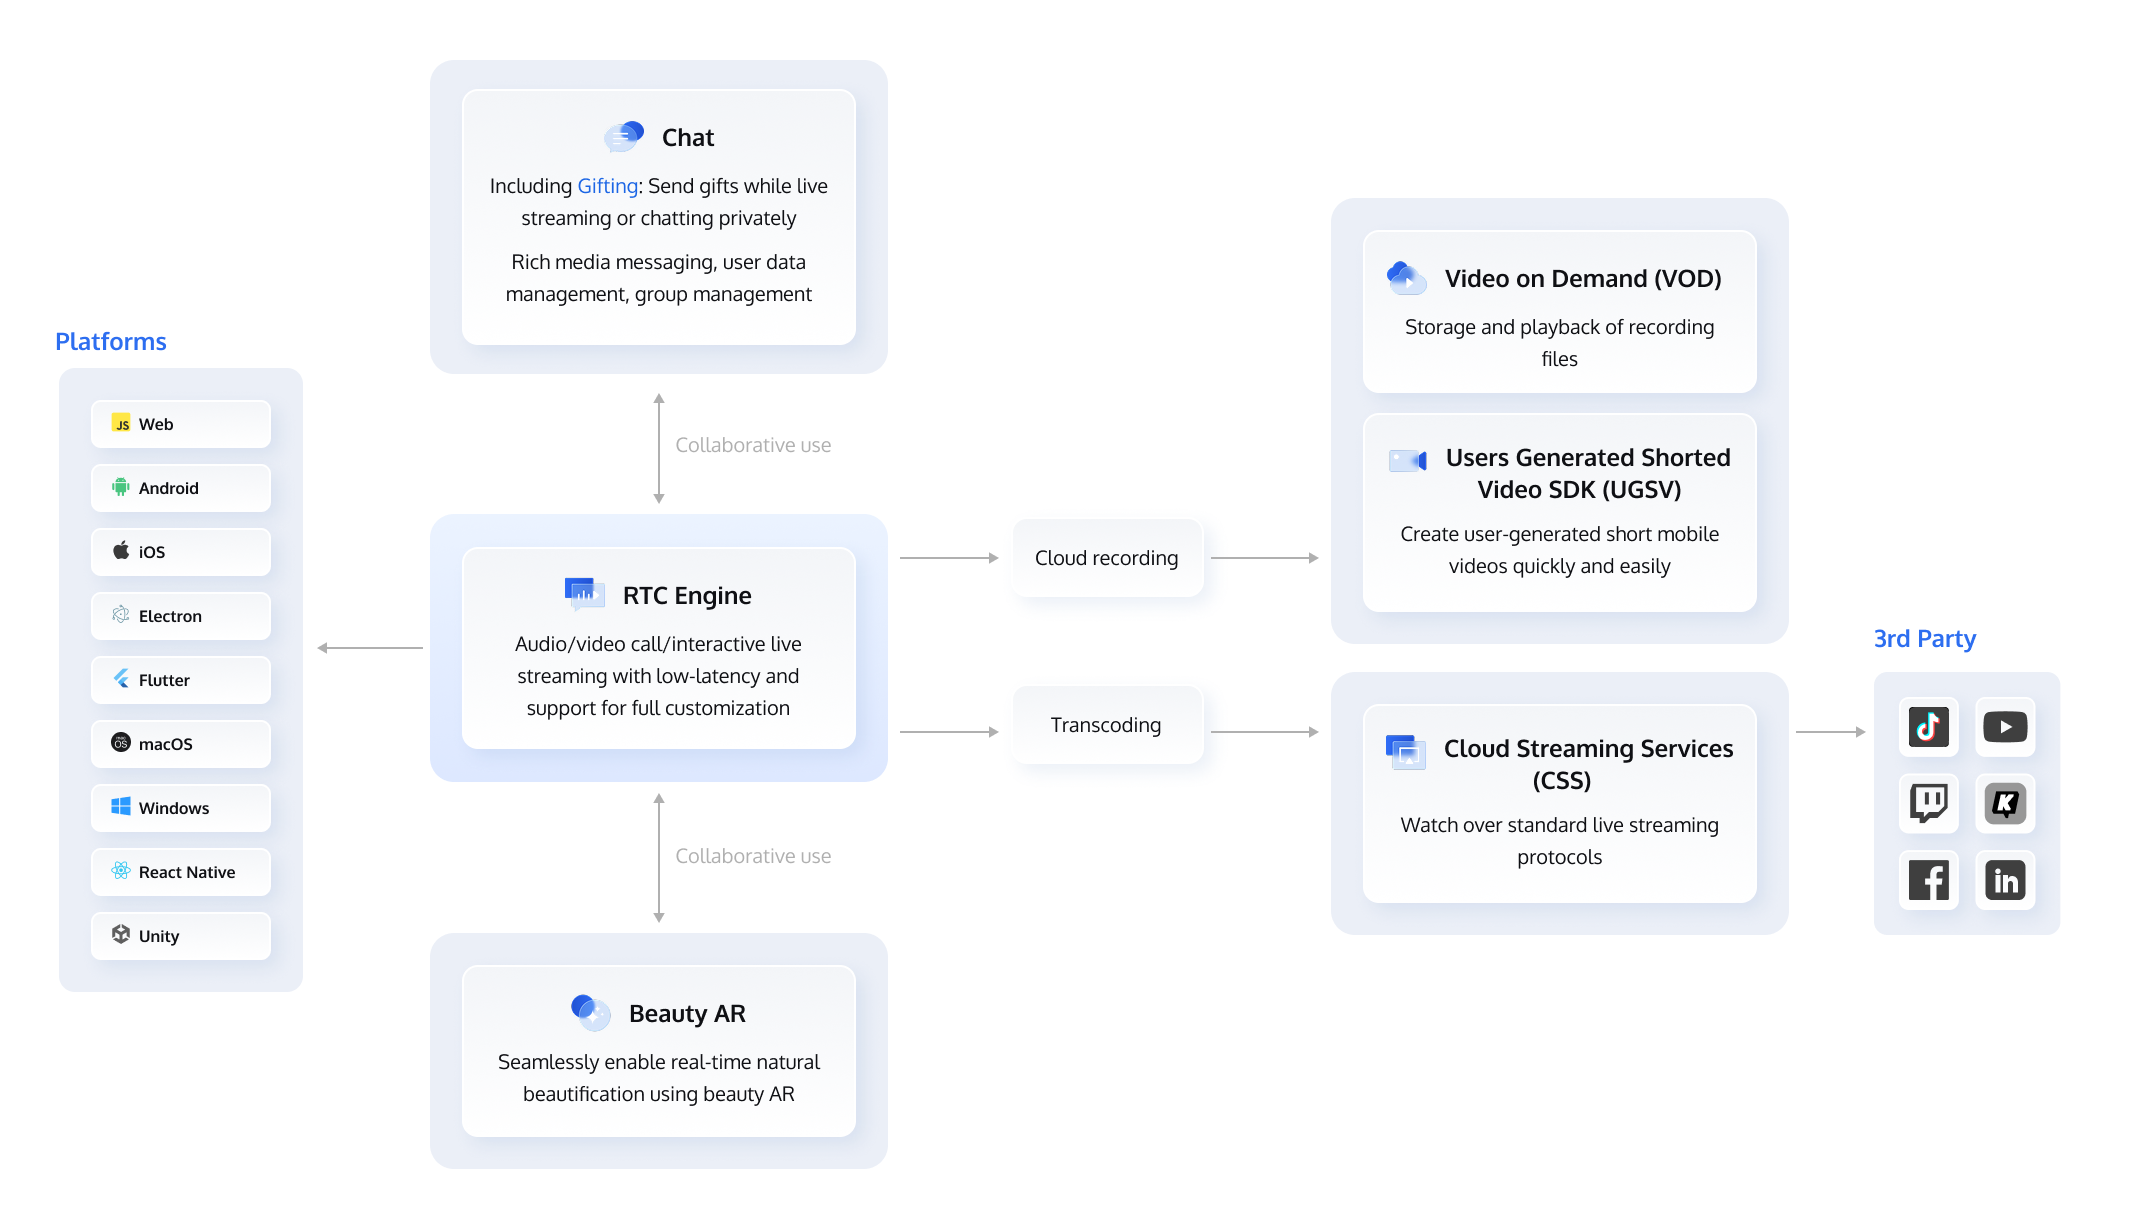
TRTC offers cross-platform solutions for audio/video calls and low-latency interactive live streaming. With SDKs for mini programs, web, Android, iOS, Electron, Windows, macOS, and other platforms, you can quickly integrate TRTC services into your projects and connect to the TRTC backend. You can also combine TRTC with other Tencent Cloud products such as Instant Messaging (IM), Cloud Streaming Services (CSS), and Video on Demand (VOD) to explore more use cases. The figure below shows how TRTC works together with other products.
Supported Platforms
TRTC supports a wide range of platforms. Below is a list of the supported platforms and the development environments required.
Platform | Environment Requirements |
iOS | iPhone and iPad on iOS 9.0 or above. Xcode 9.0+ A valid developer signature for your project. |
Android | Android Studio 3.5+ Android 4.1 (SDK API Level 16) or above. |
Windows | Windows 7 or above. Visual Studio 2010 or above (2015 is recommended). .Net Framework 4.0 or above. |
macOS | Xcode 9.0+ Mac on macOS X10.10+. A valid developer signature for your project. |
Web | Desktop Chrome 56+, Edge 80+, Firefox 56+, Safari 11+. Mobile Android Chrome 56+, iOS Safari 11+. Fore more, please refer to Supported Platforms. |
Electron | Windows 7 or above; macOS X10.10 or above. Electron 4.0.0 or above (the latest Electron SDK is recommended). |
Flutter | iOS: iPhone and iPad on iOS 9.0 or above. Xcode 9.0+ A valid developer signature for your project. Android: Android Studio 3.5+. Android 4.1 (SDK API Level 16) or above. |
React Native | iOS: Xcode 11.0 or later. OS X 10.11 or later. A valid developer signature for your project. Android: Android Studio 3.5 or later. Devices with Android 4.1 or later. |
Help and Support
Was this page helpful?
You can also Contact sales or Submit a Ticket for help.
Help us improve! Rate your documentation experience in 5 mins.
Feedback