Tencent Kubernetes Engine (TKE) allows you to create persistent volumes (PVs) and persistent volume claims (PVCs) and use existing PVCs when creating workloads and adding volumes so that you can manage Cloud Block Storage (CBS) disks by using the PVs and PVCs.
Note:
CBS disks cannot be mounted across availability zones. If a pod with a CBS-type PV mounted is migrated to another availability zone, the mounting will fail.
To manually create a PV of the CBS type, you need to bind an available StorageClass of the same type. For more information, see Creating StorageClass.
Creating a PV manually
Note:
This approach is applicable to scenarios where there are already existing cloud disks used in the cluster.
1. Log in to the TKE console and click Cluster in the left sidebar.
2. On the Cluster Management page, click the ID of the target cluster to go to the cluster details page.
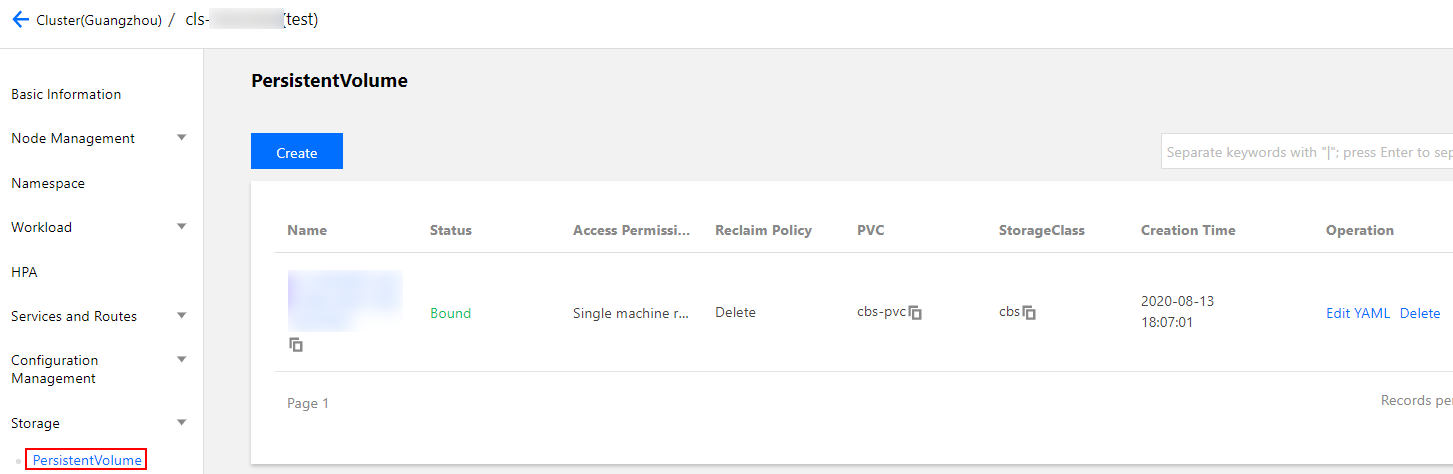
3. Choose Storage > PersistentVolume in the left sidebar to go to the PersistentVolume page, as shown in the following figure.
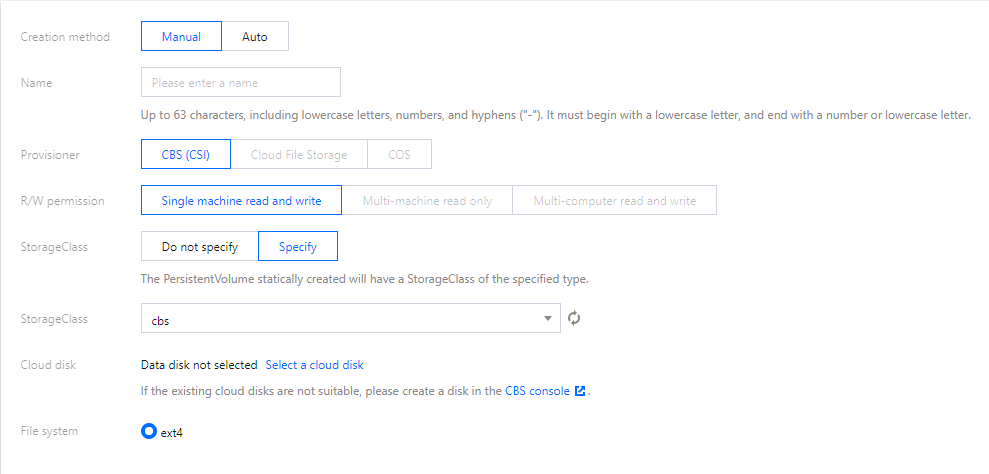
4. Click Create to go to the Create PersistentVolume page, where you can set PV parameters as required, as shown in the following figure.
The main parameters are described as follows:
Creation Method: Select Manual.
Name: Set a custom name. This document uses cbs-pv as an example.
Provisioner: Select Cloud Block Storage.
R/W permission: CBS disks only support Single machine read and write.
StorageClass: Select a StorageClass as required. This document uses cbs-test, which you created in the step of Creating a StorageClass, as an example.
Note:
The PVC and PV will be bound to the same StorageClass.
If you do not specify a StorageClass, the value of StorageClass for the corresponding PV is empty, and the value of the storageClassName field in the corresponding YAML file is a null string.
Cloud Disk: Select a created cloud disk.
File System: The default value is ext4.
5. Click Create a PersistentVolume to complete the creation.
Creating a PVC
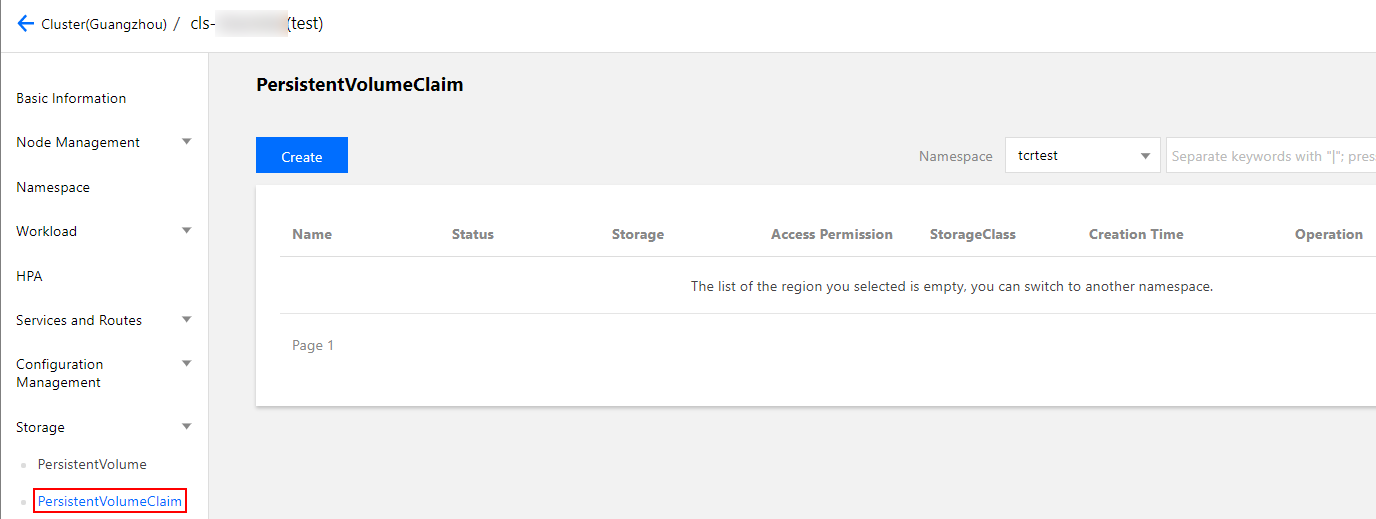
1. On the cluster details page, choose Storage > PersistentVolumeClaim in the left sidebar to go to the PersistentVolumeClaim page, as shown in the following figure.
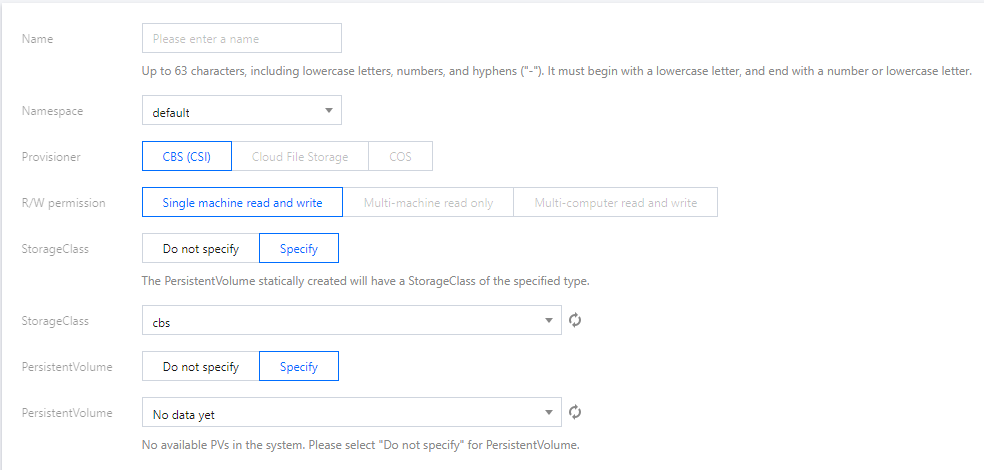
2. Click Create to go to the Create PersistentVolumeClaim page, where you can set PVC parameters as required, as shown in the following figure.
The main parameters are described as follows:
Name: Set a custom name. This document uses cbs-pvc as an example.
Namespace: Select default.
Provisioner: Select Cloud Block Storage.
R/W permission: CBS disks only support Single machine read and write.
StorageClass: Select a StorageClass as required. This document uses cbs-test, which you created in the step of Creating a StorageClass, as an example.
Note:
The PVC and PV will be bound to the same StorageClass.
If you do not specify a StorageClass, the value of StorageClass for the corresponding PVC is empty, and the value of the storageClassName field in the corresponding YAML file is a null string.
PersistVolume: specify a PersistentVolume as required. This document uses use the cbs-pv created in the step of Creating a PV manually as an example.
Note:
Only PVs in the specified StorageClass and in the Available or Released statuses can be selected. If no PV in the current cluster meets the conditions, select Do not specify in Specify PersistVolume.
If the status of the selected PV is Released, you need to manually delete the claimRef field in the corresponding YAML configuration file of the PV so that the PV can be successfully bound with the PVC. For more information, see Rules for Binding PVs and PVCs.
3. Click Create a PersistentVolumeClaim to complete the creation.
Creating a workload to use a PVC volume
Note:
This step creates a Deployment workload as an example.
1. On the Cluster Management page, click the ID of the target cluster to go to the Deployment page of the cluster.
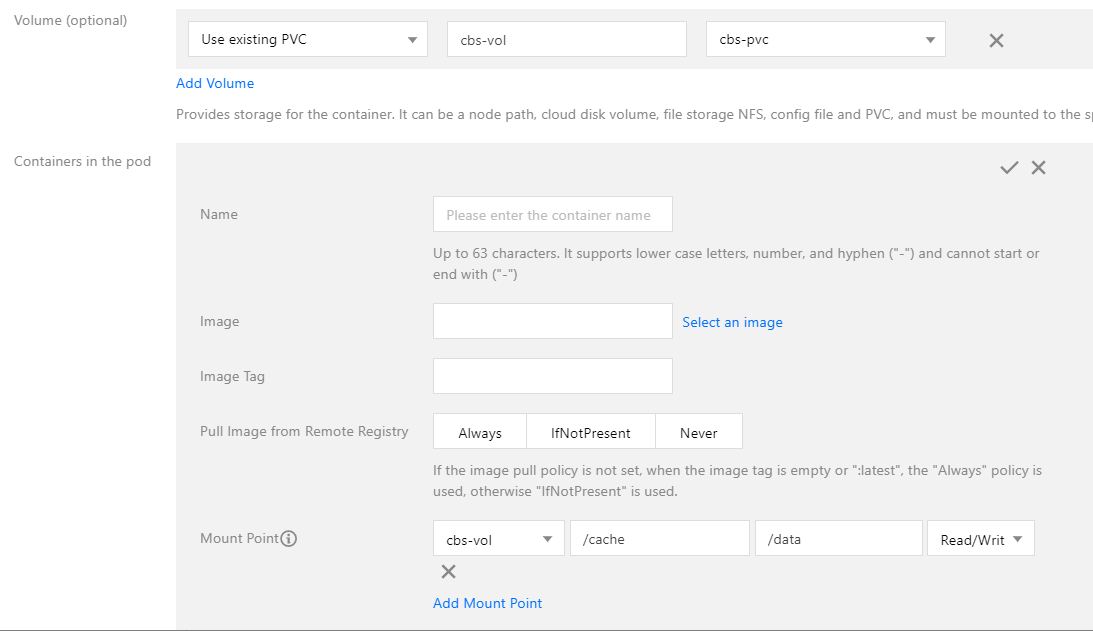
2. Click Create to go to the Create Workload page. For more information, see Creating a Deployment. Then, mount a volume as required, as shown in the following figure.
Volume (optional):
Mount method: Select Use existing PVC.
Volume name: Set a custom name. This document uses cbs-vol as an example.
Select PVC: Select cbs-pvc, which you created in the step of Creating a PVC.
Containers in the Pod: Click Add mount point to set a mount point.
Volume: Select the volume cbs-vol that you added in this step.
Target path: Enter a destination path. This document uses /cache as an example.
Sub-path: Mount only a sub-path or a single file in the selected volume, such as /data or /test.txt.
3. Click Create Workload to complete the process.
Note:
If you use the PVC mount method of CBS, the volume can be mounted to only one node.
Kubectl operation directions
You can use the following sample YAML file to perform creation by using Kubectl.
(Optional) Creating a PV
You can create a PV by using an existing CBS disk, or directly create a PVC. The system automatically creates the PV. The sample YAML file is as follows:
apiVersion: v1
kind: PersistentVolume
metadata:
name: cbs-test
spec:
accessModes:
- ReadWriteOnce
capacity:
storage: 10Gi
csi:
driver: com.tencent.cloud.csi.cbs
fsType: ext4
readOnly:false
volumeHandle: disk-xxx # Specify an existing CBS ID
storageClassName: cbs
Creating a PVC
If you did not create a PV, the system automatically creates the corresponding PV when creating a PVC. The sample YAML file is as follows:
kind: PersistentVolumeClaim
apiVersion: v1
metadata:
name: nginx-pv-claim
spec:
storageClassName: cbs
accessModes:
- ReadWriteOnce
resources:
requests:
storage: 10Gi
The capacity of the cloud disk must be a multiple of 10.
The minimum capacity of a premium cloud disk is 10 GB, and the minimum capacity of an SSD cloud disk or enhanced SSD cloud disk is 20 GB. For details, see the Creating Cloud Disks.
Using a PVC
You can create a workload to use a PVC volume. The sample YAML file is as follows: