Tencent Kubernetes Engine (TKE) allows you to create PersistentVolumes (PVs) and PersistentVolumeClaims (PVCs) and use existing PVCs when creating workloads and adding volumes so that you can manage a file system by using the PVs and PVCs.
Note:
Different regions support different file storage capabilities. You need to select a region based on your requirement. For more information, see Storage Class and Performance Specification.
Preparations
Installing the CFS add-on
Note:
If your cluster has been installed with the CFS-CSI add-on, skip this step.
2. In the left sidebar, click Cluster to go to the Cluster Management page.
3. Click the ID of the cluster for which you want to create an add-on to go to the Cluster Details page.
4. Select Add-On Management > Create to go to Create an Add-On page.
5. On the Create Add-on page, select CFS and click Done.
Creating a StorageClass in the console
To statically create a PV of the file storage type, you need to bind an available StorageClass of the same type. For more information, see Creating a StorageClass via the Console.
Creating a CFS file system
1. Log in to the CFS console and go to the File System page.
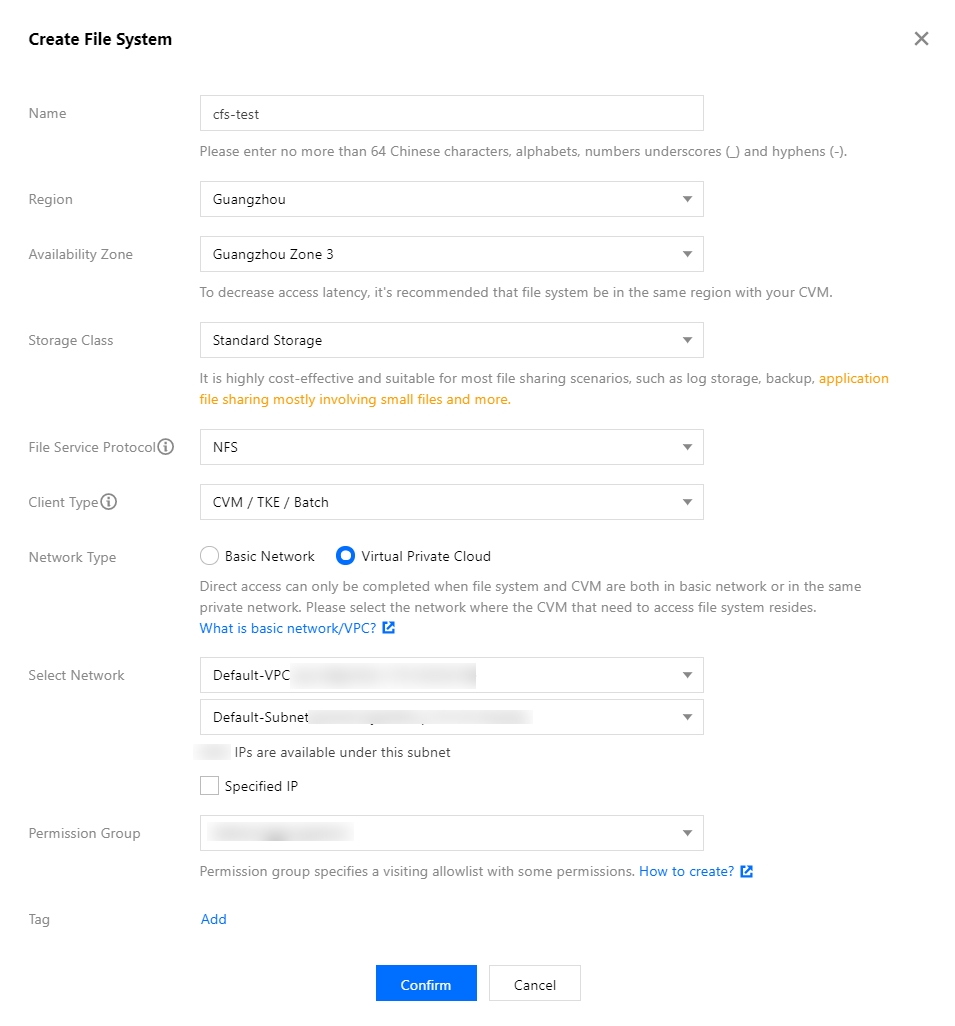
2. Click Create. Select the file system type first: Standard Storage or Performance Storage. The supported types vary by AZ. For more information, see Available Regions. Then, configure the detailed settings:
Name: set a custom name. This document uses cfs-test as an example.
Region: select a region in which to create the file system and ensure that the file system and the cluster are in the same region.
Availability Zone: select an availability zone in which to create the file system.
File Service Protocol: select a protocol type for the file system. Valid values include NFS and CIFS/SMB.
NFS: better suited to Linux and Unix clients.
CIFS/SMB: better suited to Windows clients.
Data Source: you can create a file system from a snapshot.
Select Network: select a network to ensure that the file system and the cluster that uses the file system are in the same VPC.
Permission Group: each file system must be bound to a permission group. The permission group specifies an allowlist that can access the file system and lists the read and write permissions.
Tag:
If you have a tag, you can add it to the file system.
If you do not have a tag, log in to the Tag console to create the required tag, and then bind the tag to the file system. You can also add a tag to the file system after the file system is created.
1. Click Buy Now and wait for the creation to succeed.
Getting the file system subdirectory
1. On the File System page, click the ID of the file system for which you want to obtain the destination subdirectory. The details page of the file system appears.
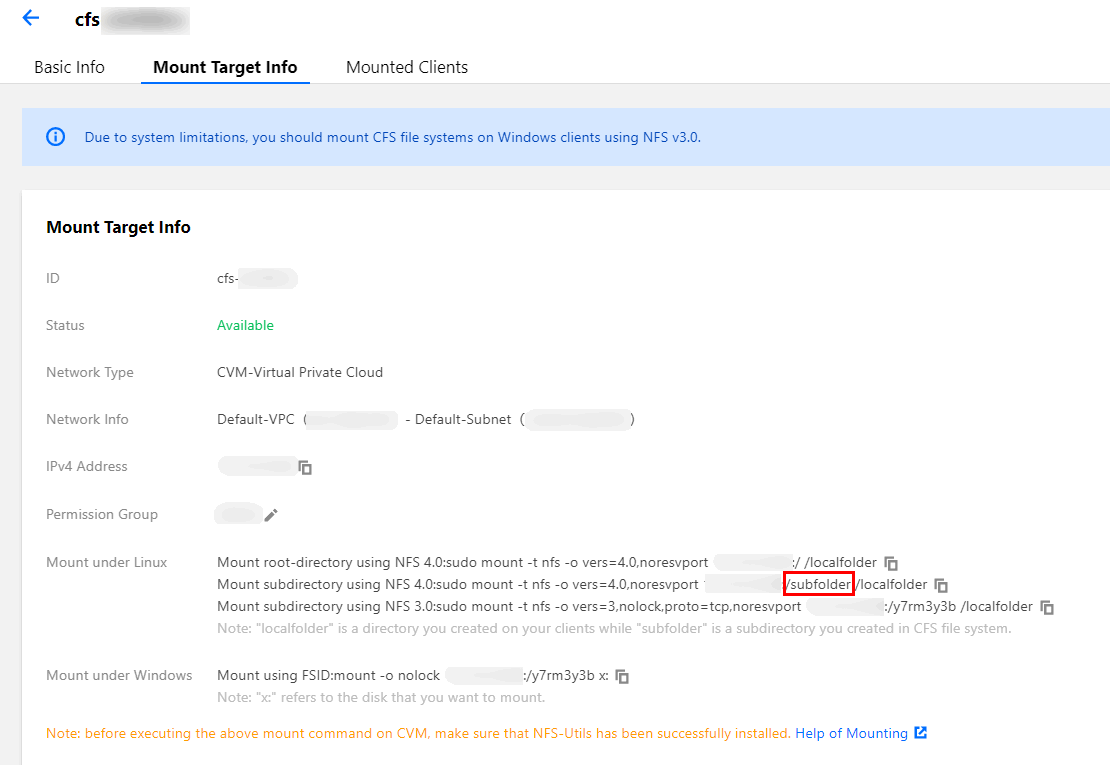
2. Select the Mount Point Info tab and obtain the subdirectory /subfolder of this file system from Mount to Linux as shown below:
localfolder: indicates the local directory that you created.
subfolder: it indicates a subdirectory that you created in the CFS file system. The subdirectory of the file system is /subfolder.
Getting the file system FSID
Note:
For better stability, when using the NFSv3 protocol to mount, you need to specify the FSID of the file system to be mounted.
1. In the CFS console, click the ID of the file system for which you want to obtain the FSID. The details page of the file system appears.
2. Select the Mount Target Info tab and get the file system FSID next to Mount to Linux such as a43qadkl as shown below:
Directions
Creating a PV statically
Note:
A statically created PV is suitable for scenarios where file storage already contains data and is used in a cluster.
1. Log in to the TKE console and select Clusters on the left sidebar.
2. On the Cluster Management page, select the ID of the cluster where the PV needs to be created. The cluster management page of the PV to create appears.
3. Choose Storage > PersistentVolume in the left sidebar to go to the PersistentVolume page, as shown in the following figure.
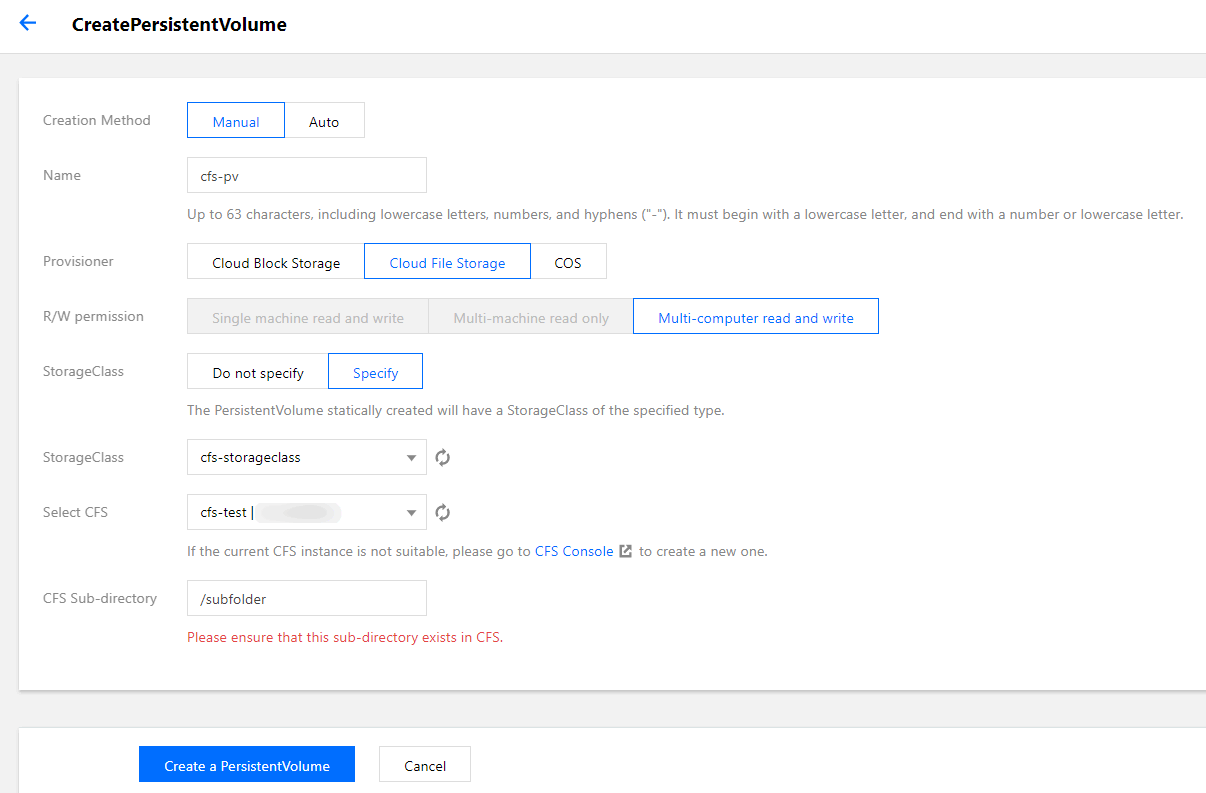
4. Click Create to go to the Create PersistentVolume page, where you can set PV parameters as required as shown below:
Creation Method: select Manual.
Name: set a custom name. This document uses cfs-pv as an example.
Provisioner: select Cloud File Storage.
R/W permission: CFS only supports multi-server read and write.
StorageClass: select a StorageClass as required. This document uses cfs-storageclass, which you created in the step of Creating a StorageClass via the console, as an example.
Note:
The PVC and PV will be bound to the same StorageClass.
If you do not specify a StorageClass, the value of StorageClass for the corresponding PV is empty, and the value of the storageClassName field in the corresponding YAML file is a null string.
Select CFS: ensure that the CFS and the current cluster are in the same VPC. This document uses cfs-test, which you created in the step of Creating CFS, as an example.
CFS Subfolder: enter the file system subdirectory that you obtained in the step of Obtaining the file system subdirectory. This document uses /subfolder as an example.
5. Click Create PersistentVolume to complete the creation.
Creating a PVC
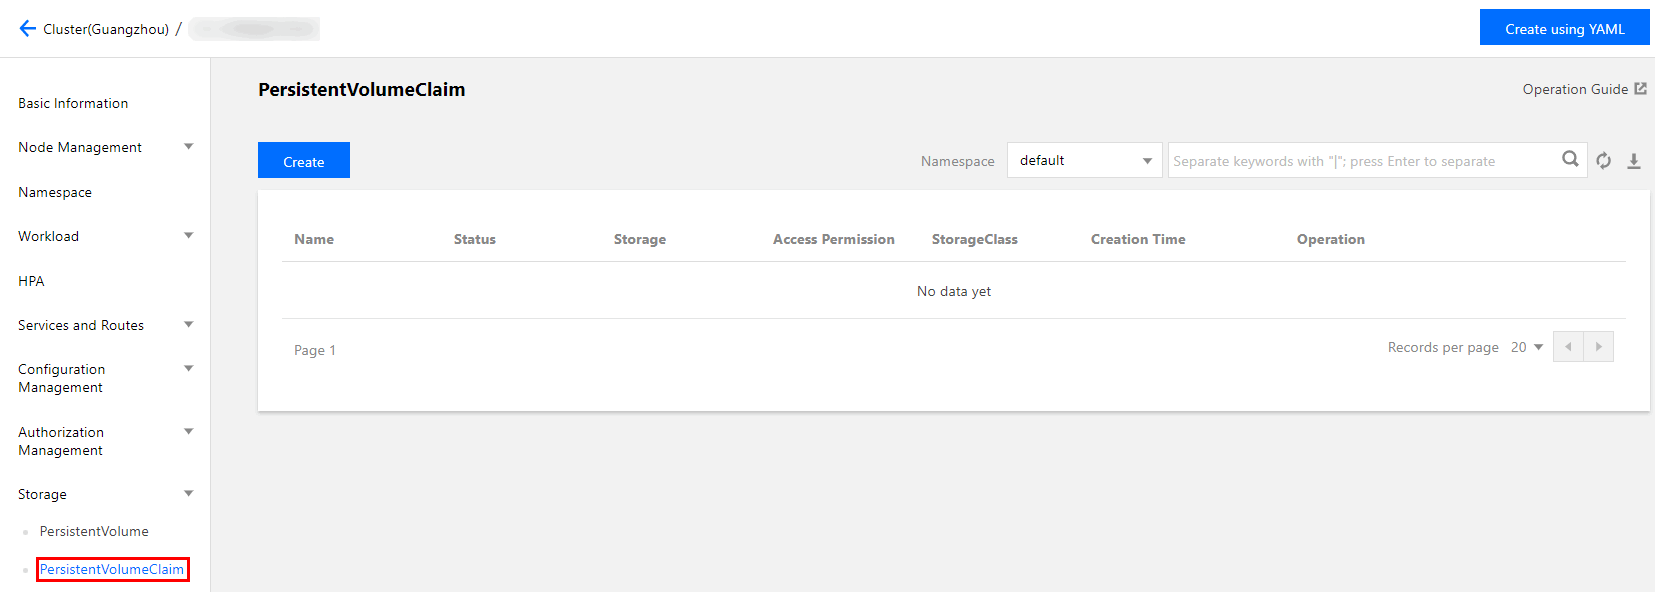
1. On the target cluster details page, choose Storage > PersistentVolumeClaim in the left sidebar to go to the PersistentVolumeClaim page, as shown in the following figure.
2. Click Create to go to the Create PersistentVolumeClaim page, where you can set key PVC parameters as required, as shown in the following figure.
Name: set a custom name. This document uses cfs-pvc as an example.
Namespace: select default.
Provisioner: select Cloud File Storage.
R/W permission: CFS only supports multi-server read and write.
StorageClass: select a StorageClass as required. This document uses cfs-storageclass, which you created in the step of Creating a StorageClass via the console, as an example.
Note:
The PVC and PV will be bound to the same StorageClass.
If you do not specify a StorageClass, the value of StorageClass for the corresponding PVC is empty, and the value of the storageClassName field in the corresponding YAML file is a null string.
PersistentVolume: specify a PersistentVolume as required. This document uses the cfs-pv created in the Creating a PV statically step as an example.
Note:
Only PVs in the specified StorageClass and in the Available or Released statuses can be selected. If no PV in the current cluster meets the conditions, select Do not specify in Specify PersistentVolume.
If the status of the selected PV is Released, you need to manually delete the claimRef field in the corresponding YAML configuration file of the PV so that the PV can be successfully bound with the PVC. For more information, see PV and PVC Binding Rules.
3. Click Create PersistentVolumeClaim to complete the creation process.
Creating a workload to use a PVC volume
Note:
This step creates a Deployment workload as an example.
1. On the Cluster Management page, select the target cluster ID to go to the Deployment page of the cluster for which the workload needs to be deployed.
2. Click Create to go to the Create Workload page. For more information on how to create a workload, see Creating a Deployment. Then, mount a volume as required, as shown in the following figure.
Volume (optional):
Mount method: select Use existing PVC.
Volume name: set a custom name. This document uses cfs-vol as an example.
Select PVC: select cfs-pvc, which you created in the step of Creating a PVC.
Containers in the Pod: click Add Mount Target to set a mount target.
Volume: select the volume cfs-vol that you added in this step.
Destination Path: enter a destination path. This document uses /cache as an example.
Sub-path: mount only a sub-path or a single file in the selected volume, such as /data or /test.txt.
3. Click Create Workload to complete the process.
Note:
If you use the PVC mount method of CFS, the volume can be mounted to multiple nodes.
Kubectl operation instructions
Creating a PV
apiVersion: v1
kind: PersistentVolume
metadata:
name: cfs
spec:
accessModes:
- ReadWriteMany
capacity:
storage: 10Gi
csi:
driver: com.tencent.cloud.csi.cfs
volumeAttributes:
fsid: XXXXXX
host: 192.168.XX.XX
path: /
vers:"3"
volumeHandle: cfs
persistentVolumeReclaimPolicy: Retain
storageClassName: XXX
volumeMode: Filesystem
Parameter
Required
Description
fsid
Yes
The file system's FSID (rather than ID), which can be viewed in the mount target information of the file system.
host
Yes
The file system's IP address, which can be viewed in the mount target information of the file system.
path
Yes
A subdirectory of the file system. After mounting, the workload will not be able to access the upper-level directory of this subdirectory.
vers
Yes
The version of the protocol used by the add-on to connect to the file system. Currently supported versions are "3" and "4".
Note:
If you specify the protocol version as vers: "3" in the YAML file of the static PV, you also need to specify the FSID of the file system to be mounted (see Getting the file system FSID); otherwise, the mount will fail. vers: "4" does not require the FSID.