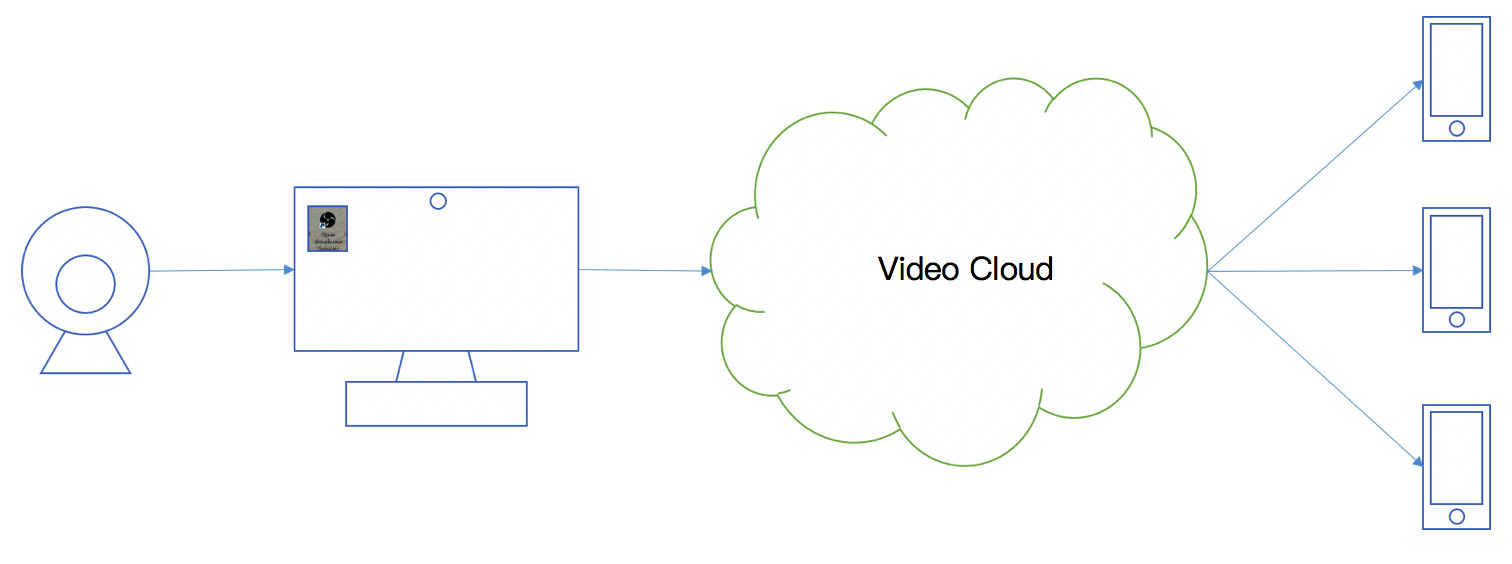
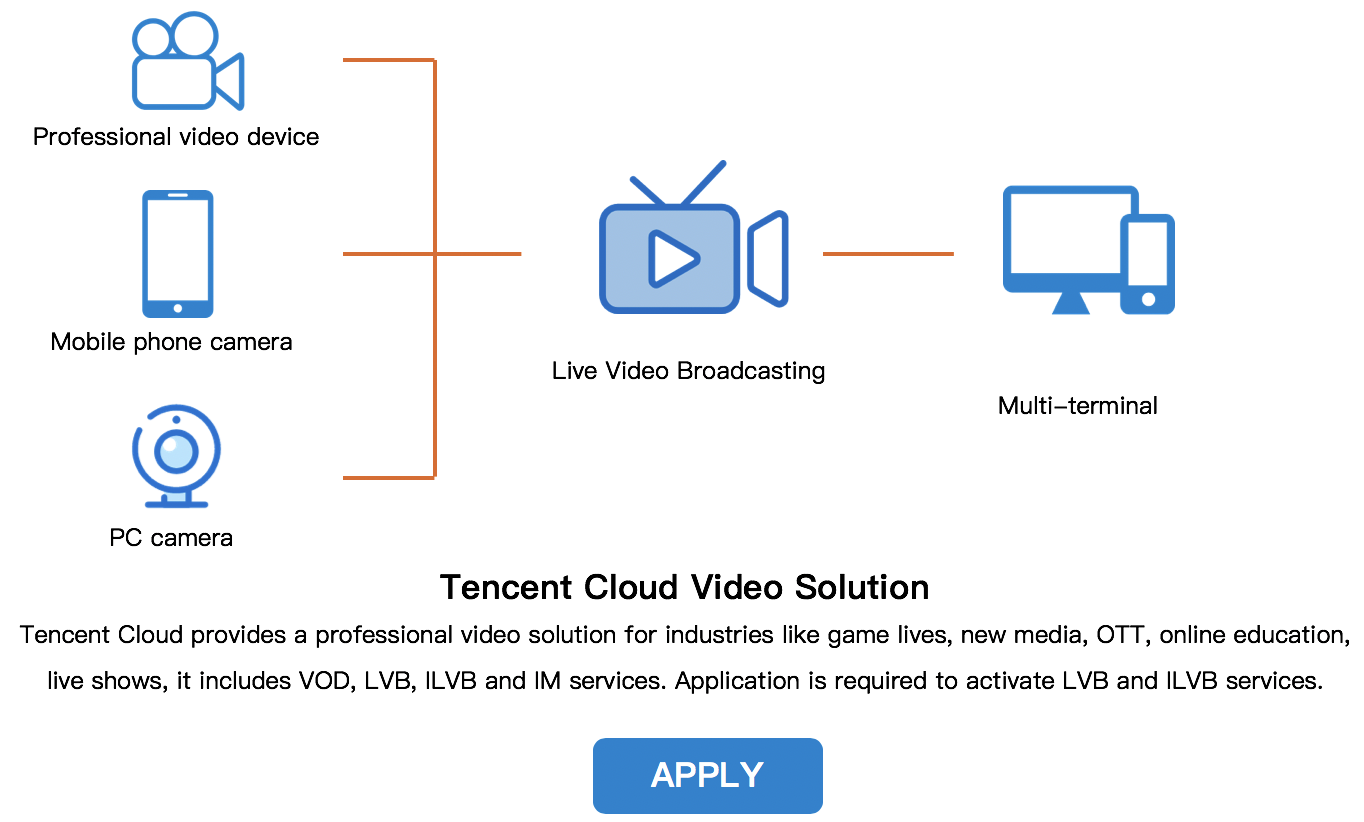
Tencent Cloud PC CSS is used to push compressed and encoded images (such as live events, teaching, projection or games) to the push URL of Tencent Video Cloud by using push software (OBS (recommended) or XSplit) installed on PCs (windows/mac). Meanwhile, viewers can see real-time images using the playback URL corresponding to the push URL.
PC CSS Procedure
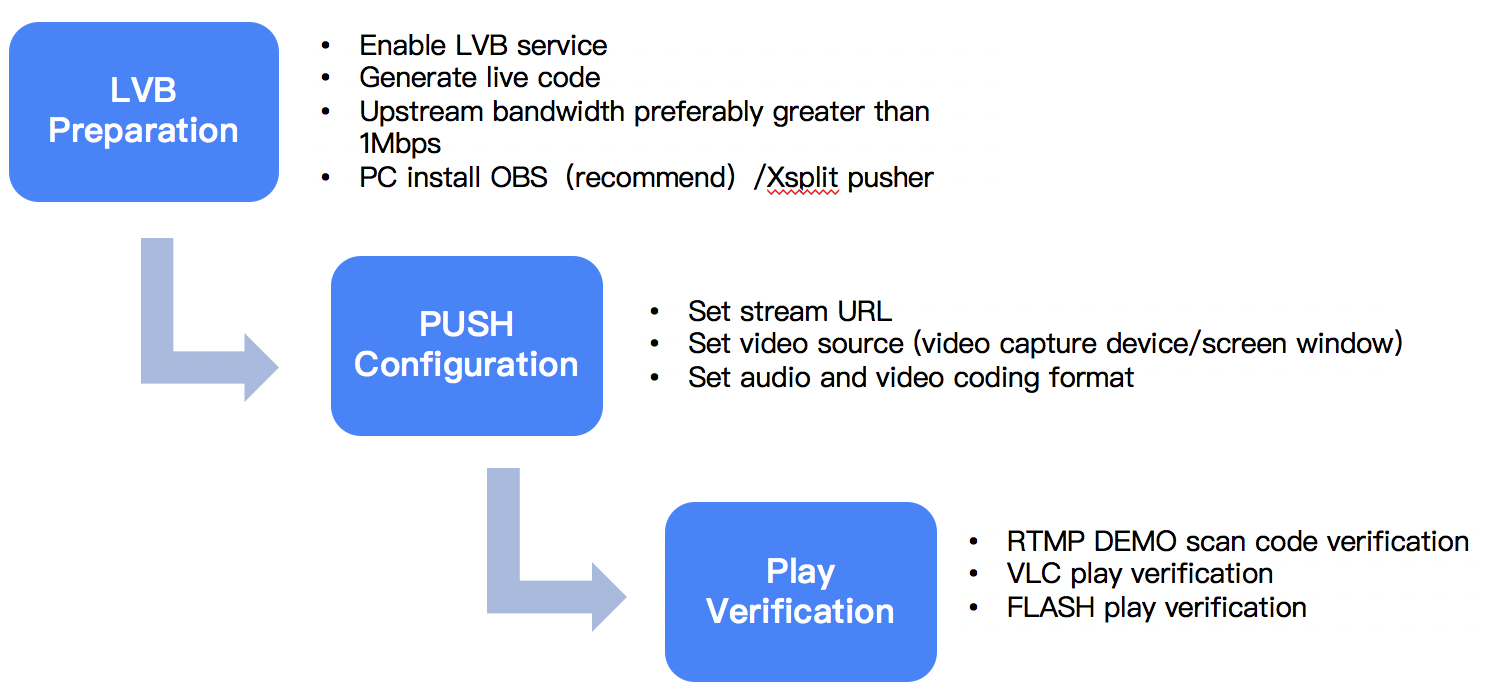
You can implement PC CSS easily by following the steps below:
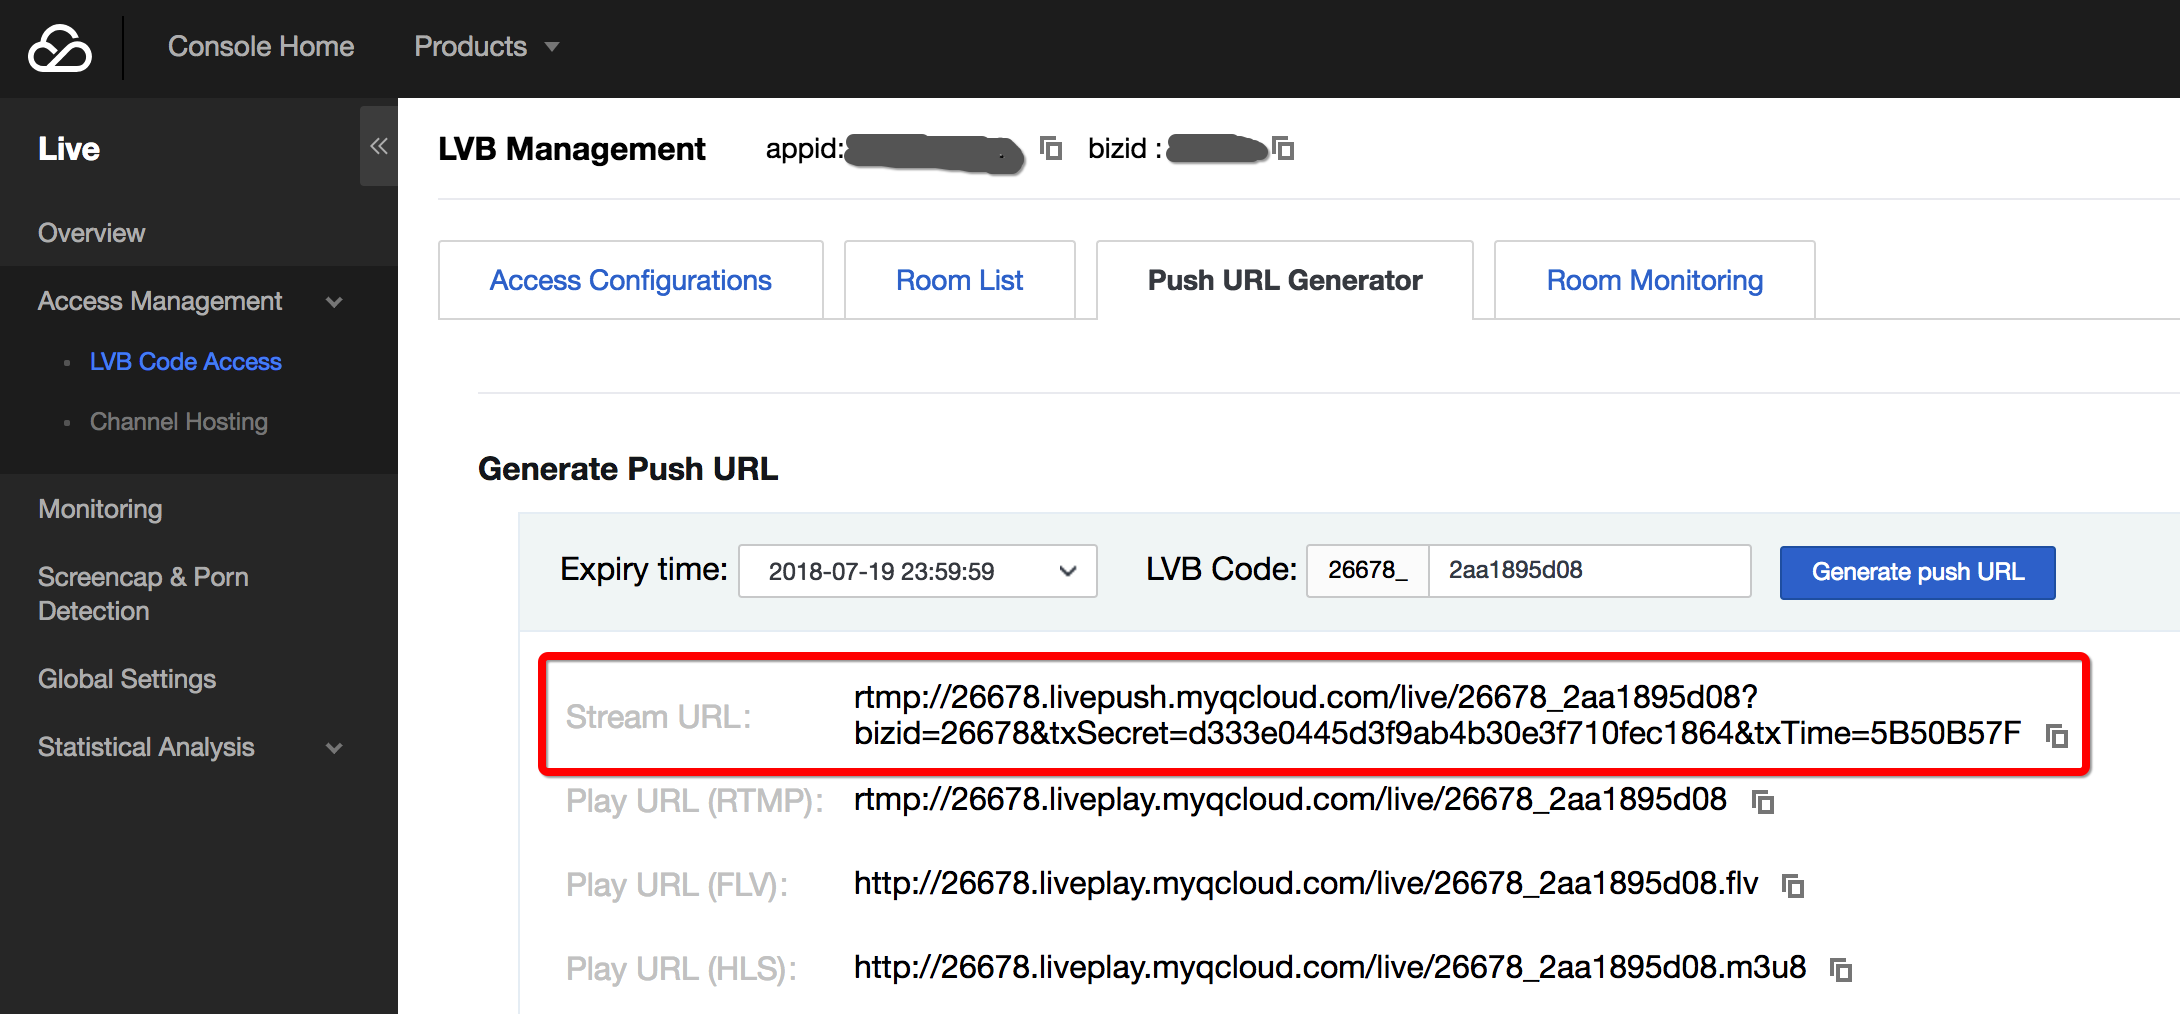
Where are the streams pushed to: Get a push URL and 3 playback URLs from Tencent Cloud CSS console.
What is pushed: Set audio/video sources for push and encoding parameters in the third-party push software.
Viewer can watch CSS using our RTMP DEMO to set playback URL. This helps push the content to the viewers.
1. Before CSS
Activate cloud CSS service on Tencent Cloud.If you have not activated the Tencent Cloud CSS service, click here to apply for the service.
The one whose domain name is livepush.myqcloud.com is the push URL:
1.3 Select the network for CSS
Network selection
Network Type
Accessibility
Stability
Wired network
Low
High
WIFI
High
Low
It is recommended to use cable network if possible, which is more stable than WIFI to make signals less disruptive. For event CSS, it is recommended to use WIFI for convenience.
Upstream bandwidth test
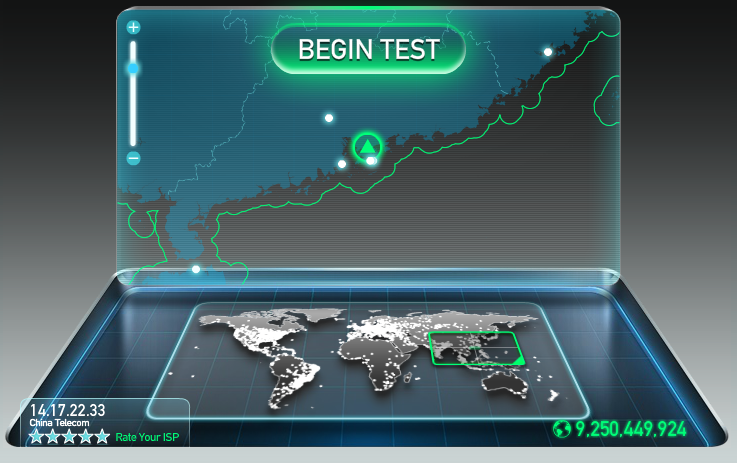
The requirement for upstream bandwidth depends on the video quality and resolution. Generally, a better video quality with a higher resolution means a higher requirement for upstream bandwidth. The upstream bandwidth should not be less than 1 Mbps. To check the condition of upstream bandwidth, you can conduct a test using speedtest.
1.4 Install push software
OBS installation
You can download an installation package on OBS official website to install according to default settings. OBS is supported in such systems as Windows/Mac/Linux. You should make sure it is Open Broadcaster Software. OBS also provides OBS Studio which is not discussed in this document.
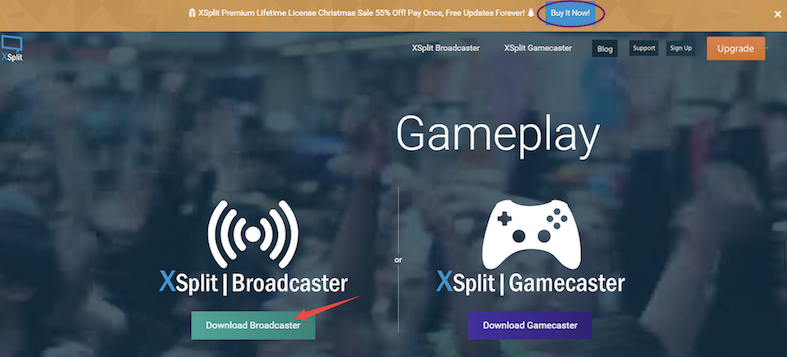
XSplit Installation
You can download an installation package on XSplit official website to install it according to default settings.
XSplit is not a free software. As an alternative, you can use OBS (Free). For game CSS, XSplit has a separate installation package. It is recommended to use BroadCaster for non-game CSS.
The front part of the push URL "rtmp://3891.livepush.myqcloud.com/live/" is called FMS URLThe latter part of the push URL "3891_test?bizid=3891&txSecret=xxx&txTime=58540F7F" is called stream code.
OBS push URL configuration
Click Settings, select Broadcasting Settings, and then set Mode to CSS Stream, Streaming Service to Custom, FMS URL to the first part of push URL, and Playback Path/Streaming Code to the second part. You're recommended to check Automatic Reconnection, which means push reconnection is triggered automatically when OBS detects an exception (such as network disconnection).
OBS Studio push URL settings
Click Settings in the lower right corner of the page, select Stream, and then set Streaming Type to Custom Streaming Media Server, URL to the first part of the push URL, and Stream Key to the second part.
2.2 Set audio and video sources
Audio and video sources are just like the contents of the package to be sent. There are three formats:
From video capturing devices, such as camera or video recording devices.
From PC windows or game sources;
From media files stored in PC, such as video images.
OBS audio and video sources settingsNote: Click the right mouse button in Source box. The left button is not applicable. The Add menu is popped up, followed by Acquire from Window, Acquire from Screen, Image Source, Slide Show, Text Source, CLR Browser, Video Capturing Device, Game Source, etc. We generally use Acquire from Window and Video Capturing Device. Other sources are configured in a different way. Next, we will introduce how to configure Video Capturing Device.
OBS Studio audio/video source settings
For more information, please see OBS audio and video sources settings.
2.3 Set audio and video formats
After the video source is configured, even though you can get the audio and video signals, the original ones are not applicable for spreading in the network because they need more bandwidth. Therefore, it is important to configure the audio and video encoding parameters before CSS starts.
Configuration Item
Feature
x264
The h264 encoder is most commonly used in the industry with a higher video compression ratio under the same image quality. It is recommended to select this option.
Nvidia NVENC
It performs encoding using the video processing core dedicated to nv graphics card. Nvidia graphics card is required.
Quick Sync
Use Intel Quick Sync Video technology to support hardware encoding with a high encoding speed and image quality. But it has a poor compatibility and high bitrate.
CBR
This is one of video encoding bitrate control modes and is called constant bitrate control. With a consistent bitrate, it is more suitable for network transmission. It is recommended to select this option.
AAC
This is the most widely used live audio encoding format. It is recommended to select this option.
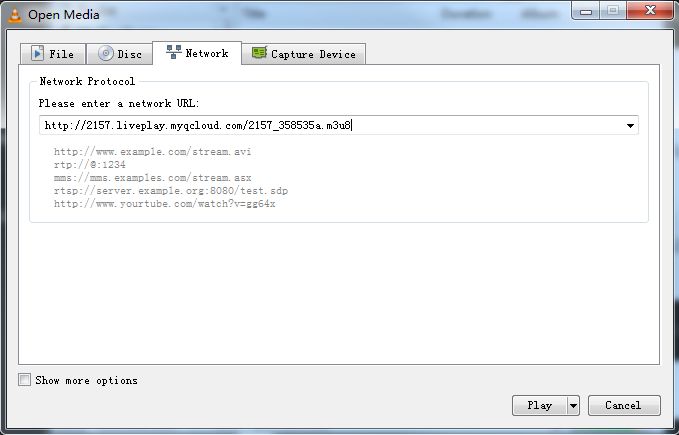
Click here for VLC Download URL. You can install according to the default settings. Open the software, click Media Menu, select Open Network Stream, enter the playback URL, and click Play.