Getting Started
Download
Mode fokus
Ukuran font
Relevant Resources
Download address for the source code of the COS XML C++ SDK
GitHub code repository: COS C++ SDK V5 GitHub
SDK quick download address: COS C++ SDK V5 Latest
Address for the Sample Demo: COS C++ SDK V5 Sample
For the change log of the SDK, see ChangeLog
Note:
If you encounter errors such as functions or methods not found while using the XML version of the SDK, please first upgrade the XML version of the SDK to the latest version and try again.
Environment Configuration and Preparation
Dependencies: Poco, OpenSSL.
COS C++ SDK supports the following operating systems and compiler environments: Linux, macOS, Windows. For other operating systems, please modify the CMakeLists.txt file to adapt for compilation.
You need to obtain a Tencent Cloud API key. This key is a prerequisite for your use of the various features of the COS SDK.
Installing the SDK
Compilation Options
In the CMakeLists.txt file in the root directory, you can configure build options. The following build options are available and can be set as needed:
option(BUILD_UNITTEST "Build unittest" OFF) # Configure compiling unit testsoption(BUILD_DEMO "Build demo" ON) # Configure compiling test code for the demooption(BUILD_SHARED_LIB "Build shared library" OFF) # Configure compilation of shared library
Note:
Build the Linux Version of the SDK
1. Install build tools and dependencies:
yum install -y gcc gcc-c++ make cmake openssl# cmake version must be greater than 2.8.
2. Compile and install the Poco library:
Note:
It is recommended to use Poco version 1.9.4, and when the OpenSSL version is greater than 1.0, it is recommended to use version 1.12.4.
# Download the Poco source code and extract it.wget https://github.com/pocoproject/poco/archive/refs/tags/poco-${version}-release.zipunzip poco-${version}-release.zip # Extract# Go to the Poco main directory and compile.cd poco-poco-${version}-release./configure --omit=Data/MySQL,Data/ODBCmkdir cmake-buildcd cmake-buildcmake ..cmake --build . --config Release -j8sudo cmake --build . --target install
Note:
After the above commands are executed, the Poco dynamic libraries will be installed in the /usr/local/lib directory, and all header files will be copied to the /usr/local/include/Poco directory. When using in a production environment, copy the library files and header files to your project to ensure the program can locate the corresponding dynamic libraries and header files.
3. Compile the SDK, download source code of the XML C++ SDK to your development environment, and run the following command:
# It is recommended to download and use the latest version, such as v5.5.19.wget https://github.com/tencentyun/cos-cpp-sdk-v5/archive/refs/tags/v5.5.19.zipunzip v5.5.19.zipcd cos-cpp-sdk-v5-5.5.19# The following two commands must be executed to compile the Demo.cp -R /usr/local/include/Poco ./third_party/include/cp /usr/local/lib/libPoco* ./third_party/lib/linux/poco/# Compile the SDK.mkdir buildcd buildcmake ..# cmake .. -DBUILD_DEMO=ON # By default, the Demo is compiled; this command can disable Demo compilation.make -j8
Note:
When executing cmake, you can add the option -DBUILD_DEMO=OFF to disable compilation of the Demo program, and specify building the SDK dynamic library with -DBUILD_SHARED_LIB=ON.
It only depends on libPocoCrypto, libPocoFoundation, libPocoJSON, libPocoNet, libPocoNetSSL, libPocoUtil, and libPocoXML library files. You can also modify the above copy command to copy only these library files to the specified directory.
4. Edit and run the test demo:
Note:
If you do not need to test the demo, you can skip this step. The code for the demo program is located in the demo directory under the SDK directory. The demo filenames are self-explanatory, and you can modify the corresponding demo files as needed.
vim demo/cos_demo.cpp # Edit the bucket name and test code in the demo.cd build && make # Compile the demo.ls bin/cos_demo # The generated executable is in the bin directory.vim bin/config.json # Edit the secret key and region.cd bin && ./cos_demo # Run the demo.
5. Using the SDK:
The compiled library files are located in the build/lib directory. The static library is named
libcossdk.a, and the dynamic library is named libcossdk-shared.so. To use them, copy the libraries to your project and copy the include directory to the include path in your project.Compile the SDK for Windows
1. Install visual studio 2017:
Install the visual studio 2017 development environment.
2. Install the CMake tool:
From CMake official website download the Windows version of the CMake build tool, and add
${CMake installation path}\\bin to the Path environment variable in the Windows system.3. Install OpenSSL:
4. Compiling the Poco library:
Note:
It is recommended to use Poco version 1.9.4, and when the OpenSSL version is greater than 1.0, it is recommended to use version 1.12.4.
# Download the Poco source code and extract it.wget https://github.com/pocoproject/poco/archive/refs/tags/poco-${version}-release.zipunzip poco-${version}-release.zip # Extract.# Go to the Poco main directory and compile.cd poco-poco-${version}-release./configure --omit=Data/MySQL,Data/ODBCmkdir cmake-buildcd cmake-buildcmake ..cmake --build . --config Release --target install -j8
Note:
After successful compilation, the dynamic and static libraries of Poco will be obtained, located in cmake-build/bin and cmake-build/lib respectively. When running
cmake .., you can specify -DCMAKE_INSTALL_PREFIX=${custom_installation_directory} to set the installation directory, which defaults to C:\\Program Files (x86)\\Poco.5. Compile the SDK:
ii. Open the Windows command line, go to the source code directory of the C++ SDK, and run the following command:
mkdir buildcd build# cmake .. # Generate Win32 makefile.cmake -G "Visual Studio 15 2017 Win64" .. -DBUILD_DEMO=OFF # Generate Win64 makefile, do not compile demo.
Note:
The cmake -G parameter is related to the actual Windows environment and cmake version. If using other versions of Visual Studio, please use other parameters (the build tool parameters that can be specified may vary across different cmake versions; the command listed below corresponds to cmake version 3.23.0. Execute the
cmake -h command to see the supported build tool versions and usage in the Generators section of the output. If not included, please upgrade cmake).Parameter list:
Visual Studio Version | cmake command |
Visual Studio 2022 | cmake -G "Visual Studio 17 2022" .. The -A parameter can be used to specify the architecture, such as cmake -G "Visual Studio 17 2022" -A x64 .. |
Visual Studio 2019 | cmake -G "Visual Studio 16 2019" .. (You can specify the architecture using the -A parameter, refer to the 2022 example). |
Visual Studio 2017 | cmake -G "Visual Studio 15 2017 Win64" .. |
Visual Studio 2015 | cmake -G "Visual Studio 14 2015 Win64" .. |
Visual Studio 2013 | cmake -G "Visual Studio 12 2013 Win64" .. |
Visual Studio 2012 | cmake -G "Visual Studio 11 2012 Win64" .. |
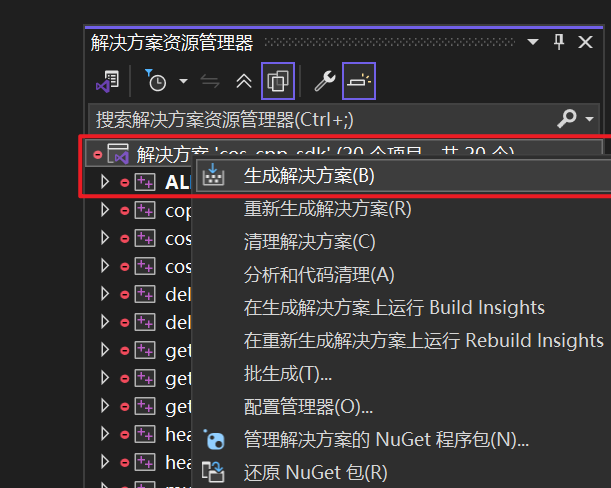
iii. Open the solution file using visual studio 2017 and execute the compilation.
6. Edit and run the test demo:
Note:
If you do not need to execute the test demo, you can skip this step.
The code of the demo program is located in the demo directory under the SDK directory. The demo filenames are self-explanatory, and you can modify the corresponding demo files as needed. After modifying the demo code, execute the compilation:
# Copy the openssl dynamic link libraries and static libraries to the specified directory.cp ${OpenSSL_installation_directory}/bin/libcrypto-*.dll ${SDK_directory}/third_party/lib/${target}/openssl/.cp ${OpenSSL_installation_directory}/bin/libssl-*.dll ${SDK_directory}/third_party/lib/${target}/openssl/.cp ${OpenSSL_installation_directory}/lib/VC/${target}/MD/openssl.lib ${SDK_directory}/third_party/lib/${target}/openssl/.cp ${OpenSSL_installation_directory}/lib/VC/${target}/MD/libssl.lib ${SDK_directory}/third_party/lib/${target}/openssl/.cp ${OpenSSL_installation_directory}/lib/VC/${target}/MD/libcrypto.lib ${SDK_directory}/third_party/lib/${target}/.# Copy the poco dynamic link libraries and static libraries to the specified directory.cp ${Poco_installation_directory}/bin/Poco*.dll ${SDK_directory}/third_party/lib/${target}/poco/.cp ${Poco_installation_directory}/lib/Poco*.lib ${SDK_directory}/third_party/lib/${target}/poco/.# Copy the relevant header files to the specified directory.cp -R ${OpenSSL_installation_path}/include/openssl ${SDK_directory}/third_party/include/.cp -R ${Poco_installation_directory}/include/Poco ${SDK_directory}/third_party/include/.# Start compiling.cd build# cmake .. # Generate Win32 makefile.cmake -G "Visual Studio 15 2017 Win64" .. -DBUILD_DEMO=ON # By default, compile the demo; -DBUILD_DEMO=ON can be omitted.
Note:
The variable
${target} is "x64" in 64-bit systems and "Win32" in 32-bit systems.It only depends on libPocoCrypto, libPocoFoundation, libPocoJSON, libPocoNet, libPocoNetSSL, libPocoUtil, and libPocoXML library files. You can also modify the above copy command to copy only these library files to the specified directory.
7. Using the SDK:
The compiled library files are located in the build/Release directory, with the static library named
cossdk.lib. When you use it, copy the library to your project, copy the include directory to the include path in your project, and refer to Step 6 to copy the dependent library files and header files to the corresponding directories in your project so that the SDK can locate these files.Compiling the SDK version for macOS
1. Install build tools and dependencies:
brew install gcc make cmake openssl
2. Compiling the Poco library:
Note:
It is recommended to use Poco version 1.9.4, and when the OpenSSL version is greater than 1.0, it is recommended to use version 1.12.4.
# Download the Poco source code and extract it.wget https://github.com/pocoproject/poco/archive/refs/tags/poco-${version}-release.zipunzip poco-${version}-release.zip # Extract.# Go to the Poco main directory and compile.cd poco-poco-${version}-release./configure --omit=Data/MySQL,Data/ODBCmkdir cmake-buildcd cmake-buildcmake ..cmake --build . --config Release -j8sudo cmake --build . --target install
Note:
After the above commands are executed, the Poco dynamic libraries will be installed in the /usr/local/lib directory, and all header files will be copied to the /usr/local/include/Poco directory. When the library files and header files are used in a production environment, copy them to your project to ensure the program can locate the corresponding dynamic libraries and header files.
3. Compile the SDK:
cd ${cos-cpp-sdk}mkdir buildcd buildcmake .. -DBUILD_DEMO=OFF # Exclude demo from compilation.make -j8
4. Edit and run the demo:
Note:
If you do not need to test the demo, you can skip this step.
The program code for the demo is located in the demo directory under the SDK directory. The demo filenames are self-explanatory. You can modify the corresponding demo files as needed. After the demo code is modified, execute the compilation command:
# Copy Poco dynamic link libraries and static libraries to the specified directory.cp /usr/local/lib/libPoco* ${SDK directory}/third_party/lib/macOS/poco/.# Copy the relevant header files to the specified directory.cp -R /usr/local/include/Poco ${SDK directory}/third_party/include/.# Start compiling.cd buildcmake .. -DBUILD_DEMO=ON # The demo is compiled by default; -DBUILD_DEMO=ON can be omittedmake -j8
Note:
It only depends on libPocoCrypto, libPocoFoundation, libPocoJSON, libPocoNet, libPocoNetSSL, libPocoUtil, and libPocoXML library files. You can also modify the above copy command to copy only these library files to the specified directory.
5. Using the SDK:
The compiled library files are located in the build/lib directory. The static library is named
libcossdk.a, and the dynamic library is named libcossdk-shared.dylib. When you use them, copy the libraries to your project, copy the include directory to the include path of your project, and refer to Step 4 to copy the dependent library files and header files to the corresponding directories in your project so that the SDK can locate these files.Initialize COS Service
The following describes how to use the COS C++ SDK to perform basic operations, such as initializing a client, creating a bucket, querying the bucket list, uploading an object, querying the object list, downloading an object, and deleting an object.
Note:
For the meanings and acquisition methods of names, such as SecretId, SecretKey, and Bucket mentioned in this document, see COS Terminology Information.
It is recommended that users use sub-account keys + environment variables to call the SDK to enhance the security of SDK usage. When sub-accounts are authorized, users should follow the least privilege principle to prevent the leakage of resources other than the target bucket or objects.
If you must use permanent secret keys, it is recommended that you follow the Principle of Least Privilege to restrict the scope of permissions for these keys.
Configure API Access Key
If you need to access COS using temporary keys, see the following code:
#include "cos_api.h"#include "cos_sys_config.h"#include "cos_defines.h"int main(int argc, char *argv[]) {//Initialization can be done either through parameters or configuration files. You can choose the appropriate method based on your business needs.qcloud_cos::CosConfig config(appid, "secret_id", "secret_key", "region");// secret_id and secret_key for the temporary key. For the generation and usage guide of temporary keys, see https://www.tencentcloud.com/document/product/436/14048?from_cn_redirect=1.config.SetTmpToken("xxx");qcloud_cos::CosAPI cos(config);}
If you need to access COS using permanent secret keys, see the following code:
#include "cos_api.h"#include "cos_sys_config.h"#include "cos_defines.h"int main(int argc, char *argv[]) {qcloud_cos::CosConfig config("./config.json"); // Initialize using the configuration file method.// Alternatively, initialize directly using constructor parameters.//qcloud_cos::CosConfig config(appid, "secret_id", "secret_key", "region"); // permanent secret keyqcloud_cos::CosAPI cos(config);}
Specify Configuration File
When a CosConfig instance is created, you can also configure the SDK through configuration files. See the following code:
#include "cos_api.h"#include "cos_sys_config.h"#include "cos_defines.h"int main(int argc, char *argv[]) {qcloud_cos::CosConfig config("./config.json"); // Initialize via configuration fileqcloud_cos::CosAPI cos(config);... ...return 0;}
For the configuration file, you can refer to the config.json file in the demo directory of the SDK. The fields in the configuration file are described below:
Configuration Field | Description | Required |
SecretId | User's SecretId. It is recommended to use sub-account keys, with authorization following the principle of least privilege to reduce usage risks. For obtaining sub-account keys, see Sub-account Access Key Management | Yes, it can be specified through code or in the configuration file. |
SecretKey | User's SecretKey. It is recommended to use sub-account keys, with authorization following the guidance of the least privilege principle to mitigate usage risks. | Yes, it can be specified through code or in the configuration file. |
Region | Bucket region, replace with the region where the customer's bucket is located. You can view the bucket region information in the COS console Bucket Overview page. For details about regions, see Regions and Access Domains | Yes, it can be specified through code or in the configuration file. |
SignExpiredTime | expiration time of the signature, in seconds | No, default value 3600. |
ConnectTimeoutInms | connect timeout in milliseconds | No, default value 5000. |
ReceiveTimeoutInms | recv timeout in milliseconds | No, default value 5000. |
UploadPartSize | Part size for file uploads. Range: 1M to 5G | No, default value 10M. |
UploadCopyPartSize | Part size for file copy uploads. Range: 5M to 5G | No, default value 20M. |
UploadThreadPoolSize | Thread pool size for single-file part uploads. Range: 1 to 100 | No, default value 5. |
DownloadSliceSize | Part size for file downloads. Range: 4K to 20M | No, default value 4M. |
DownloadThreadPoolSize | Thread pool size for single-file downloads. Range: 1 to 10 | No, default value 10. |
AsynThreadPoolSize | Thread pool size for asynchronous upload/download. Minimum value: 1; no upper limit | No, default value 2. |
LogoutType | Type of log output: 0: no output, 1: output to screen, 2: output to syslog | No, default value 1. |
LogLevel | Level of log output:1: ERR, 2: WARN, 3:INFO, 4:DBG | No, default value 4. |
IsDomainSameToHost | Whether to use a dedicated Host | No, default value false. |
DestDomain | Specific Host | No, default value is empty. |
IsUseIntranet | Whether to use a specific IP address and port number | No, default value false. |
IntranetAddr | Specific IP address and port number, such as "127.0.0.1:80" | No, default value is empty. |
MaxRetryTimes | Maximum number of retries after a single request failure. Set to 0 if no retry is needed. | No, default value 3. |
RetryIntervalMs | Retry interval in milliseconds | No, default value 100ms. |
Output SDK Internal Logs to Custom Log File (Optional)
If you need to print the SDK's internal logs to a custom log file (especially on Windows systems), refer to the following code (it is recommended to output log content to a specified file to facilitate troubleshooting when exceptions occur):
#include "cos_api.h"#include "cos_sys_config.h"#include "cos_defines.h"void TestLogCallback(const std::string& log) {std::ofstream ofs;ofs.open("test.log", std::ios_base::app);ofs << log;ofs.close();}int main(int argc, char** argv) {qcloud_cos::CosConfig config("./config.json");config.SetLogCallback(&TestLogCallback);qcloud_cos::CosAPI cos(config);}
Access the COS Service
The introductory example for creating a bucket is as follows. For detailed examples, refer to the GitHub address.
#include "cos_api.h"#include "cos_sys_config.h"#include "cos_defines.h"int main(int argc, char *argv[]) {// 1. Specify the configuration file path and initialize CosConfig.qcloud_cos::CosConfig config("./config.json");qcloud_cos::CosAPI cos(config);// 2. Construct a request to create a bucket.std::string bucket_name = "examplebucket-1250000000"; // Replace with the user's bucket name, which follows the bucketname-appid format (appid must be included). The bucket name can be viewed in the COS console: https://console.tencentcloud.com/cos5/bucketqcloud_cos::PutBucketReq req(bucket_name);qcloud_cos::PutBucketResp resp;// 3. Call the API for creating a bucket.qcloud_cos::CosResult result = cos.PutBucket(req, &resp);// 4. Process the call results.if (result.IsSucc()) {// Created successfully} else {// Failed to create the bucket. You can call the member function of CosResult to output error information, such as requestID.std::cout << "HttpStatus=" << result.GetHttpStatus() << std::endl;std::cout << "ErrorCode=" << result.GetErrorCode() << std::endl;std::cout << "ErrorMsg=" << result.GetErrorMsg() << std::endl;std::cout << "ResourceAddr=" << result.GetResourceAddr() << std::endl;std::cout << "XCosRequestId=" << result.GetXCosRequestId() << std::endl;std::cout << "XCosTraceId=" << result.GetXCosTraceId() << std::endl;}}
The introductory example for querying the bucket list is as follows. For detailed examples, refer to the GitHub address.
#include "cos_api.h"#include "cos_sys_config.h"#include "cos_defines.h"int main(int argc, char *argv[]) {// 1. Specify the configuration file path and initialize CosConfig.qcloud_cos::CosConfig config("./config.json");qcloud_cos::CosAPI cos(config);// 2. Construct a request to query the bucket list.qcloud_cos::GetServiceReq req;qcloud_cos::GetServiceResp resp;qcloud_cos::CosResult result = cos.GetService(req, &resp);// 3. Obtain the response information.const qcloud_cos::Owner& owner = resp.GetOwner();const std::vector<qcloud_cos::Bucket>& buckets = resp.GetBuckets();std::cout << "owner.m_id=" << owner.m_id << ", owner.display_name=" << owner.m_display_name << std::endl;for (std::vector<qcloud_cos::Bucket>::const_iterator itr = buckets.begin(); itr != buckets.end(); ++itr) {const qcloud_cos::Bucket& bucket = *itr;std::cout << "Bucket name=" << bucket.m_name << ", location="<< bucket.m_location << ", create_date=" << bucket.m_create_date << std::endl;}// 4. Process the call results.if (result.IsSucc()) {// Bucket list queried successfully.} else {// If the bucket list query fails, you can call the member function of CosResult to output error details, such as requestID.std::cout << "HttpStatus=" << result.GetHttpStatus() << std::endl;std::cout << "ErrorCode=" << result.GetErrorCode() << std::endl;std::cout << "ErrorMsg=" << result.GetErrorMsg() << std::endl;std::cout << "ResourceAddr=" << result.GetResourceAddr() << std::endl;std::cout << "XCosRequestId=" << result.GetXCosRequestId() << std::endl;std::cout << "XCosTraceId=" << result.GetXCosTraceId() << std::endl;}}
The introductory sample for uploading objects is as follows. For detailed samples, refer to the GitHub address.
#include "cos_api.h"#include "cos_sys_config.h"#include "cos_defines.h"int main(int argc, char *argv[]) {// 1. Specify the path of the configuration file and initialize CosConfig.qcloud_cos::CosConfig config("./config.json");qcloud_cos::CosAPI cos(config);// 2. Construct a request to upload a file.std::string bucket_name = "examplebucket-1250000000"; // Replace with the user's bucket name, which follows the bucketname-appid format (appid must be included). The bucket name can be viewed in the COS console: https://console.tencentcloud.com/cos5/bucket.std::string object_name = "exampleobject"; // exampleobject is the object key (Key), which serves as the unique identifier of the object in the bucket. For instance, in the object's access domain name examplebucket-1250000000.cos.ap-guangzhou.myqcloud.com/doc/pic.jpg, the object key is doc/pic.jpg. Replace it with the user-specified object name.qcloud_cos::PutObjectByFileReq req(bucket_name, object_name, "/path/to/local/file"); // Replace with the user-specified file path.//req.SetXCosStorageClass("STANDARD_IA"); // By default, it is STANDARD. You can call the Set method to configure the storage class.qcloud_cos::PutObjectByFileResp resp;// 3. Call the API for uploading files.qcloud_cos::CosResult result = cos.PutObject(req, &resp);// 4. Process the call results.if (result.IsSucc()) {// File uploaded successfully.} else {// If the file upload fails, you can call the member functions of CosResult to output error information, such as requestID.std::cout << "HttpStatus=" << result.GetHttpStatus() << std::endl;std::cout << "ErrorCode=" << result.GetErrorCode() << std::endl;std::cout << "ErrorMsg=" << result.GetErrorMsg() << std::endl;std::cout << "ResourceAddr=" << result.GetResourceAddr() << std::endl;std::cout << "XCosRequestId=" << result.GetXCosRequestId() << std::endl;std::cout << "XCosTraceId=" << result.GetXCosTraceId() << std::endl;}}
The getting started example for querying the object list is as follows. Detailed examples can be found at GitHub address.
#include "cos_api.h"#include "cos_sys_config.h"#include "cos_defines.h"int main(int argc, char *argv[]) {// 1. Specify the configuration file path and initialize CosConfig.qcloud_cos::CosConfig config("./config.json");qcloud_cos::CosAPI cos(config);// 2. Construct a request to query the object list.std::string bucket_name = "examplebucket-1250000000"; // Replace with the user's bucket name, which follows the bucketname-appid format (appid must be included). The bucket name can be viewed in the COS console: https://console.tencentcloud.com/cos5/bucket.qcloud_cos::GetBucketReq req(bucket_name);qcloud_cos::GetBucketResp resp;qcloud_cos::CosResult result = cos.GetBucket(req, &resp);std::vector<qcloud_cos::Content> cotents = resp.GetContents();for (std::vector<qcloud_cos::Content>::const_iterator itr = cotents.begin(); itr != cotents.end(); ++itr) {const qcloud_cos::Content& content = *itr;std::cout << "key name=" << content.m_key << ", lastmodified ="<< content.m_last_modified << ", size=" << content.m_size << std::endl;}// 3. Process the call results.if (result.IsSucc()) {// Querying the object list succeeded.} else {// If querying the object list fails, you can call the member functions of CosResult to output error information, such as requestID.std::cout << "HttpStatus=" << result.GetHttpStatus() << std::endl;std::cout << "ErrorCode=" << result.GetErrorCode() << std::endl;std::cout << "ErrorMsg=" << result.GetErrorMsg() << std::endl;std::cout << "ResourceAddr=" << result.GetResourceAddr() << std::endl;std::cout << "XCosRequestId=" << result.GetXCosRequestId() << std::endl;std::cout << "XCosTraceId=" << result.GetXCosTraceId() << std::endl;}}
The introductory sample for downloading objects is as follows. For detailed samples, see the GitHub address.
#include "cos_api.h"#include "cos_sys_config.h"#include "cos_defines.h"int main(int argc, char *argv[]) {// 1. Specify the path of the configuration file and initialize CosConfig.qcloud_cos::CosConfig config("./config.json");qcloud_cos::CosAPI cos(config);// 2. Construct a request to download the object.std::string bucket_name = "examplebucket-1250000000"; // Replace with the user's bucket name, which follows the bucketname-appid format (appid must be included). The bucket name can be viewed in the COS console: https://console.tencentcloud.com/cos5/bucket.std::string object_name = "exampleobject"; // The object key (Key) is the unique identifier of an object in a bucket. For example, in the access domain name for the object examplebucket-1250000000.cos.ap-guangzhou.myqcloud.com/doc/pic.jpg, the object key is doc/pic.jpg. Replace it with the user-specified object name.std::string local_path = "/tmp/exampleobject";// The request should contain appid, bucketname, object, and local path (including file name).qcloud_cos::GetObjectByFileReq req(bucket_name, object_name, local_path);qcloud_cos::GetObjectByFileResp resp;// 3. Call the API for downloading objectsqcloud_cos::CosResult result = cos.GetObject(req, &resp);// 4. Process the call results.if (result.IsSucc()) {// Download the file successfully.} else {// If the file download fails, you can call the member function of CosResult to output error information, such as requestID.std::cout << "HttpStatus=" << result.GetHttpStatus() << std::endl;std::cout << "ErrorCode=" << result.GetErrorCode() << std::endl;std::cout << "ErrorMsg=" << result.GetErrorMsg() << std::endl;std::cout << "ResourceAddr=" << result.GetResourceAddr() << std::endl;std::cout << "XCosRequestId=" << result.GetXCosRequestId() << std::endl;std::cout << "XCosTraceId=" << result.GetXCosTraceId() << std::endl;}}
The introductory sample for deleting objects is as follows. For detailed samples, see the GitHub address.
Note:
Once an object is deleted, its corresponding data will no longer be accessible.
#include "cos_api.h"#include "cos_sys_config.h"#include "cos_defines.h"int main(int argc, char *argv[]) {// 1. Specify the path of the configuration file and initialize CosConfig.qcloud_cos::CosConfig config("./config.json");qcloud_cos::CosAPI cos(config);// 2. Construct the request to delete the object.std::string bucket_name = "examplebucket-1250000000"; // Replace with the user's bucket name, which follows the bucketname-appid format (appid must be included). The bucket name can be viewed in the COS console: https://console.tencentcloud.com/cos5/bucketstd::string object_name = "exampleobject"; // exampleobject is the object key (Key), which uniquely identifies the object in the bucket. For example, in the domain for object access 'examplebucket-1250000000.cos.ap-guangzhou.myqcloud.com/doc/pic.jpg', the object key is doc/pic.jpg. Replace it with the user-specified object name.// 3. Call the interface for deleting objectsqcloud_cos::DeleteObjectReq req(bucket_name, object_name);qcloud_cos::DeleteObjectResp resp;qcloud_cos::CosResult result = cos.DeleteObject(req, &resp);// 4. Process the call results.if (result.IsSucc()) {// Object deletion succeeded.} else {// If object deletion fails, you can call the member functions of CosResult to output error information, such as requestID.std::cout << "HttpStatus=" << result.GetHttpStatus() << std::endl;std::cout << "ErrorCode=" << result.GetErrorCode() << std::endl;std::cout << "ErrorMsg=" << result.GetErrorMsg() << std::endl;std::cout << "ResourceAddr=" << result.GetResourceAddr() << std::endl;std::cout << "XCosRequestId=" << result.GetXCosRequestId() << std::endl;std::cout << "XCosTraceId=" << result.GetXCosTraceId() << std::endl;}}
FAQs
Bantuan dan Dukungan
Apakah halaman ini membantu?
Anda juga dapat Menghubungi Penjualan atau Mengirimkan Tiket untuk meminta bantuan.
masukan