This tutorial guides you through how to use VOD event notifications in "normal callback" and "reliable callback" modes.
Prerequisites
Python 2.7 runtime environment for normal callback.
Normal Callback
Deploying callback receiving service
To get event notifications through normal callback, you need to deploy a callback receiving service on a server with a public IP. Below describes how to deploy such a service on a CVM instance as an example: 1. Enter the Instance List page in the CVM Console and click Create. 2. Select the Quick Configuration menu, select Ubuntu Server or CentOS for Image and 1 Mbps for Public Network Bandwidth, check Allocate Free Public IP, and then click Buy Now.
3. Enter the Instance List page again, find the CVM instance successfully created, and copy the public IP in Primary IP Address (134.XXX.XXX.167 in this example).
4. Log in to the purchased CVM instance, download the source code package, extract it to your working directory, and run the following command:
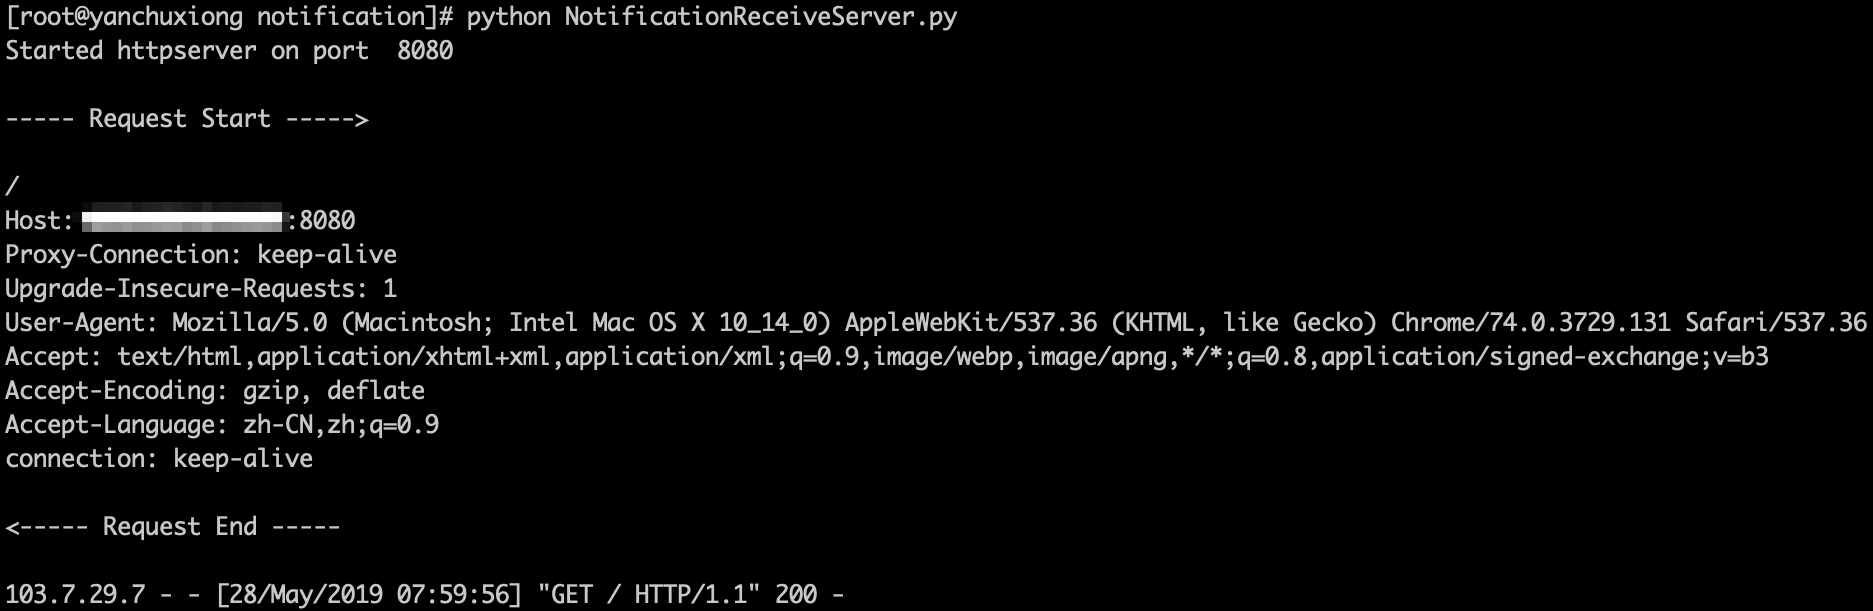
python NotificationReceiveServer.py
After the command is executed, the standard output of the CVM instance should print Started httpserver on port 8080, indicating that the service process has started and is listening on port 8080. 5. Enter http://134.XXX.XXX.167:8080 in a browser, and the standard output of the CVM instance should print the following HTTP request information.
Configuring normal callback
1. Log in to the VOD Console and click Callback Settings on the left sidebar. 2. Click Settings:
Event Notification Method: Select Normal Callback.
Callback URL: enter http://134.XXX.XXX.167:8080.
Event Notification: Select Finished video uploading.
3. Click Confirm.
Initiating and receiving normal callback
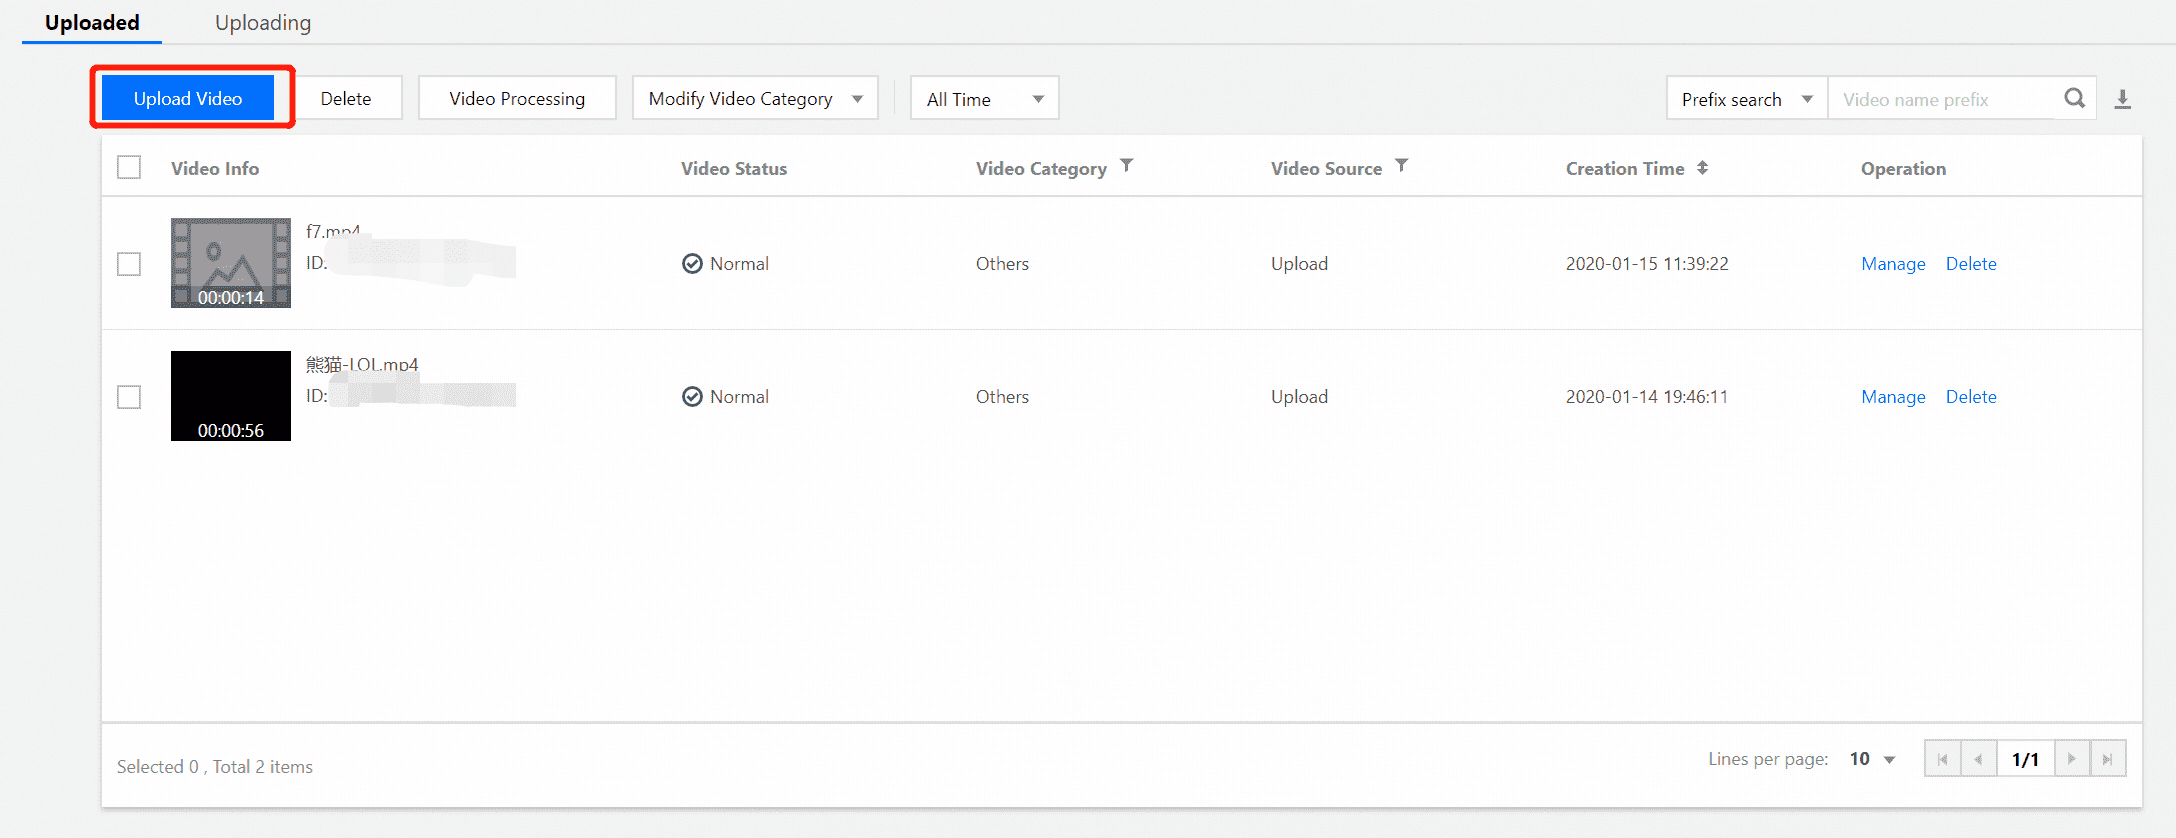
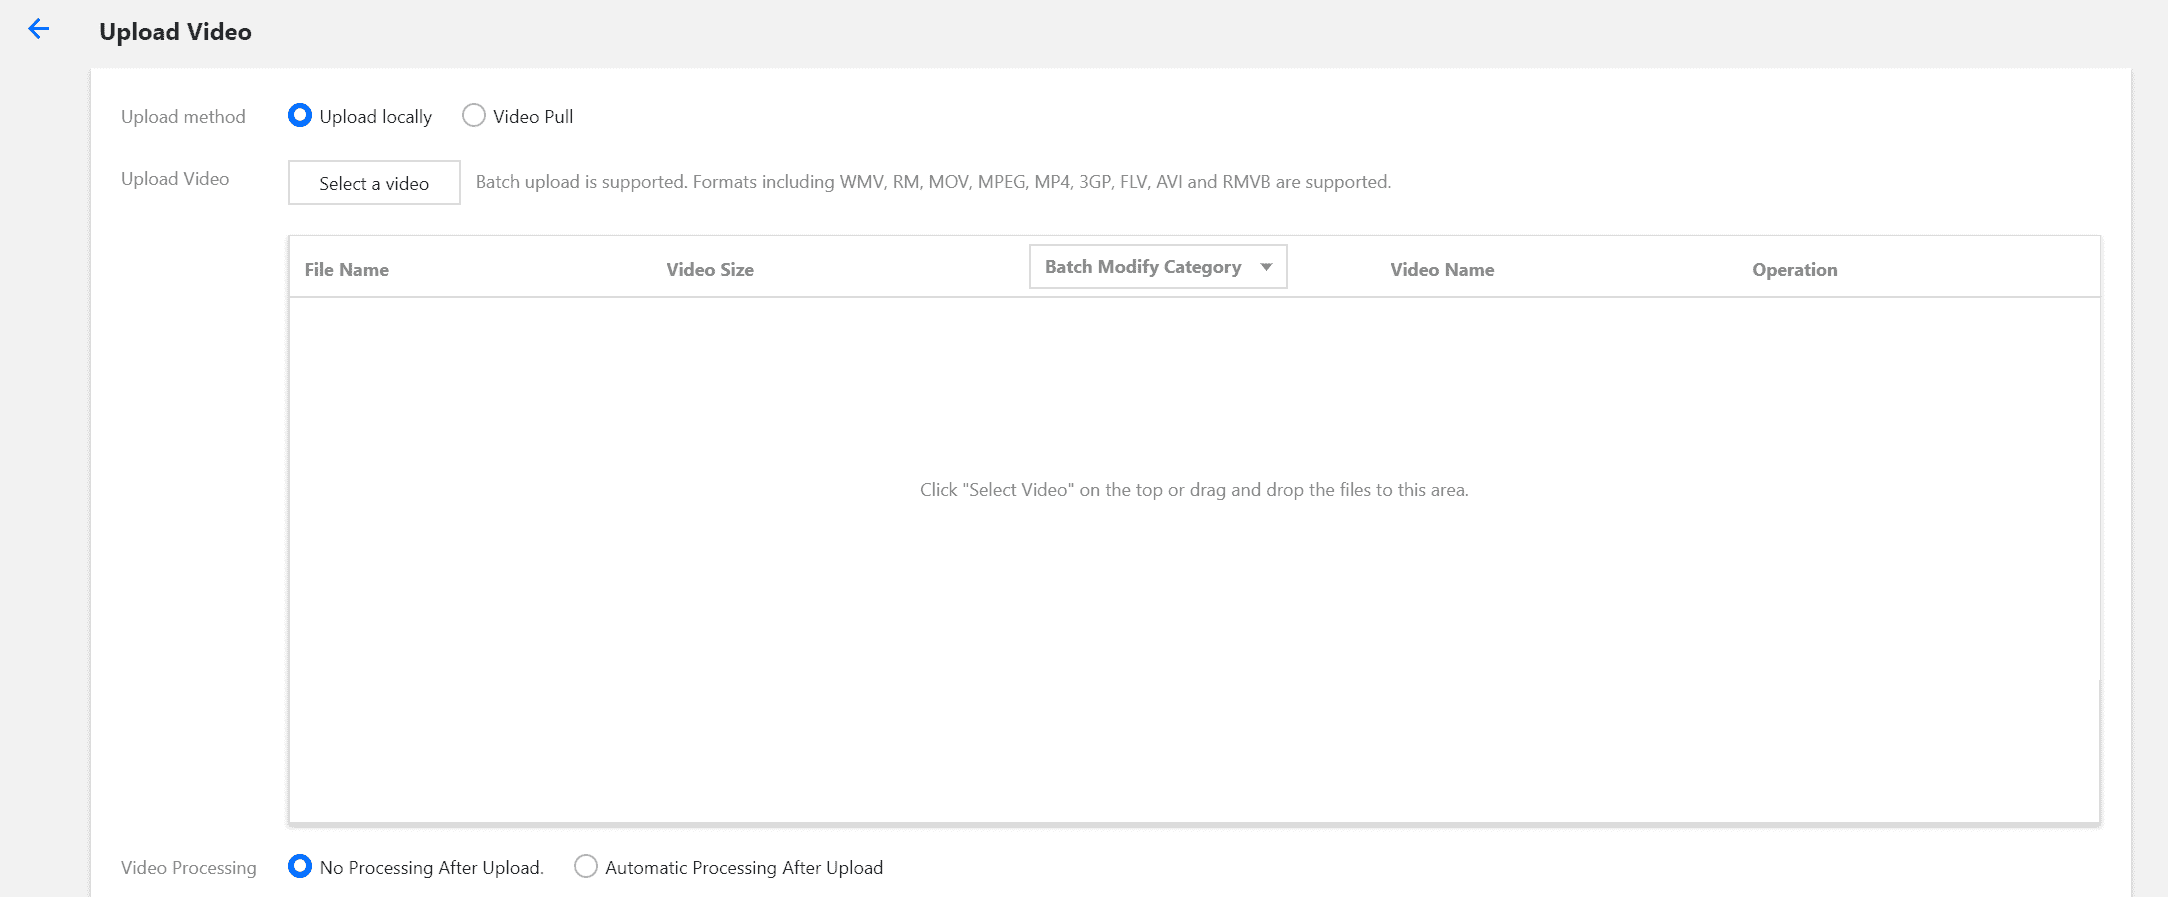
1. Select Media Assets > Video Management on the left sidebar.
2. In the Upload Video dialog box that pops up, select Local Upload, click Select Video, and upload the demo video to the VOD platform.
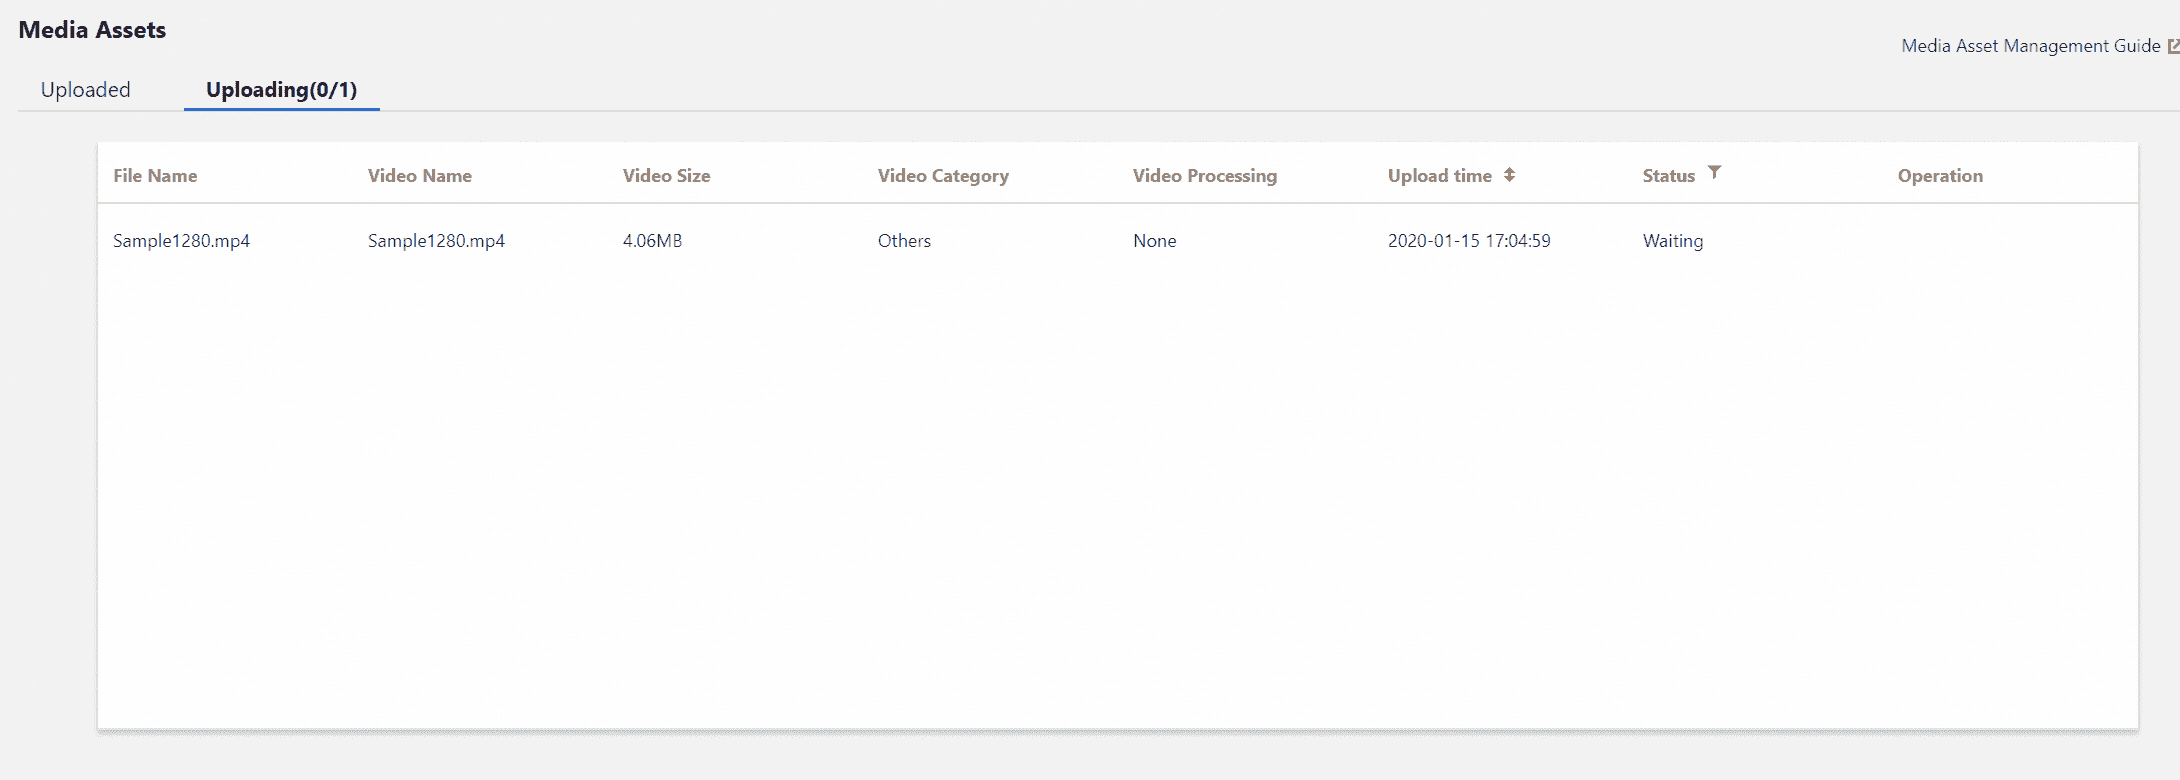
After performing the upload operation, you will see the video upload progress in the Uploading column.
After the upload is completed, you will see the uploaded video and its corresponding ID (i.e., FileId) in the video list in the Uploaded column.
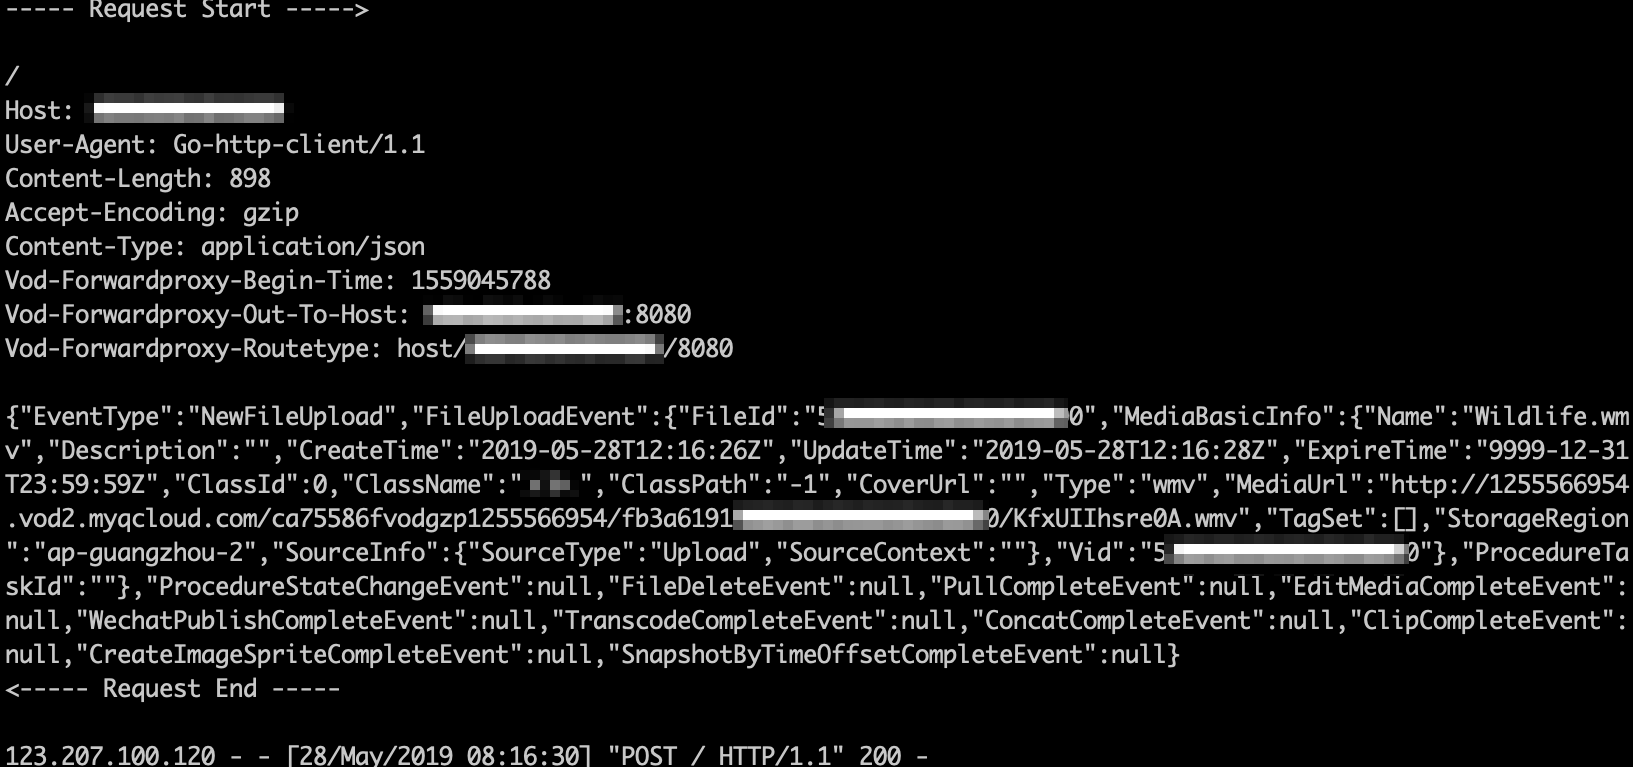
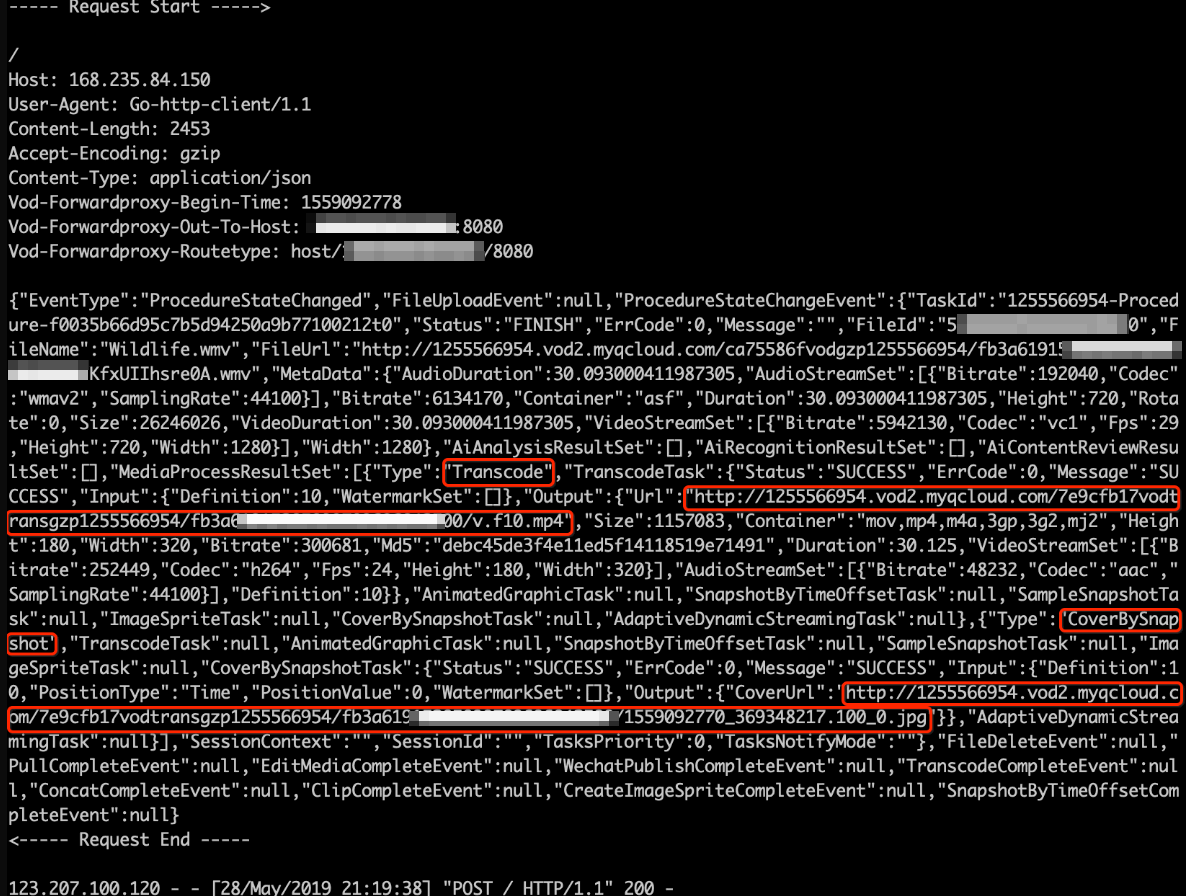
3. Check the CVM instance. The standard output should print the content of the notification for video upload completion. 4. In the Uploaded column in Media Assets, select the video just uploaded and click Video Processing. Select Manually select transcoding template for Processing Type, check MP4-LD-FLU (10) in Transcoding Template, keep Video Cover checked, and click OK. 5. After waiting for 10 minutes, check the CVM instance, and its standard output should print the content of the notification for task flow status change, including the results of transcoding (where Type is Transcode) and time point screencapturing for cover generation (where Type is CoverBySnapshot). At this point, you have uploaded a video and performed a transcoding task on it. After the upload and transcoding were completed, your callback receiving service received notifications for video upload completion and task flow status change.
Reliable Callback
1. Log in to the VOD Console and click Callback Settings on the left sidebar. 2. Click Settings:
Callback Mode: select Reliable Callback.
Callback Event: check video upload completion callback.
3. Click OK.
Initiating reliable callback
1. Select Media Assets > Video Management on the left sidebar, select Uploaded, and click Upload Video.
2. In the Upload Video dialog box that pops up, select Local Upload, click Select Video, and upload the demo video to the VOD platform.
After performing the upload operation, you will see the video upload progress in the Uploading column.
After the upload is completed, you will see the uploaded video and its corresponding ID (i.e., FileId) in the video list in the Uploaded column.
3. In the Uploaded column in Media Assets, select the video just uploaded and click Video Processing. Select Manually select transcoding template for Processing Type, check MP4-LD-FLU (10) in Transcoding Template, keep Video Cover checked, and click OK. At this point, you have uploaded a video again and initiated a transcoding task for it. These operations have triggered event notifications.