When you are still using the default distribution domain name of VOD to accelerate the distribution of media content, add your own domain name for distribution to ensure more flexible business and avoid the impact of business distribution caused by the ban of the default distribution domain name of VOD risk.
Preparation
Prepare a domain that has been registered and can be used for video on demand acceleration, for example: example.com
Method 1: Add a domain name through the cloud Video on Demand Console
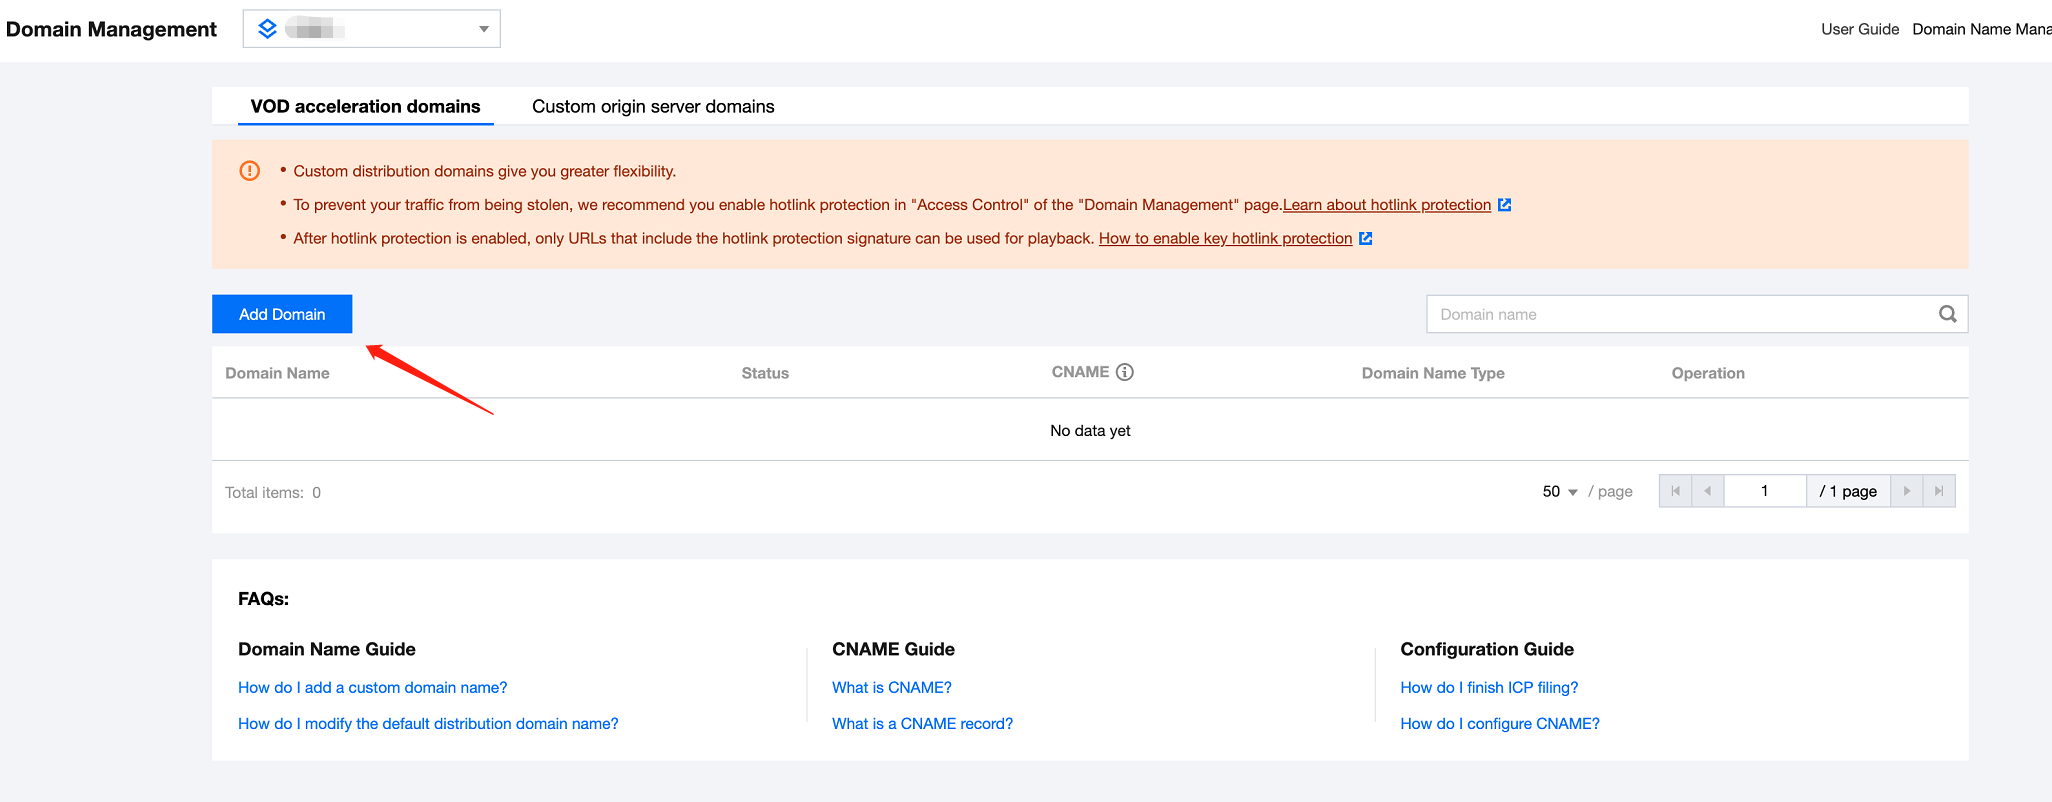
1.Add domain
Video on Demand Console > Distribution playback settings > Aomain management > Add domain or Add a custom origin site acceleration domain. After entering the domain name, domain attribution resolution verification is required.
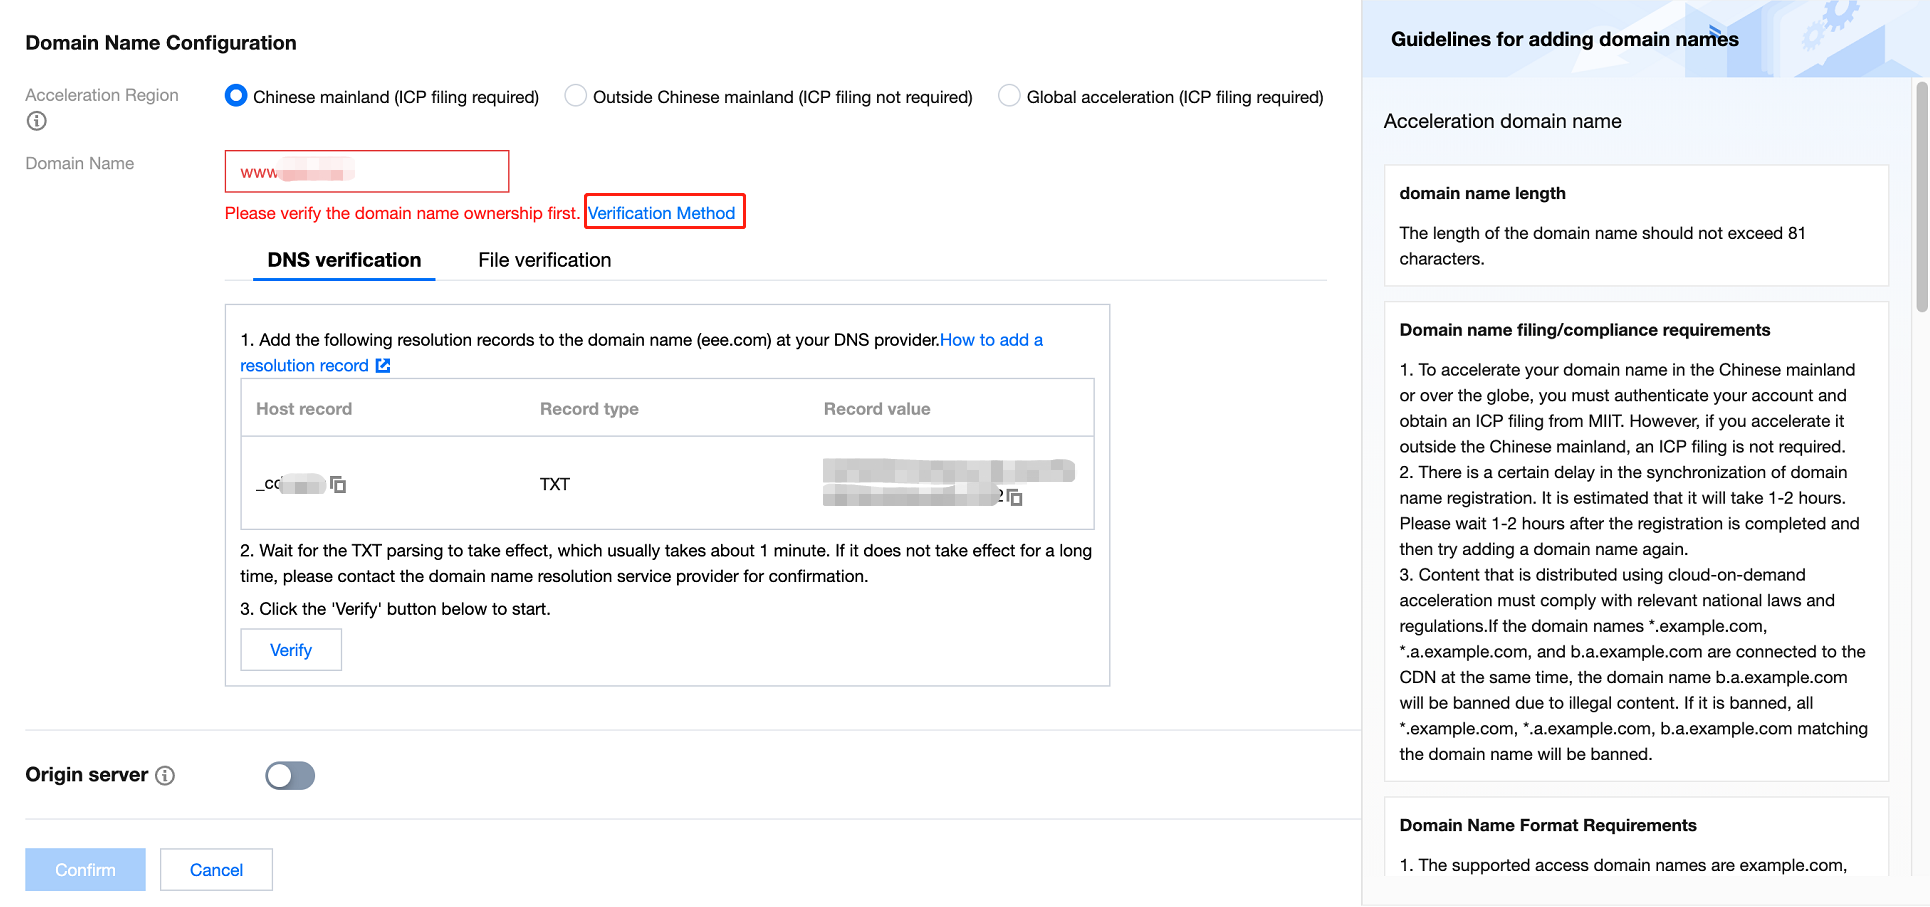
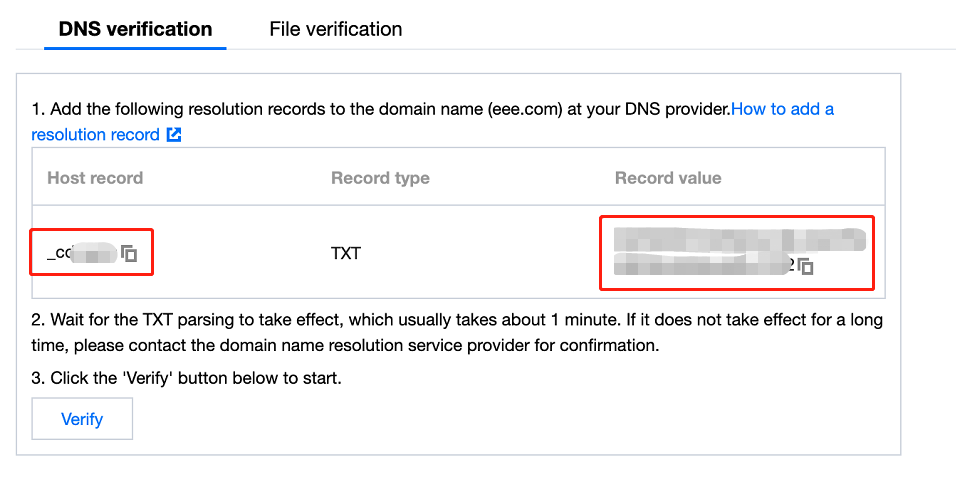
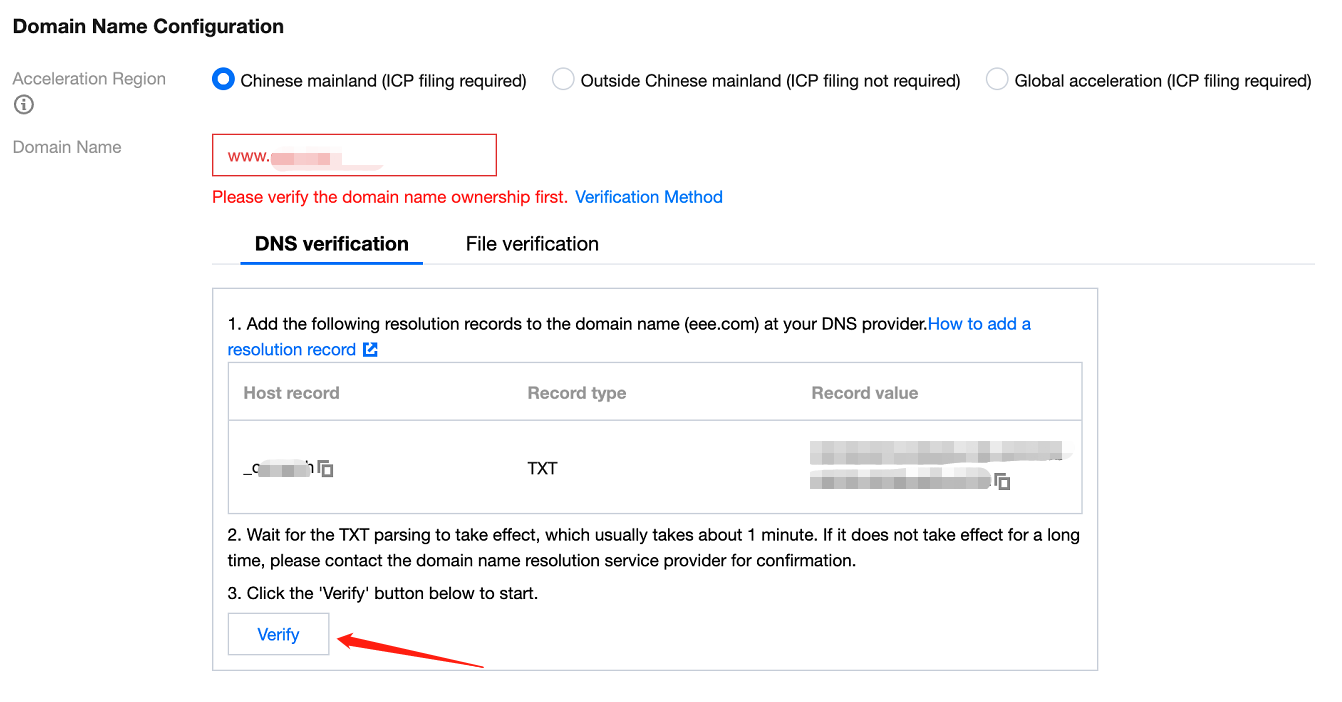
2. DNS Verification
(1)Click Verification Method
(2)Use the default verification method, which is DNS verification
To start DNS verification, add the "_cdnauth" host record of the TXT type for the domain name at your DNS provider.
Note:
In scenarios where multi-level domain names are used, host records must be added only for the domain name regardless of the level of the added domain name, such as c.b.a.example.com, *.example.com, and test.example.com. For example, if you add the c.b.a.example.com subdomain name, you must add the _cdnauth.example.com resolution record.
To add a resolution record of Tencent Cloud DNS, perform the following operations:
If your DNS provider is Tencent Cloud, log in to the DNSPod console, find the target domain name, click DNS, and add a TXT record. Set the Host parameter to _cdnauth, the Record Type parameter to TXT, and the Record Value parameter to the record value provided by Tencent Cloud CDN. Use the default settings for other parameters.
To add a resolution record of Alibaba Cloud DNS, perform the following operations:
If your DNS provider is Alibaba Cloud, log in to the DNS console of Alibaba Cloud, find the target domain name, and click DNS Settings in the Actions column. Set the Record Type parameter to TXT, configure the Hostname and Record Value parameters, and use the default settings for other parameters.
(3)Complete domain name attribution verification
Wait for the TXT record to take effect before you click the verification button to start verification. If the domain name fails to be verified, make sure that the TXT record is valid and has taken effect at the DNS provider. How do I know whether a TXT record takes effect?
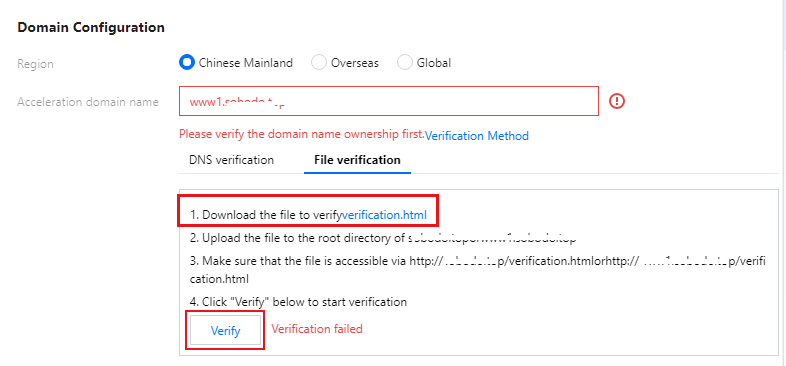
3. File Verification
(1)Click the File verification tab.
(2)Click verification.html to download the file for verification.
Upload the file to the root directory on the server of your domain name, such as a Tencent Cloud Cloud Virtual Machine (CVM) instance, a Tencent Cloud Object Storage (COS) bucket, an Alibaba Cloud Elastic Compute Service (ECS) instance, or an Alibaba Cloud Object Storage Service (OSS) bucket. For example, if your domain name is test.example.com, you must upload the file to the example.com/ or test.example.com/ root directory.
Note:
You can perform verification by uploading the file to a subdomain name only if you use the file verification method.
(3)Complete domain name attribution verification
Make sure that the file is accessible via http://example.com/verification.html or http://test.example.com/verification.html before you click Verify. Your domain name will be successfully verified if the record you added is consistent with the content of the file. If the domain name cannot be verified, check whether the record and the content of the file are consistent.
Example:
In this example, the acceleration domain name is a.test.com and the origin server is a COS biucket.
1. Upload the verification.html file to the root directory of COS.
2. Add a CNAME record for the acceleration domain name at your DNS provider. Set the Record value parameter to the COS domain name.
3. Check whether the verification.html file is accessible via http(https)://Acceleration domain name/verification.html. Click Verify.
Method 2:API Operation Verification
1.Call the CreateVerifyRecord operation to generate a TXT resolution record for an acceleration domain name.
4.If the resolution record takes effect, call the AddCdnDomain operation to add the domain name.
FAQs
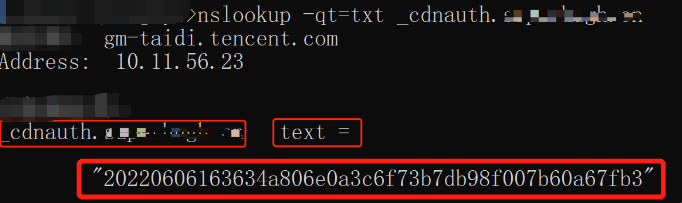
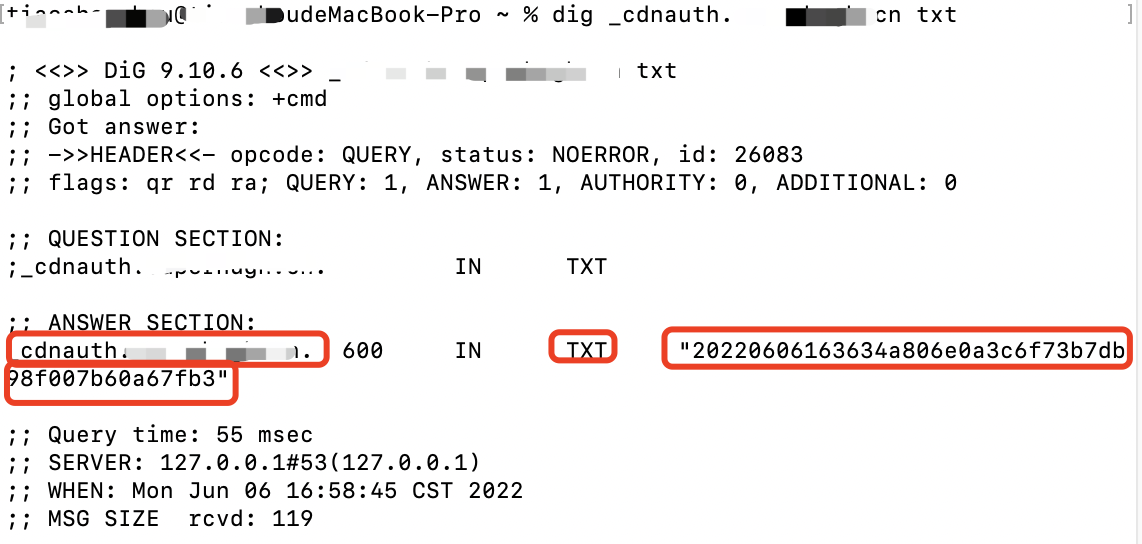
How do I know whether a TXT record takes effect?
Windows:
If the domain name that you connected is test.example.com, open the command prompt and run the nslookup -qt=txt _cdnauth.example.com command. Check whether the TXT record takes effect or is valid based on the output.
Linux or macOS:
If the domain name that you connected is test.example.com, open the command prompt and run the dig _cdnauth.example.com txt command. Check whether the TXT record takes effect or is valid based on the output.