Step 1. Create an Adaptive Bitrate Streaming Template
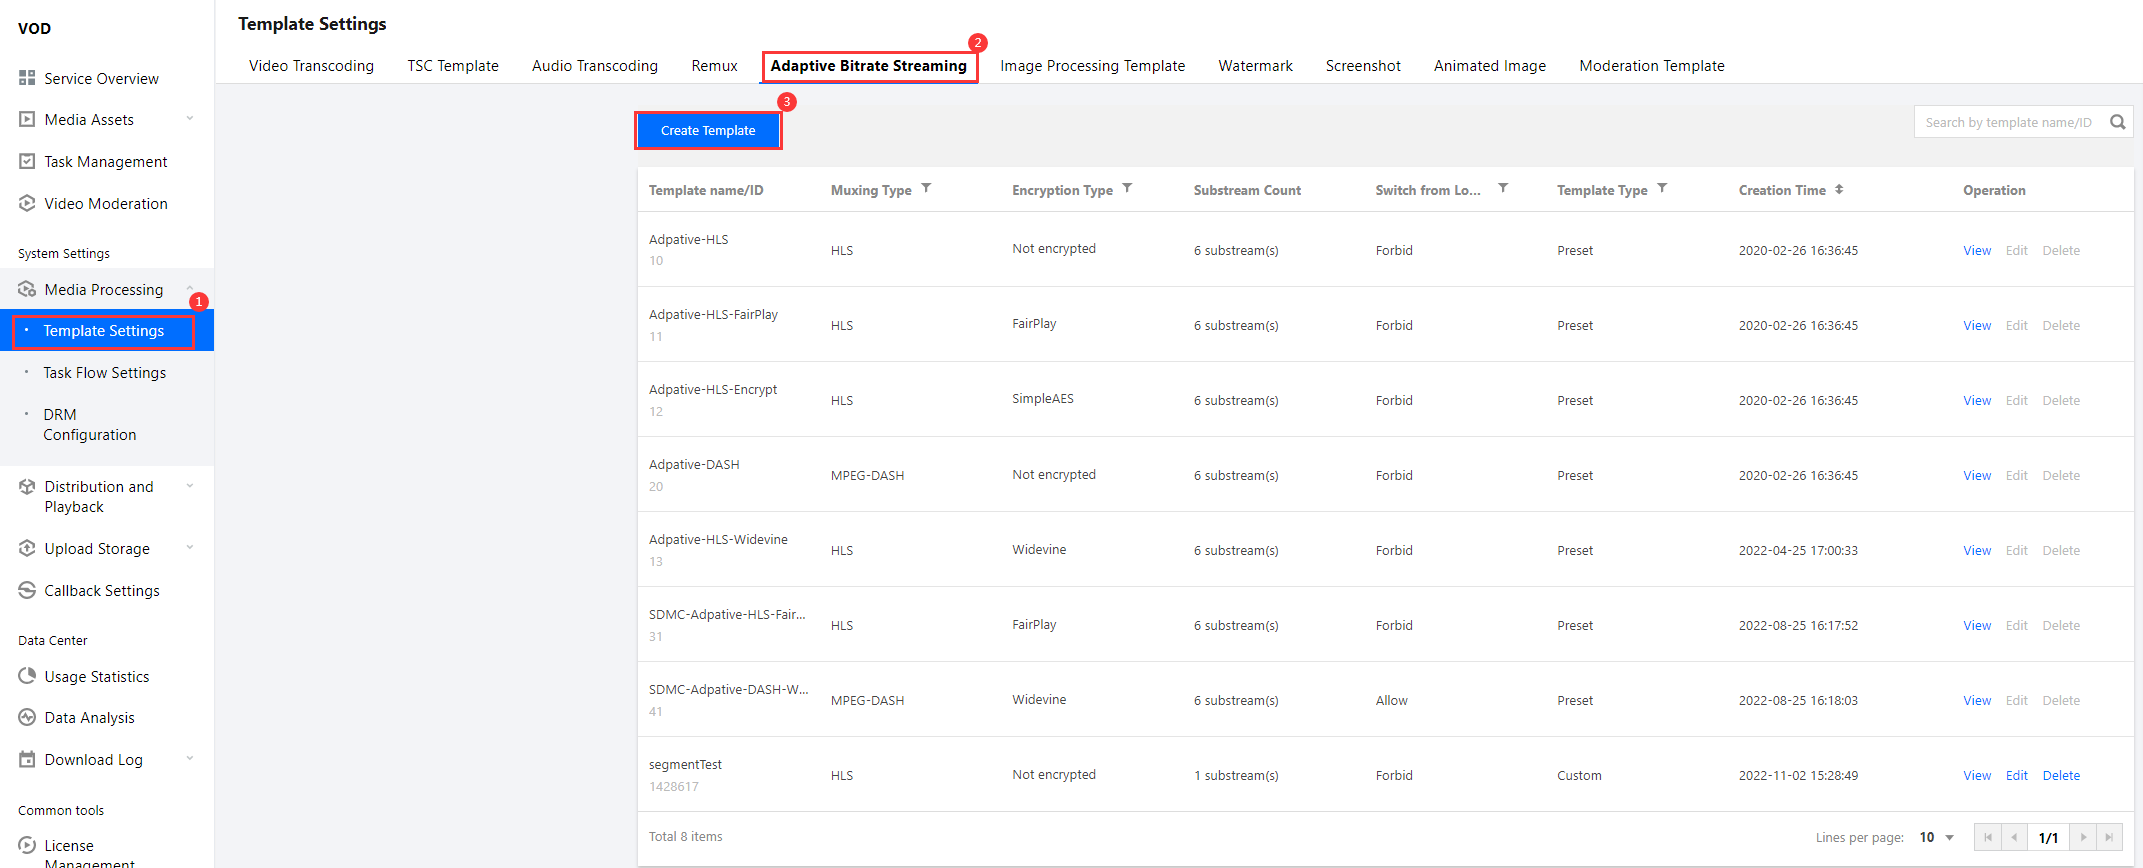
1. Log in to the VOD console. Select Application Management on the left sidebar. Select the target application and go to Media Processing > Template Settings. Under the Adaptive Bitrate streaming tab, click Create Template.
2. Click Add Stream to add a stream 2 and stream 3 and complete the following settings:
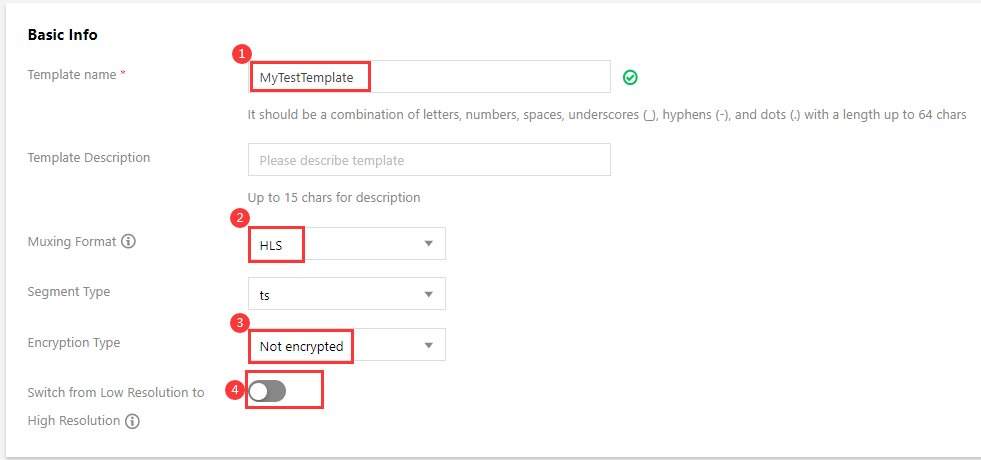
Basic Info:
Template name: Type MyTestTemplate.
Muxing format: Select "HLS".
Encryption type: Select "Not encrypted".
Switch from Low Resolution to High Resolution: Disable
Streams
Stream No.
Video Bitrate
Resolution
Frame Rate
Audio Bitrate
Sound Channels
Stream 1
512 Kbps
Long side: 0 px, short side: 480 px.
24 fps
48 Kbps
Dual
Stream 2
512 Kbps
Long side: 0 px, short side: 720 px.
24 fps
48 Kbps
Dual
Stream 3
1,024 Kbps
Long side: 0 px, short side: 1080 px.
24 fps
48 Kbps
Dual
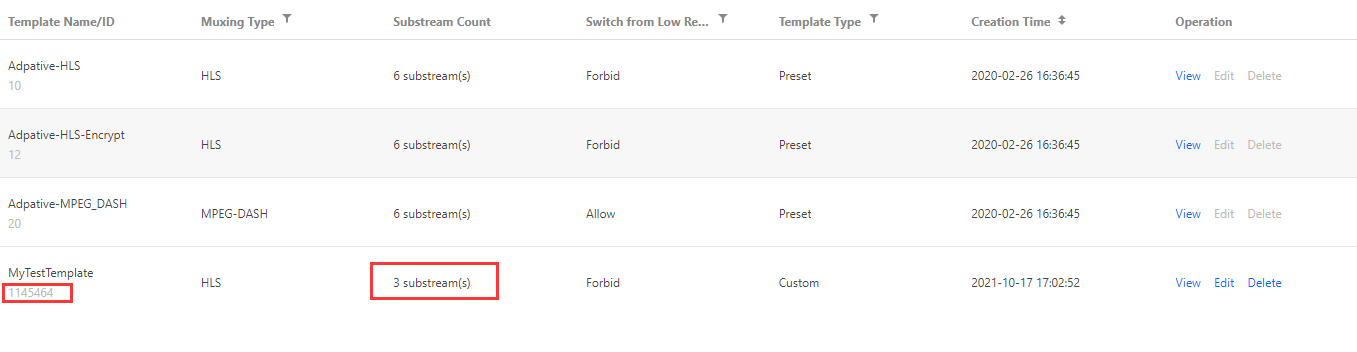
3. Click Create. An adaptive streaming template that converts a video into three streams is created. The ID of the template is 1430219.
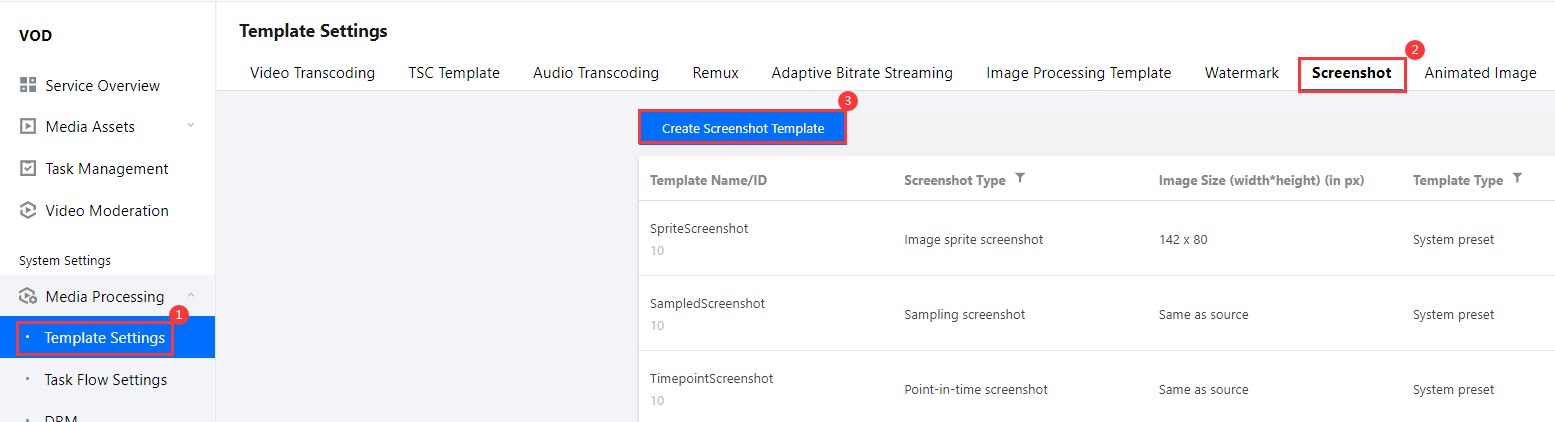
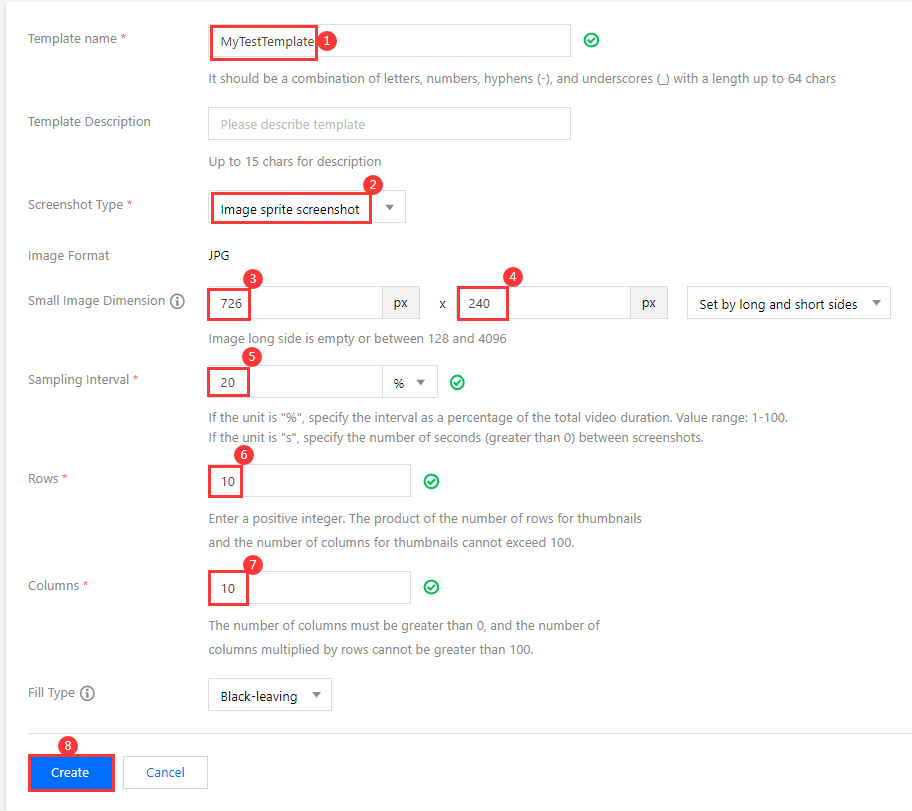
Step 2. Create an Image Sprite Template
1. Go to Media Processing > Template Settings. Select the Screenshot tab and click Create Screenshot Template.
3. Click Create. An image sprite template with the ID 131864 is created.
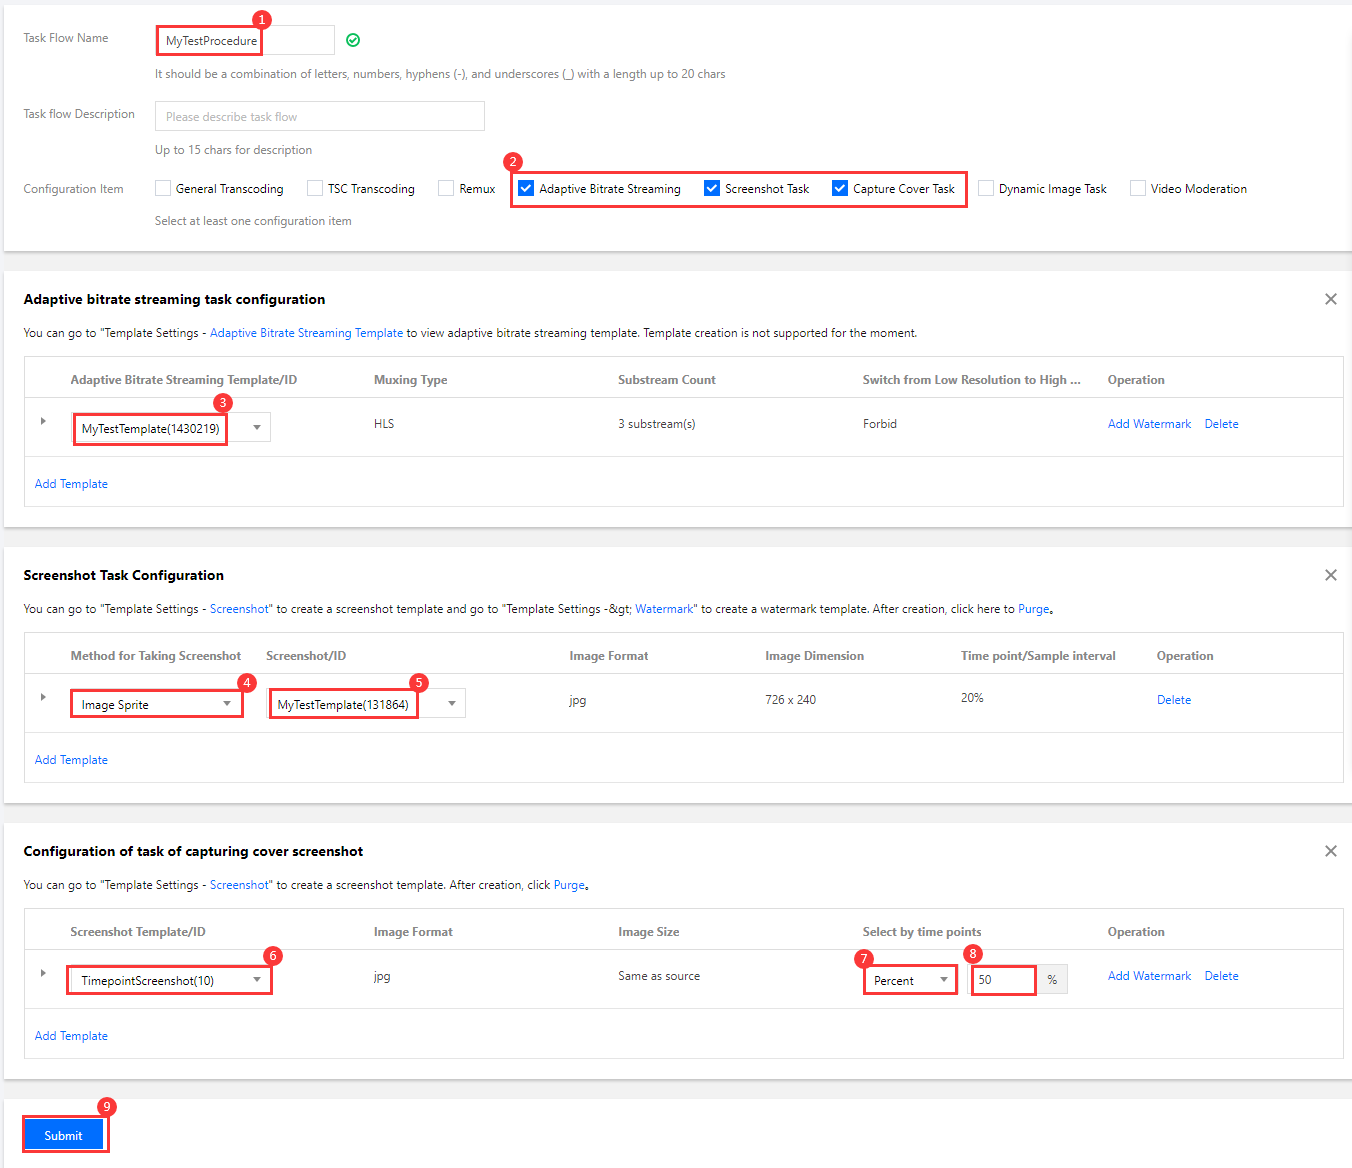
Step 3. Create and Start a Task Flow
Now you have an adaptive bitrate streaming template (ID 1430219) and an image sprite template (ID 131864). You also need to create a task flow.
1. Go to Media Processing > Task Flow Settings and click Create Task Flow.
Task flow name: Enter MyTestProcedure.
Configuration item: Select "Adaptive bitrate streaming", "Screenshot", and "Thumbnail generation".
In the Adaptive bitrate streaming task configuration area, click Add Template, and select the MyTestTemplate template (ID 1430219) created in step 1.
In the Screenshot task configuration area, click Add Template. Select Image sprite for Method for Taking Screenshot and then select the MyTestTemplate template (ID 131864) created in step 2.
In the Configuration of task of capturing cover screenshot area, click Add Template. For Screenshot Template/ID, select "TimepointScreenshot". For Select by time points, select "Percent", and enter "50".
2. Click Submit. A task flow named MyTestProcedure will be generated.
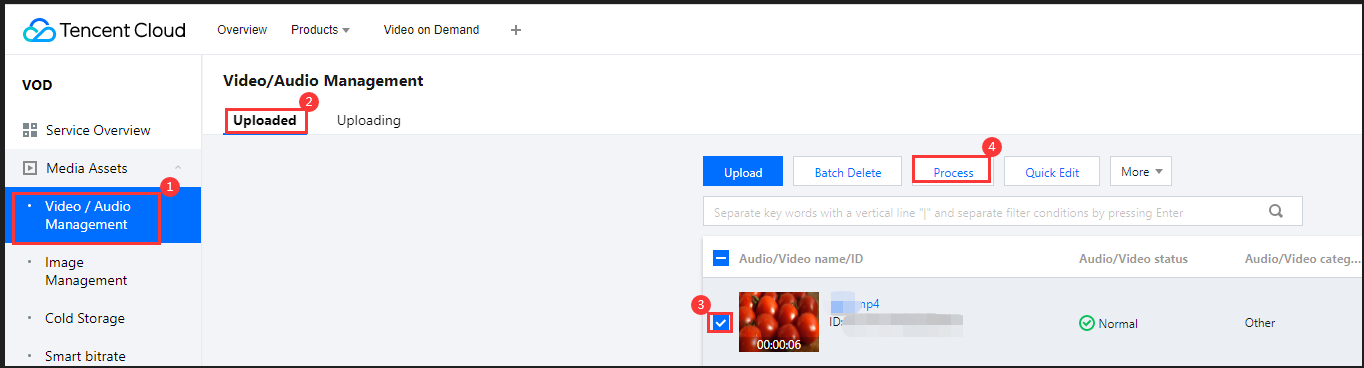
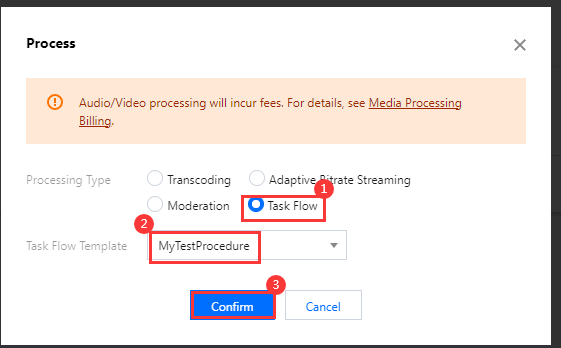
3. Go to Media Assets > Video/Audio Management, select the target video (file ID 243xxx814xxxxx416), and click Task Flow.
4. Complete the following settings:
Select Task Flow as the Processing Type.
Select the "MyTestProcedure" task flow template.
5. Click Confirm. Go to Task Center. If the status of the task changes from "Processing" to "Completed", the processing of the video is finished.
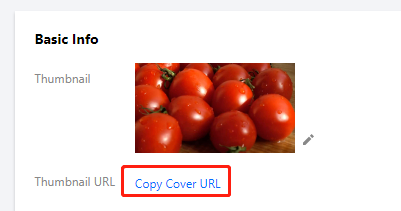
6. Return to the Media Assets > Video/Audio Management page, find your video, and click Manage on the right.
6.1 In the Basic Info area:
You can view the thumbnail generated and the outputs of adaptive bitrate streaming (template ID: 1430219).
6.2 Select the Screenshots tab:
You can view the image sprite generated (template ID: 131864).
Step 4. Generate a Player Signature
In this step, you can use the signature tool to quickly generate a signature for the player to play back the video.
Select Distribution and Playback > Player Signature Tools on the left sidebar and complete the following settings:
Video file ID: Enter the file ID (243xxx814xxxxx416) in step 3.
Signature expiration time: Enter the player signature expiration time. If you leave it empty, the signature will never expire.
Playable video type: Select Unencrypted adaptive bitrate.
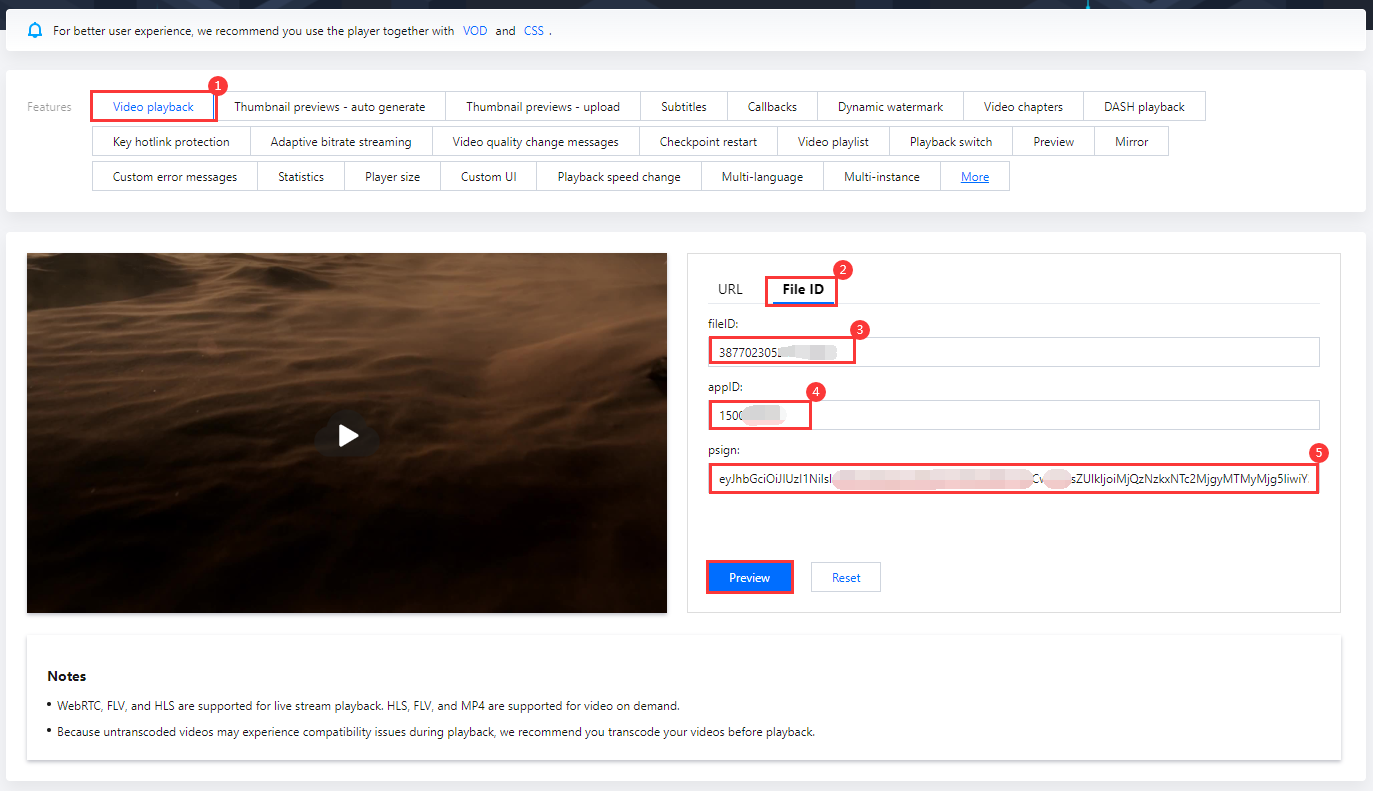
After step 4, you have obtained the three parameters needed for video playback: appId, fileId and psign (player signature). The following describes how to play the video on the web.
fileID: Enter the same file ID (243xxx814xxxxx416) in the previous step.
appID: Enter the ID of the VOD application to which the file belongs (which is also the App ID displayed on the signature generation page in the previous step).
psign: Enter the signature string generated in the previous step.
Click Preview to play the video.
Multi-platform player demos
After generating the player signature, you can use our player demos for web, Android, and iOS to play the video. For details, see the source code for the demos.
Summary
At this point, you have understood how to play an adaptive bitrate streaming video.
To learn how to play an encrypted video, see Stage 4. Play back an encrypted video.